Teams and access
Shared connections, roles, invitations and audit logs on the Team plan.
Team plan overview
The Team plan is designed for organizations that need to manage multiple users. It features shared connections (with the option to save the database password, a feature unique to the Team plan), a comprehensive role-based access control system and audit logs.
Team account setup
Setting up a team account is exactly the same as setting up a "Free" or "Pro" account, except this time you will select the "Team" plan option and choose the number of seats for your team. Note that this can be changed later if required.
Once you have created your account and logged in, you will see the Team plan workspace page. If you are familiar with the "Free" or "Pro" workspace, you will notice that this page is broadly similar but with the additional team management options in the menu on the left-hand side.
Team Members page
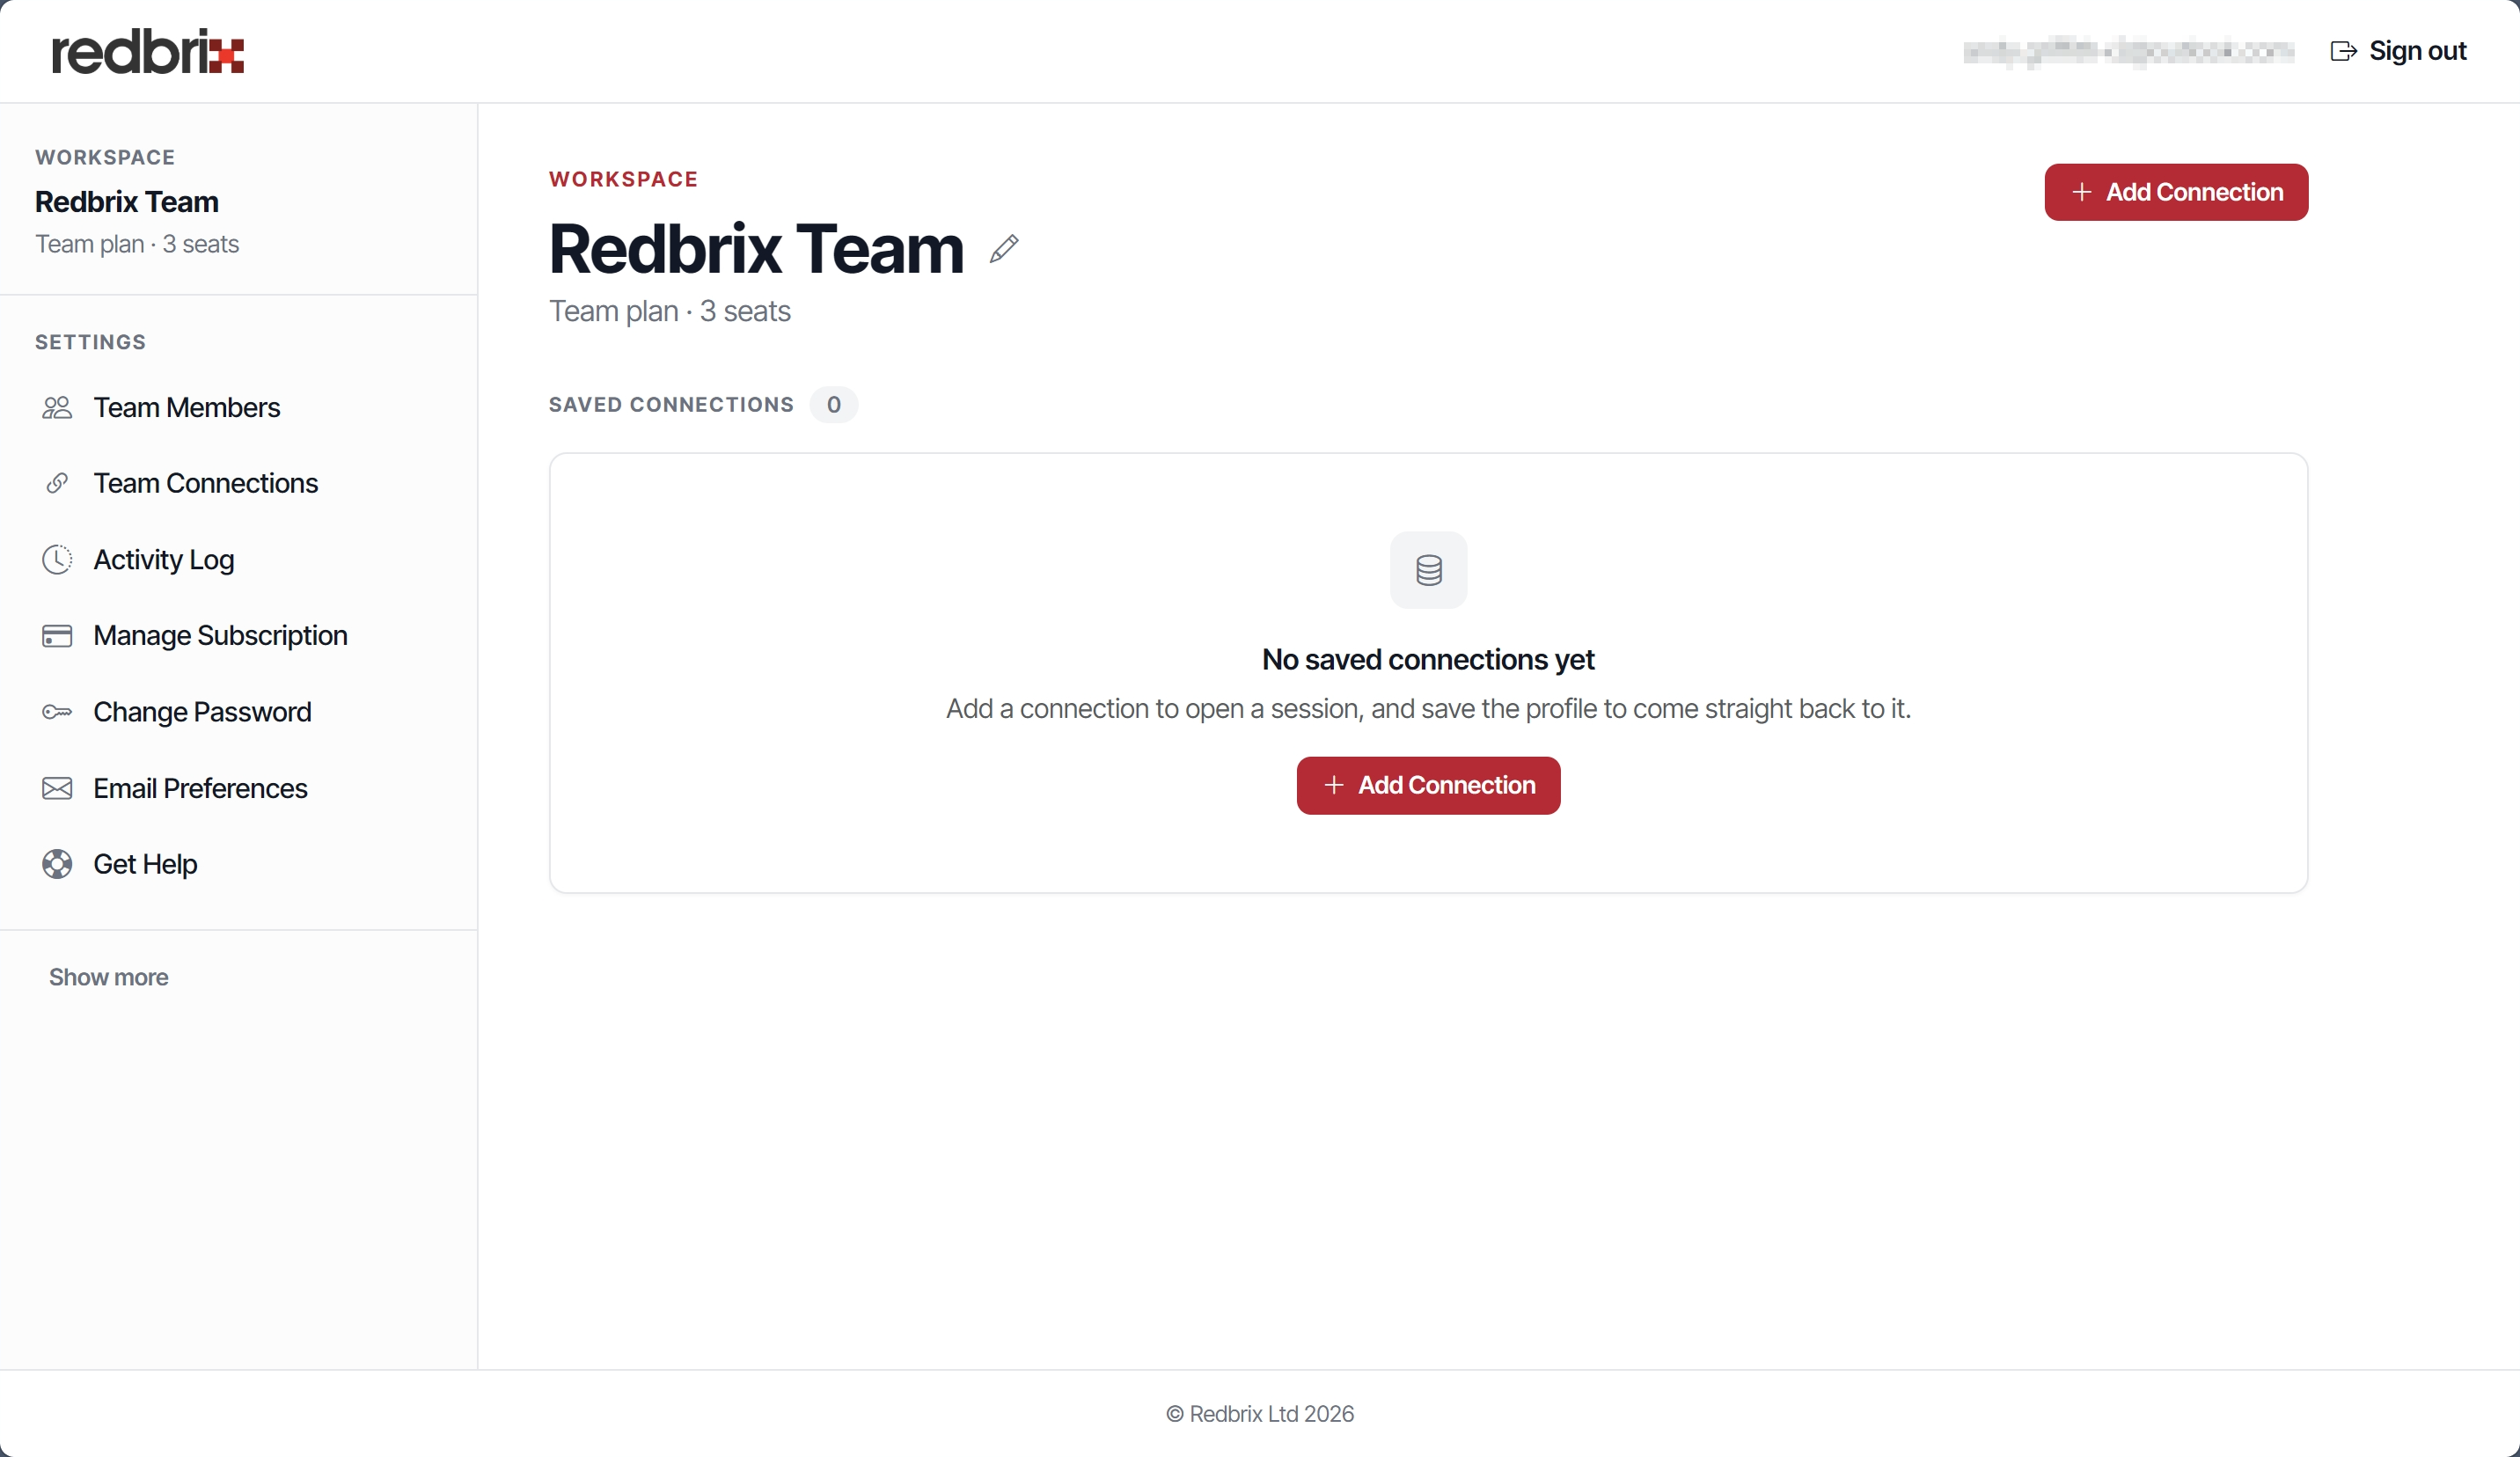
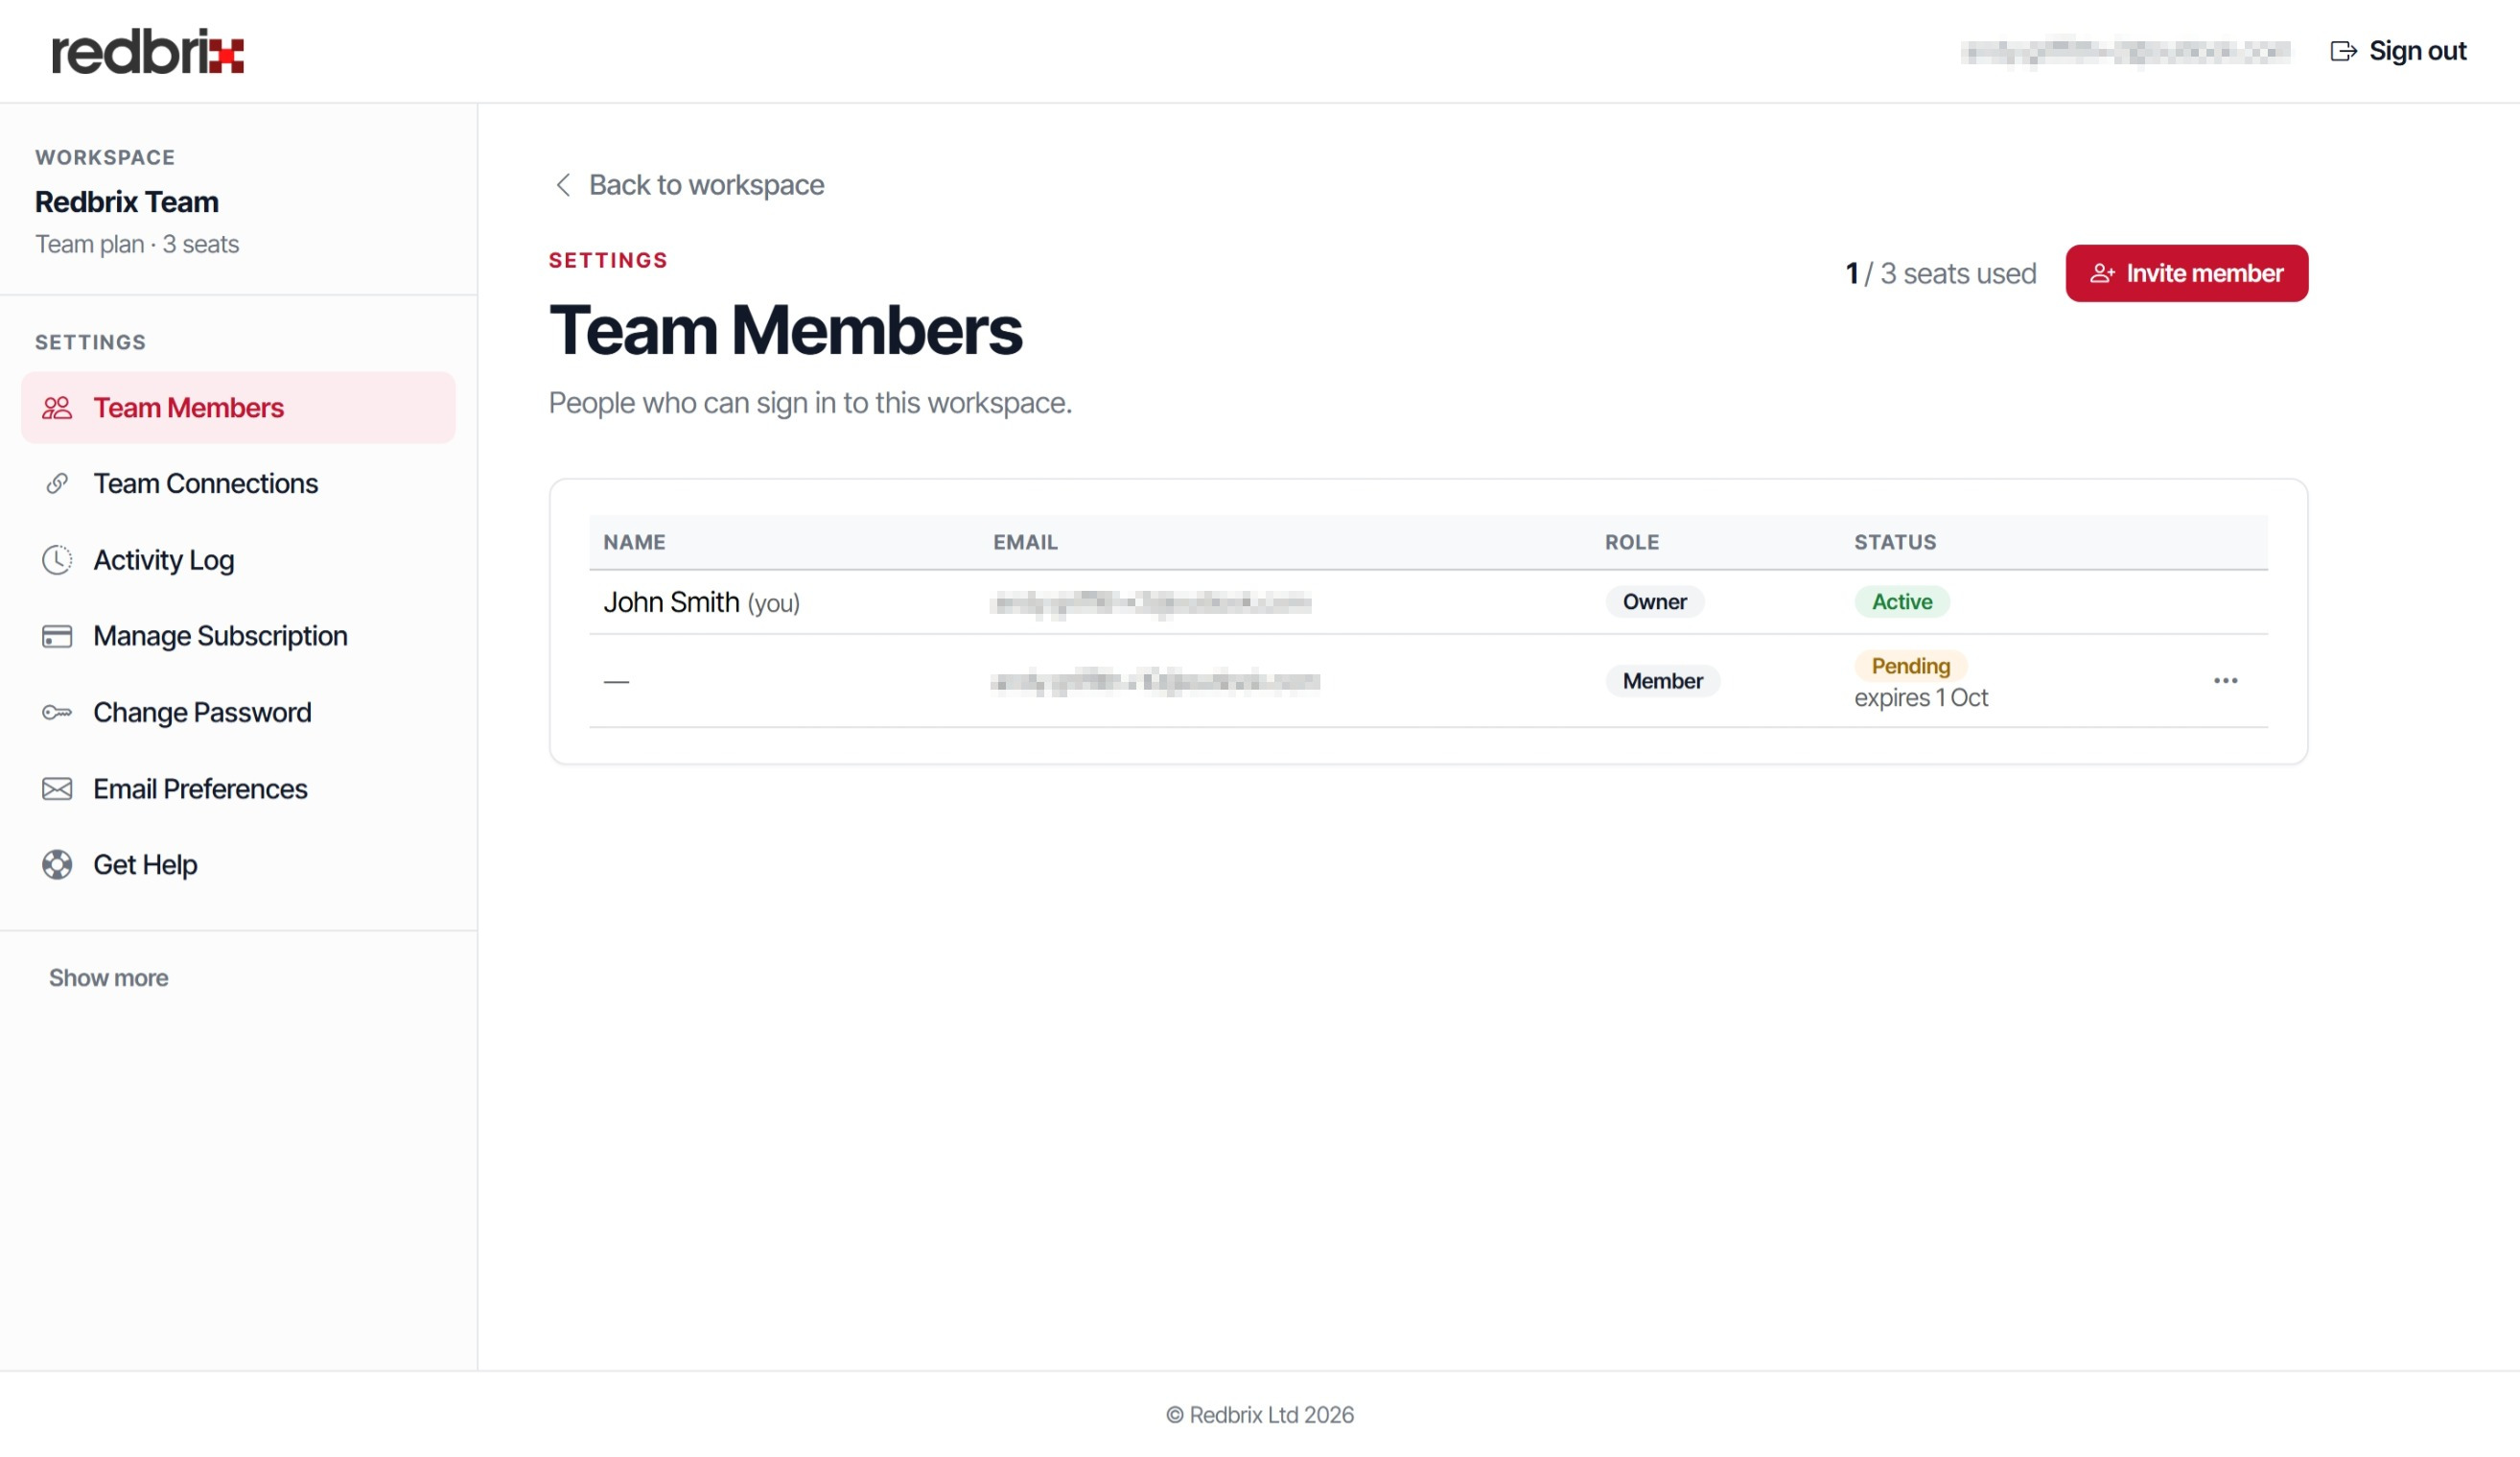
When you first access the Team Members page, you will see one entry, which is your admin account associated with the email address you used for registration.
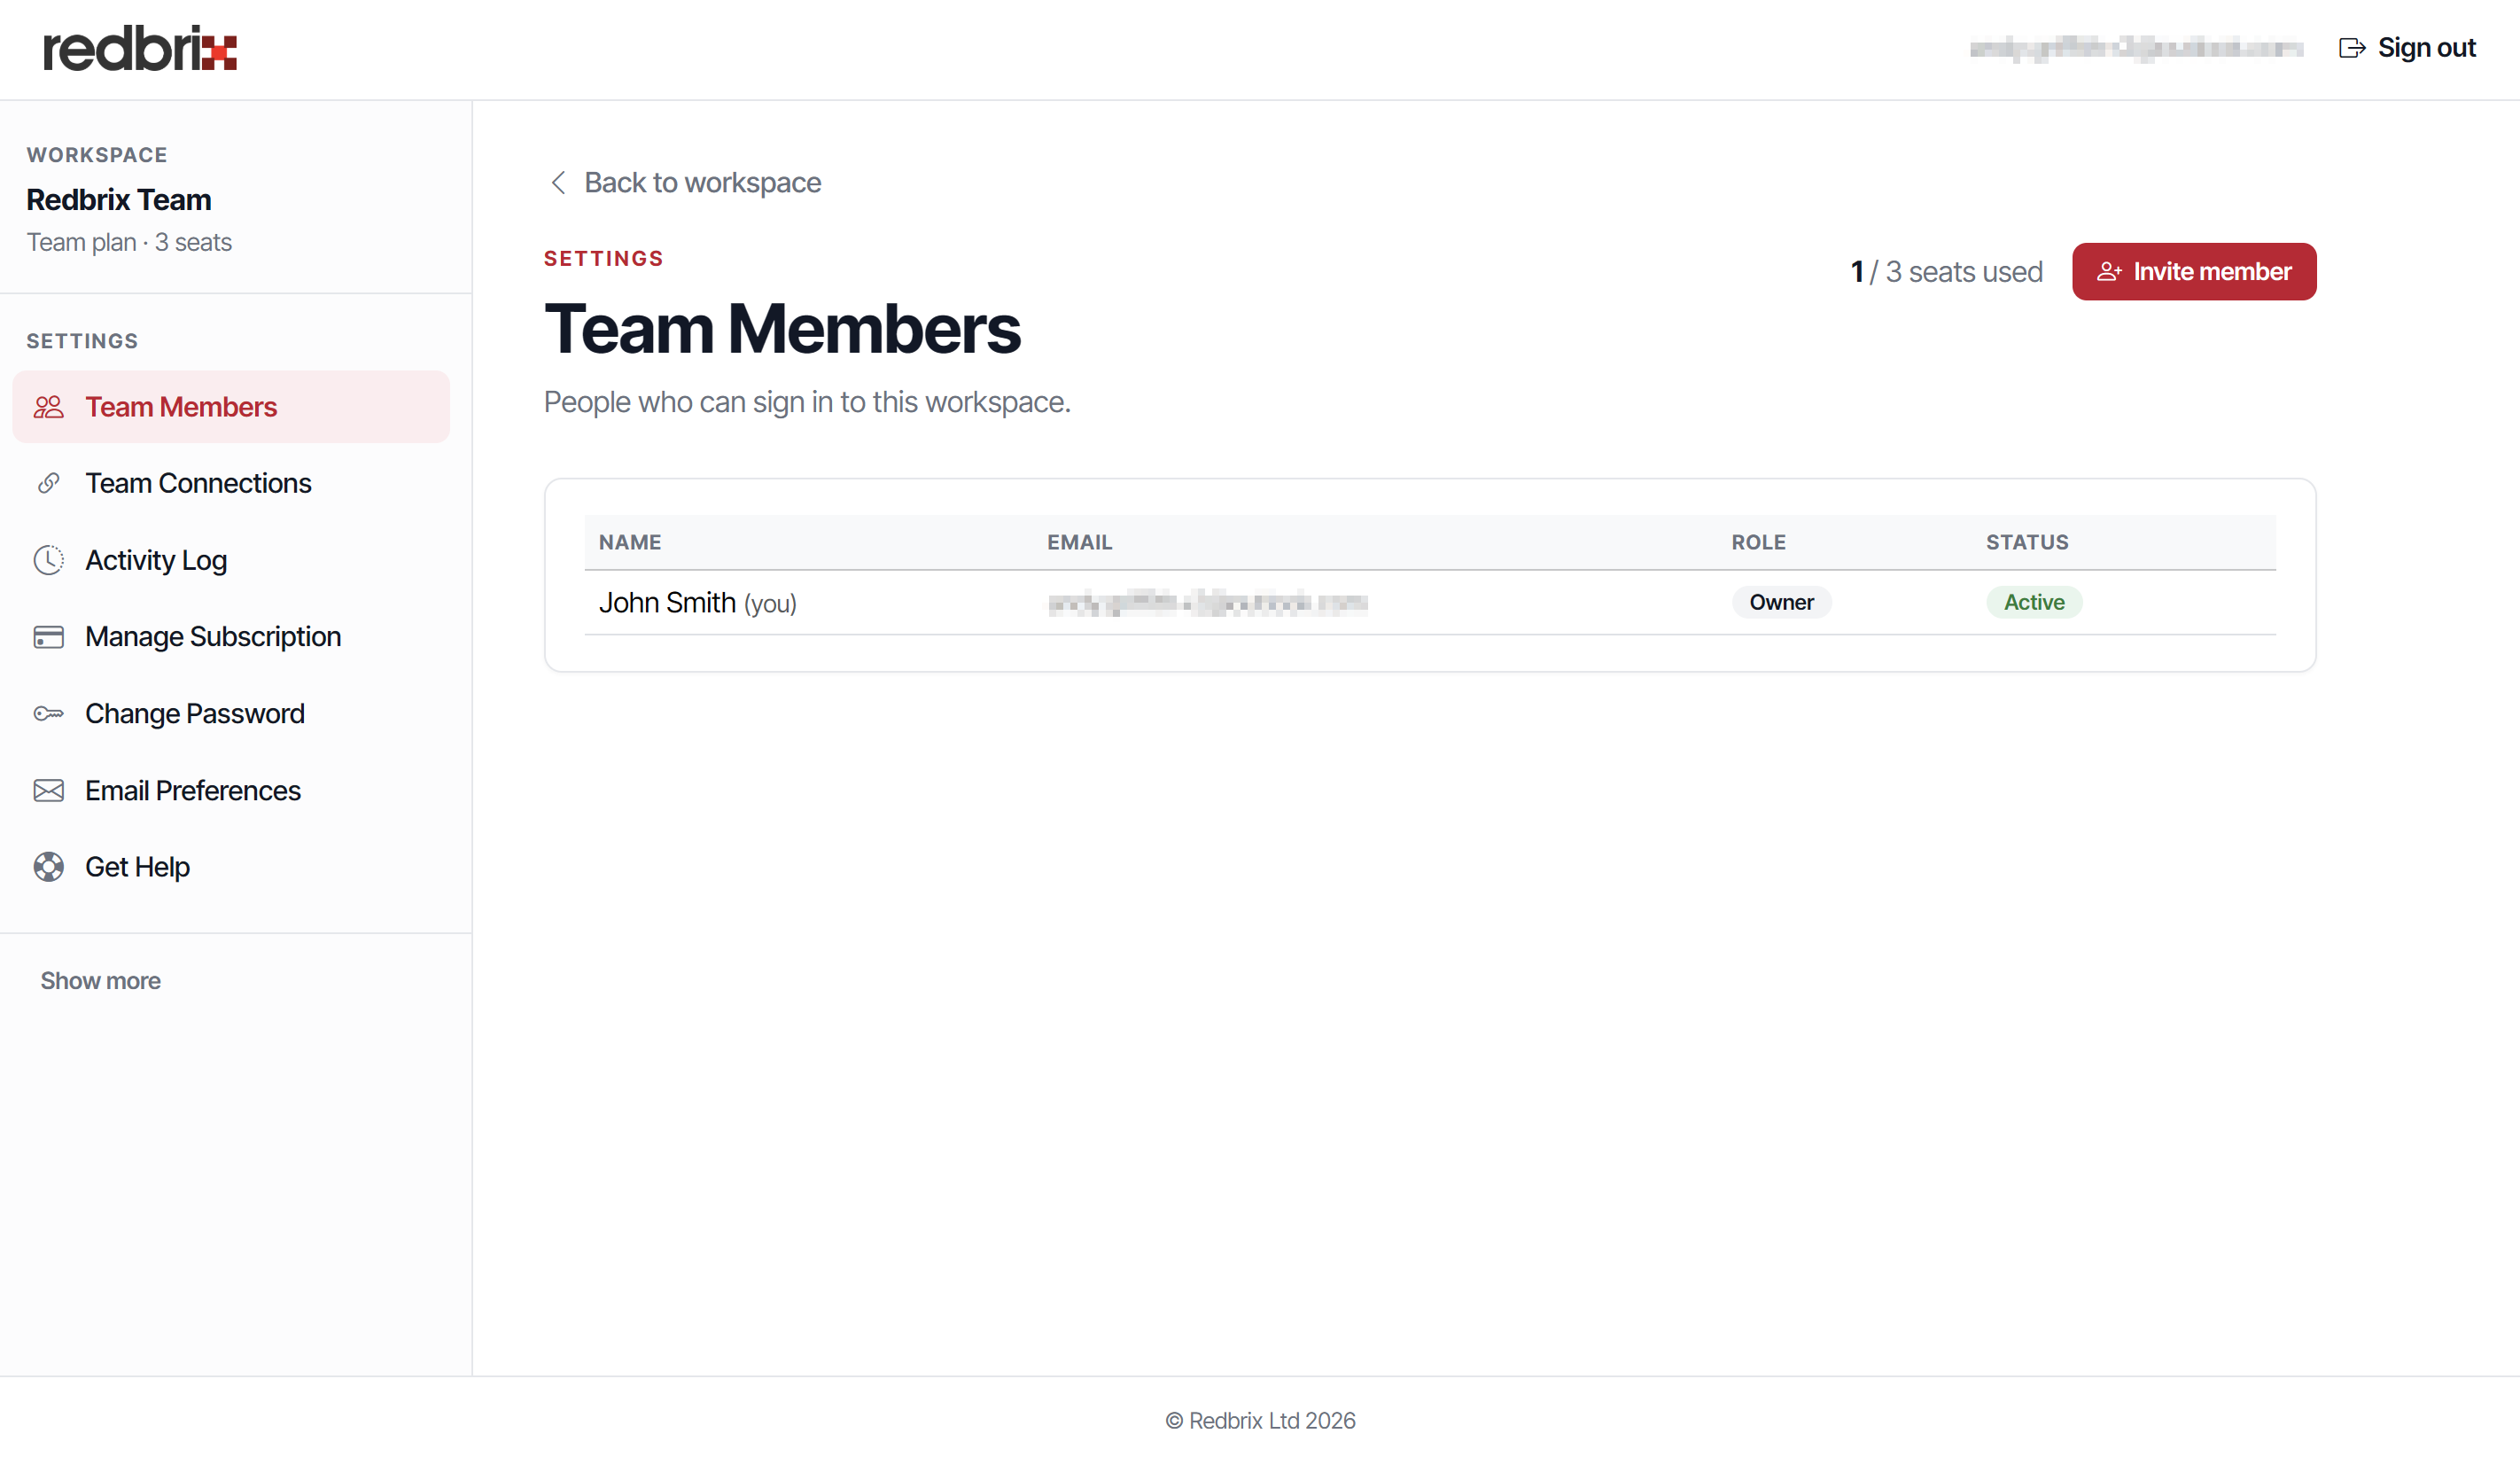
To invite new team members, click the Invite member button. You will be prompted to enter the email address of the person you want to invite and the role they will perform. The majority of your users will probably be Members. Please use admin accounts sparingly for those users that really need such access.
Once invited, your new user will receive an email with instructions to join your team. At this time, the invitation is pending; you will see the status reflected on the Team Members page:
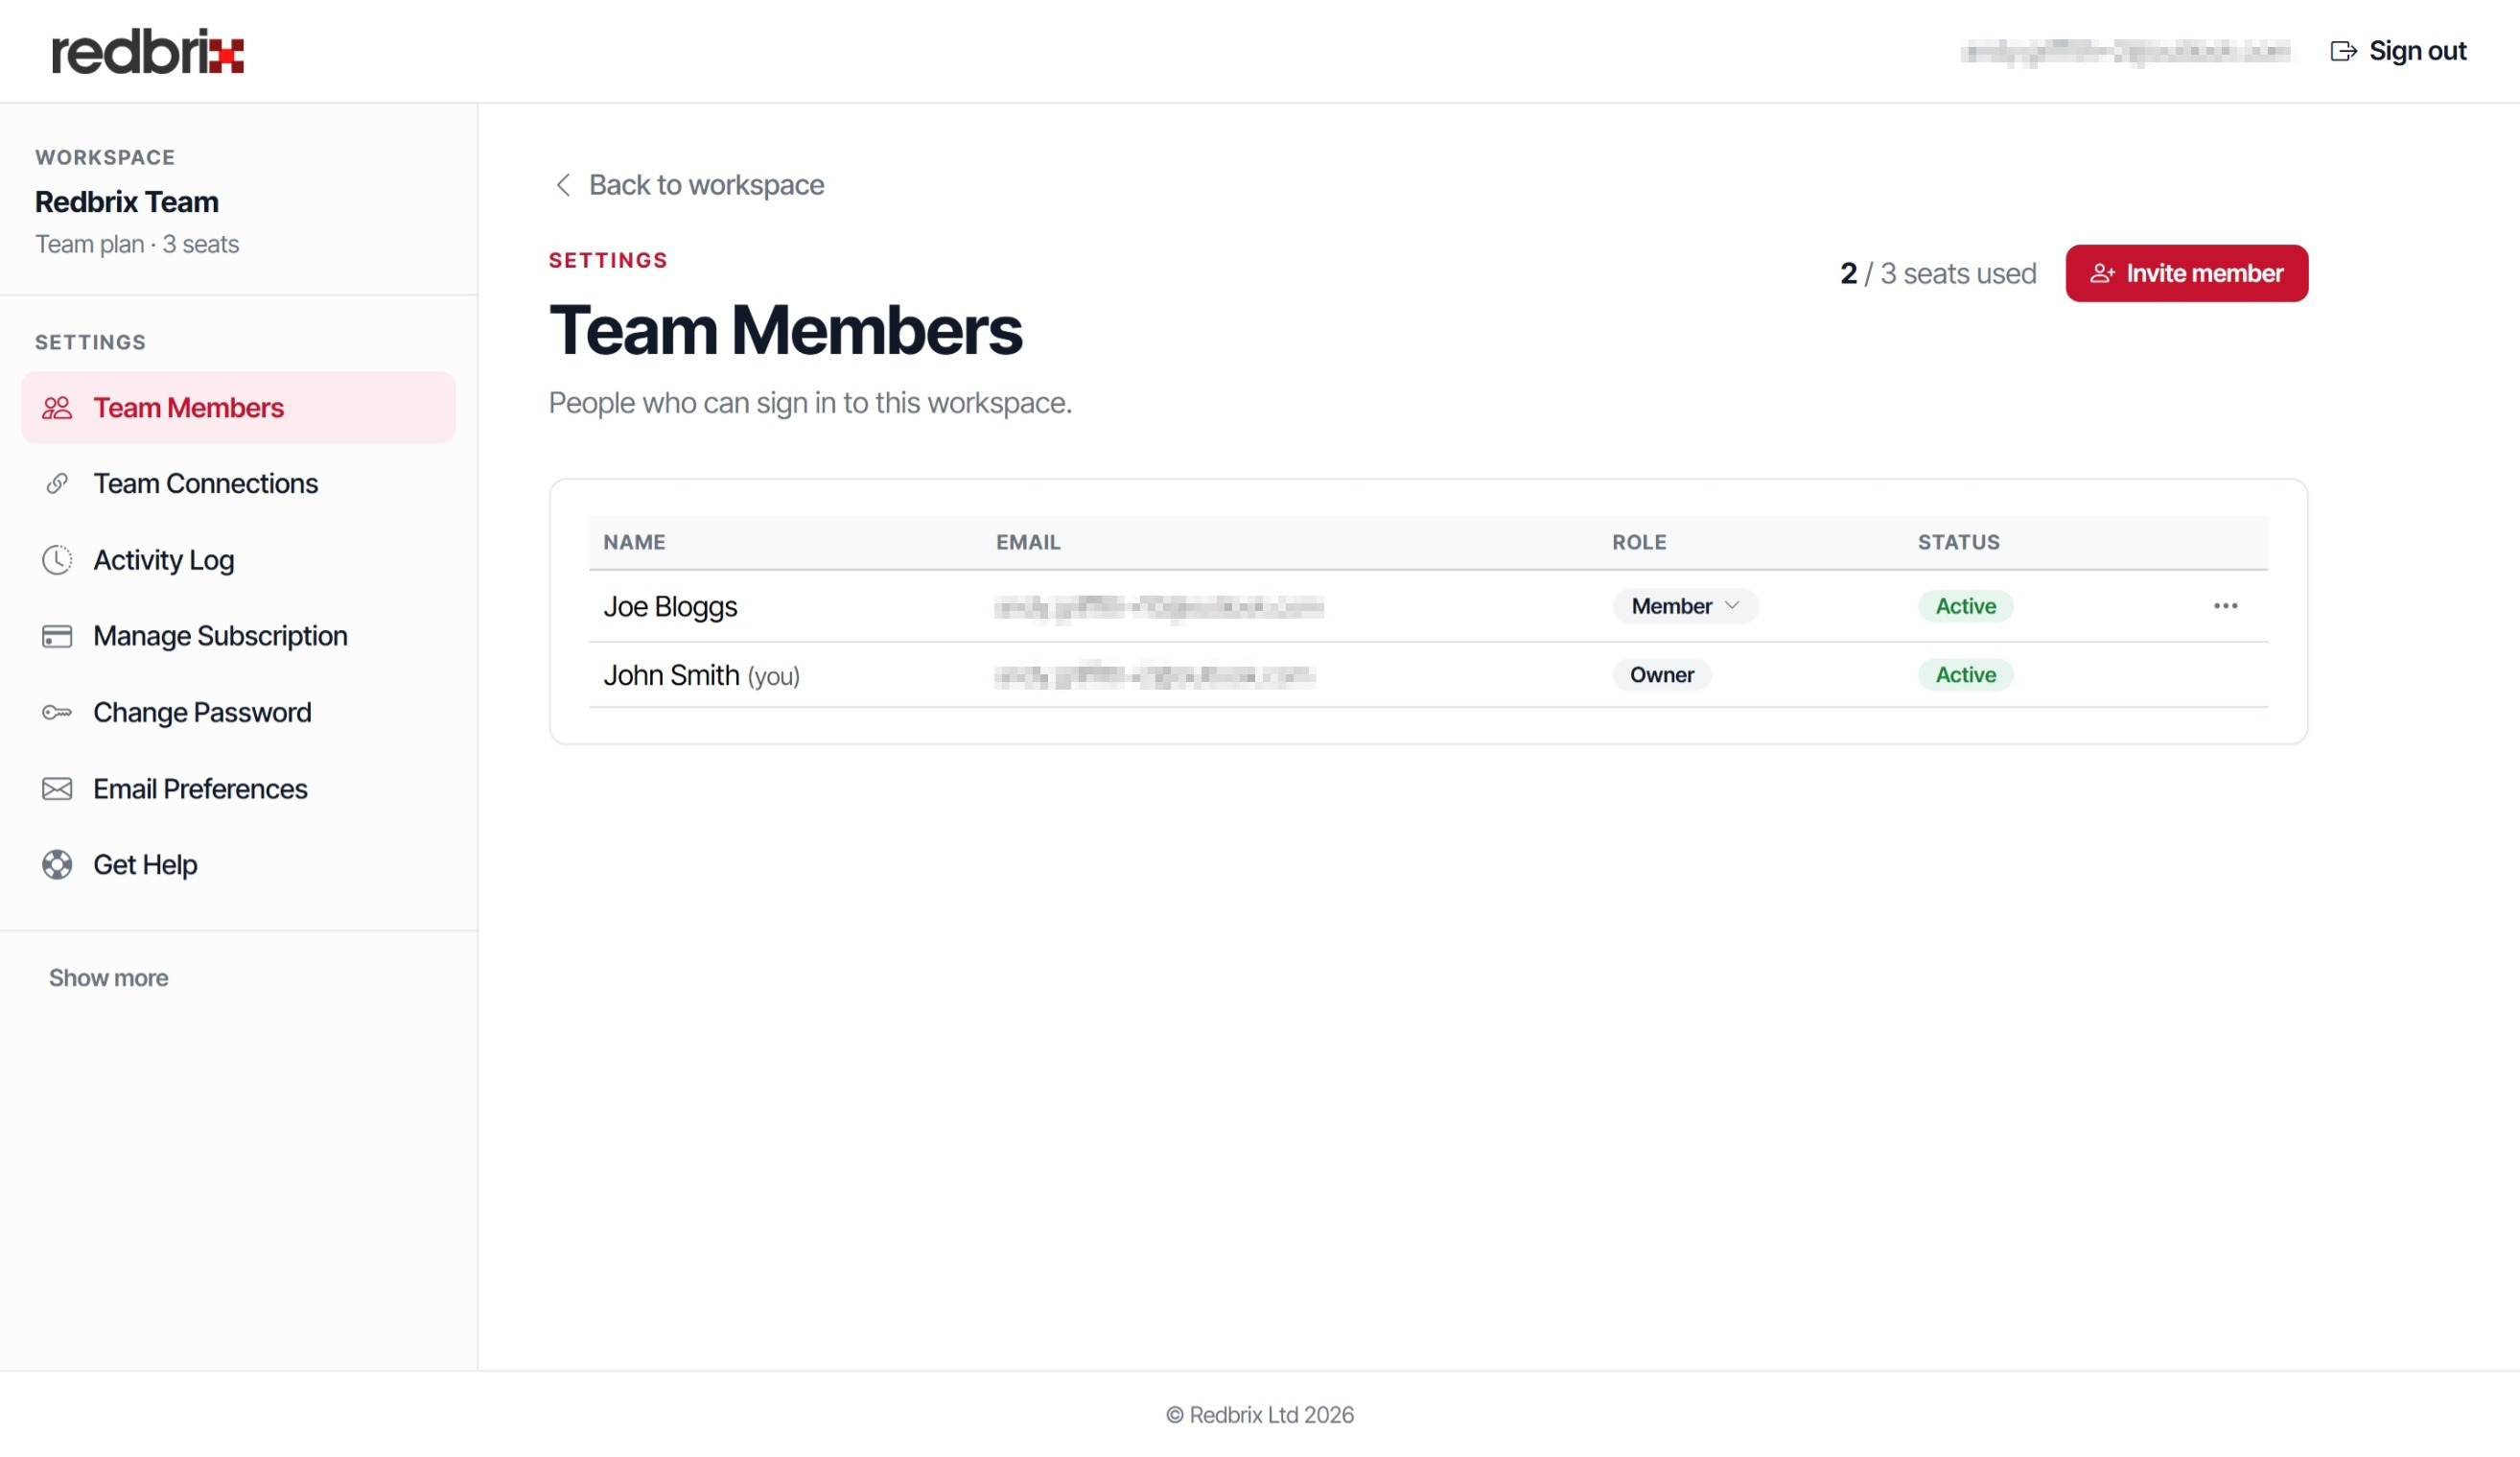
Then, after the invited user accepts the invitation, their status will change from "Pending" to "Active" on the Team Members page:
Team Connections page and credential storage
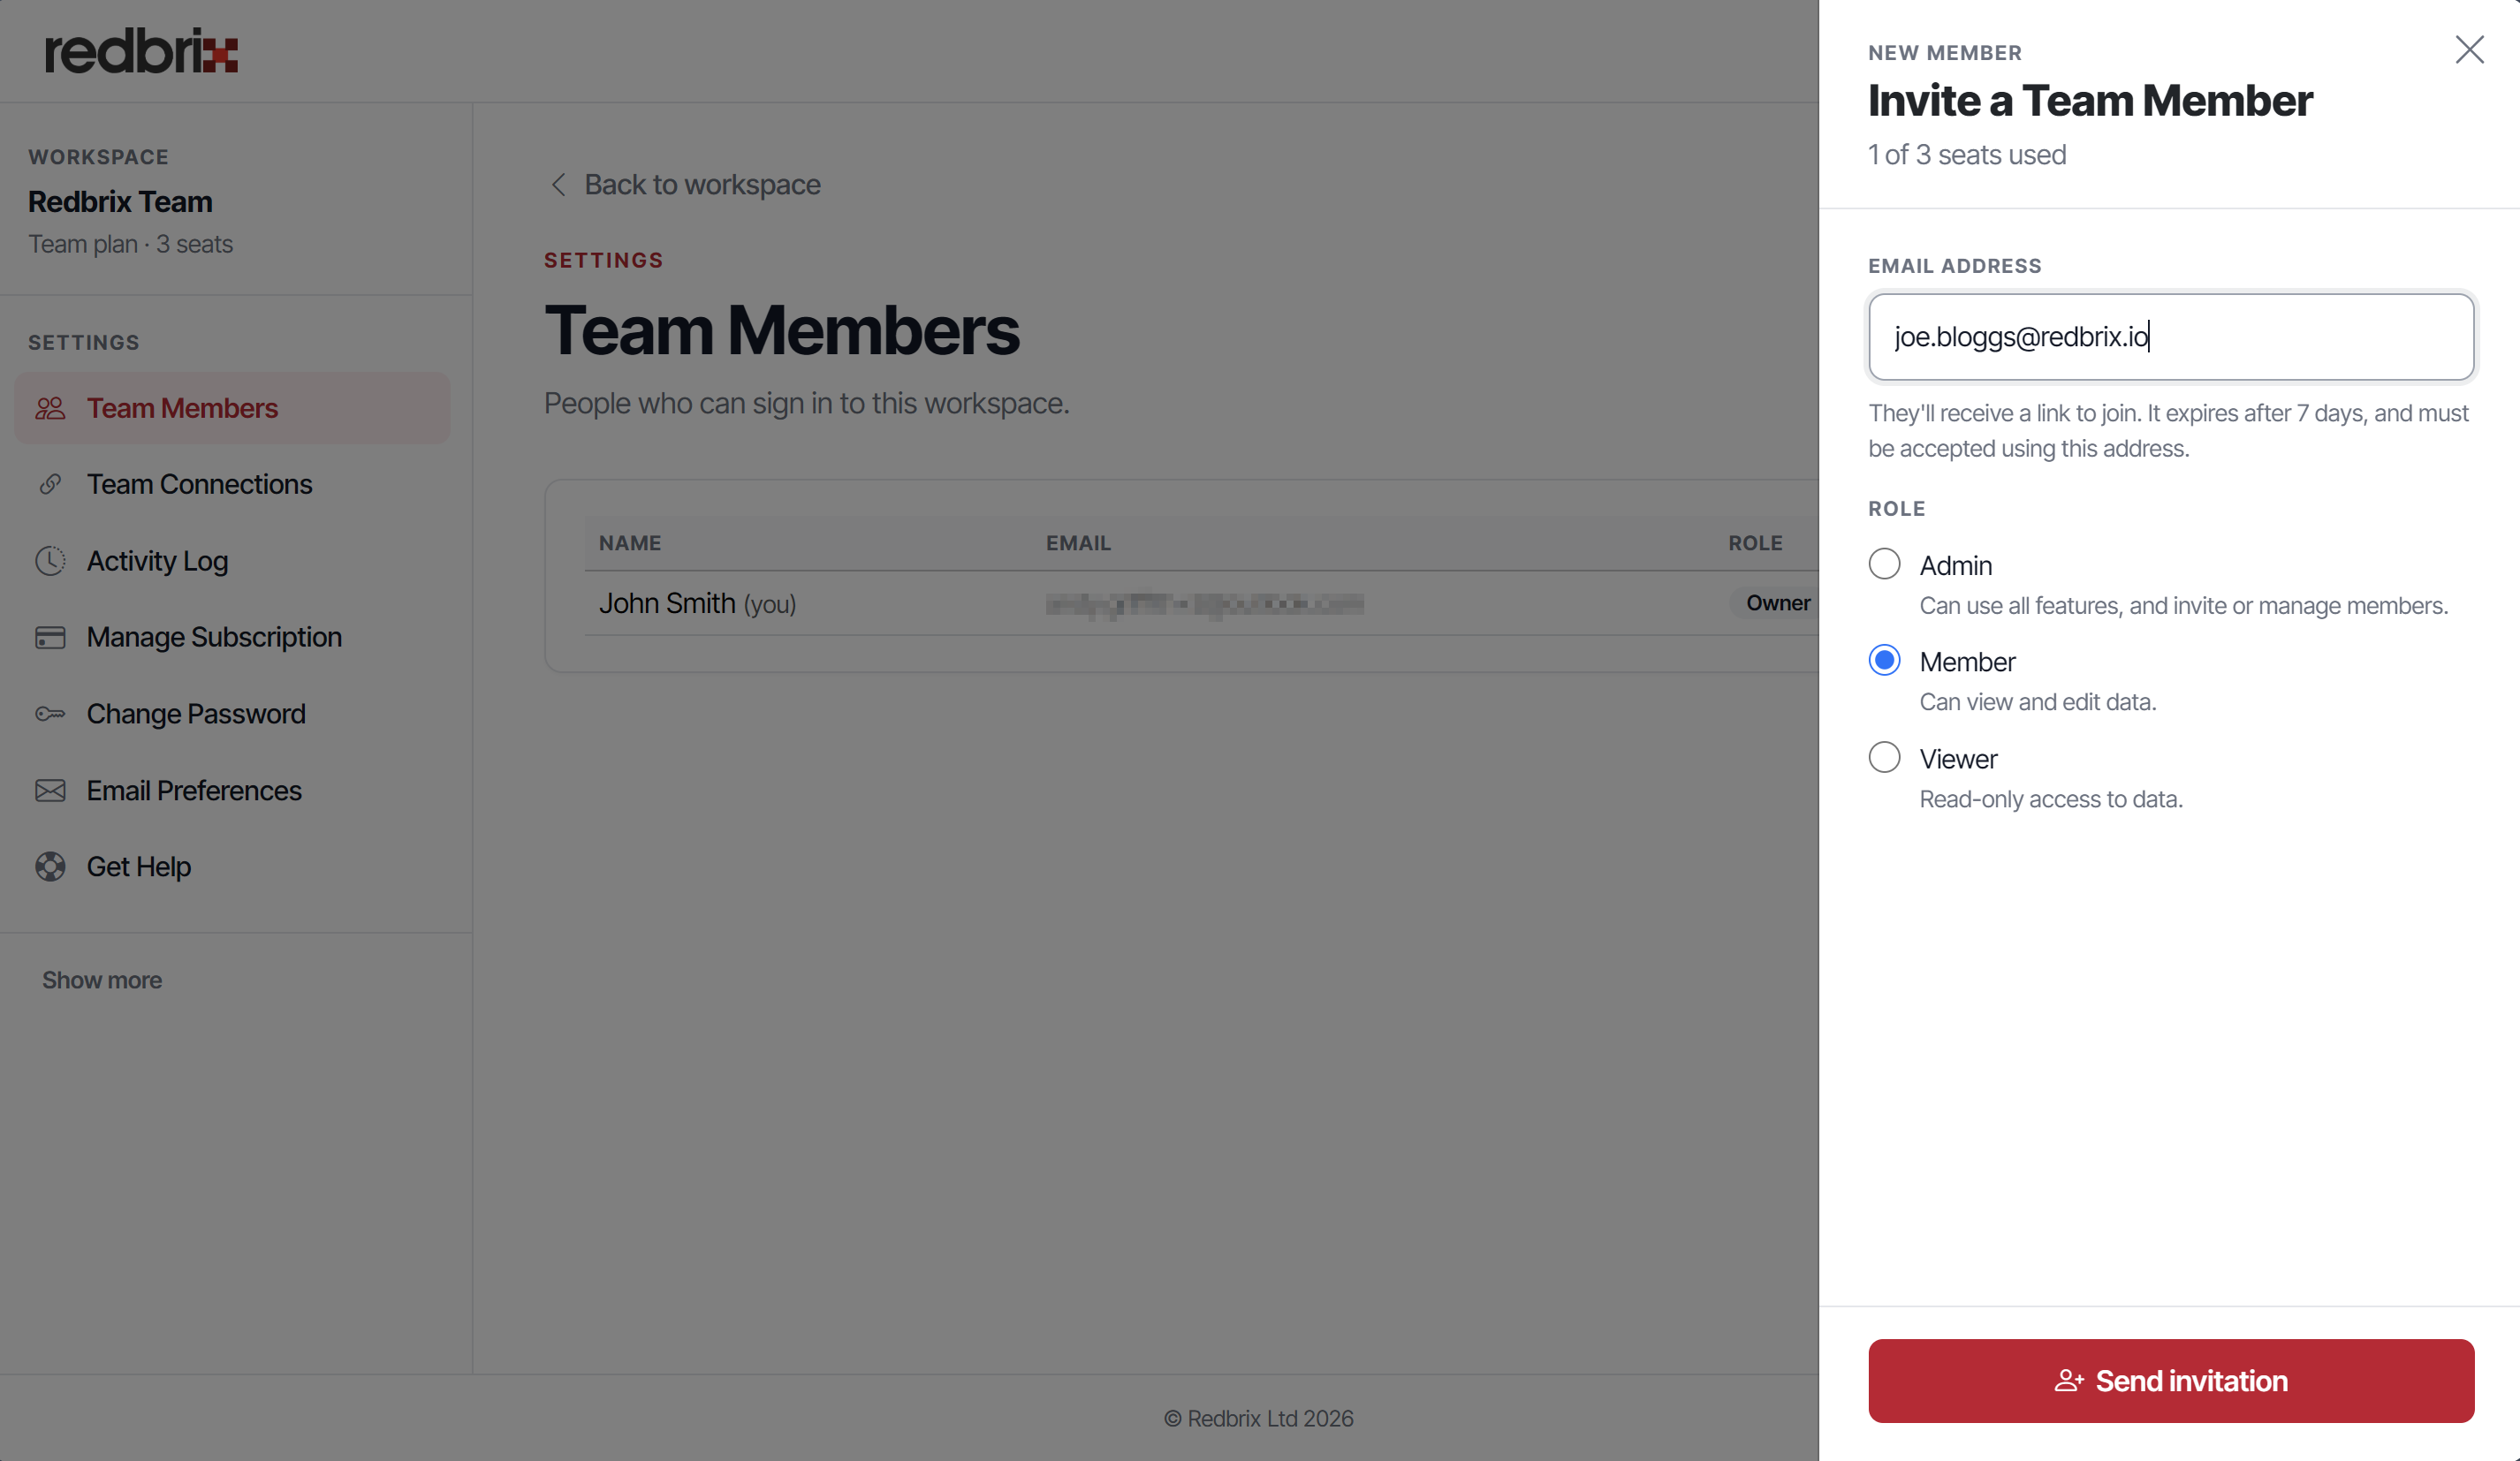
The first thing you'll want to do is create a database connection that can be shared among your team members. To do this, click on the Team Connections option in the menu. You will see a screen similar to the one below:
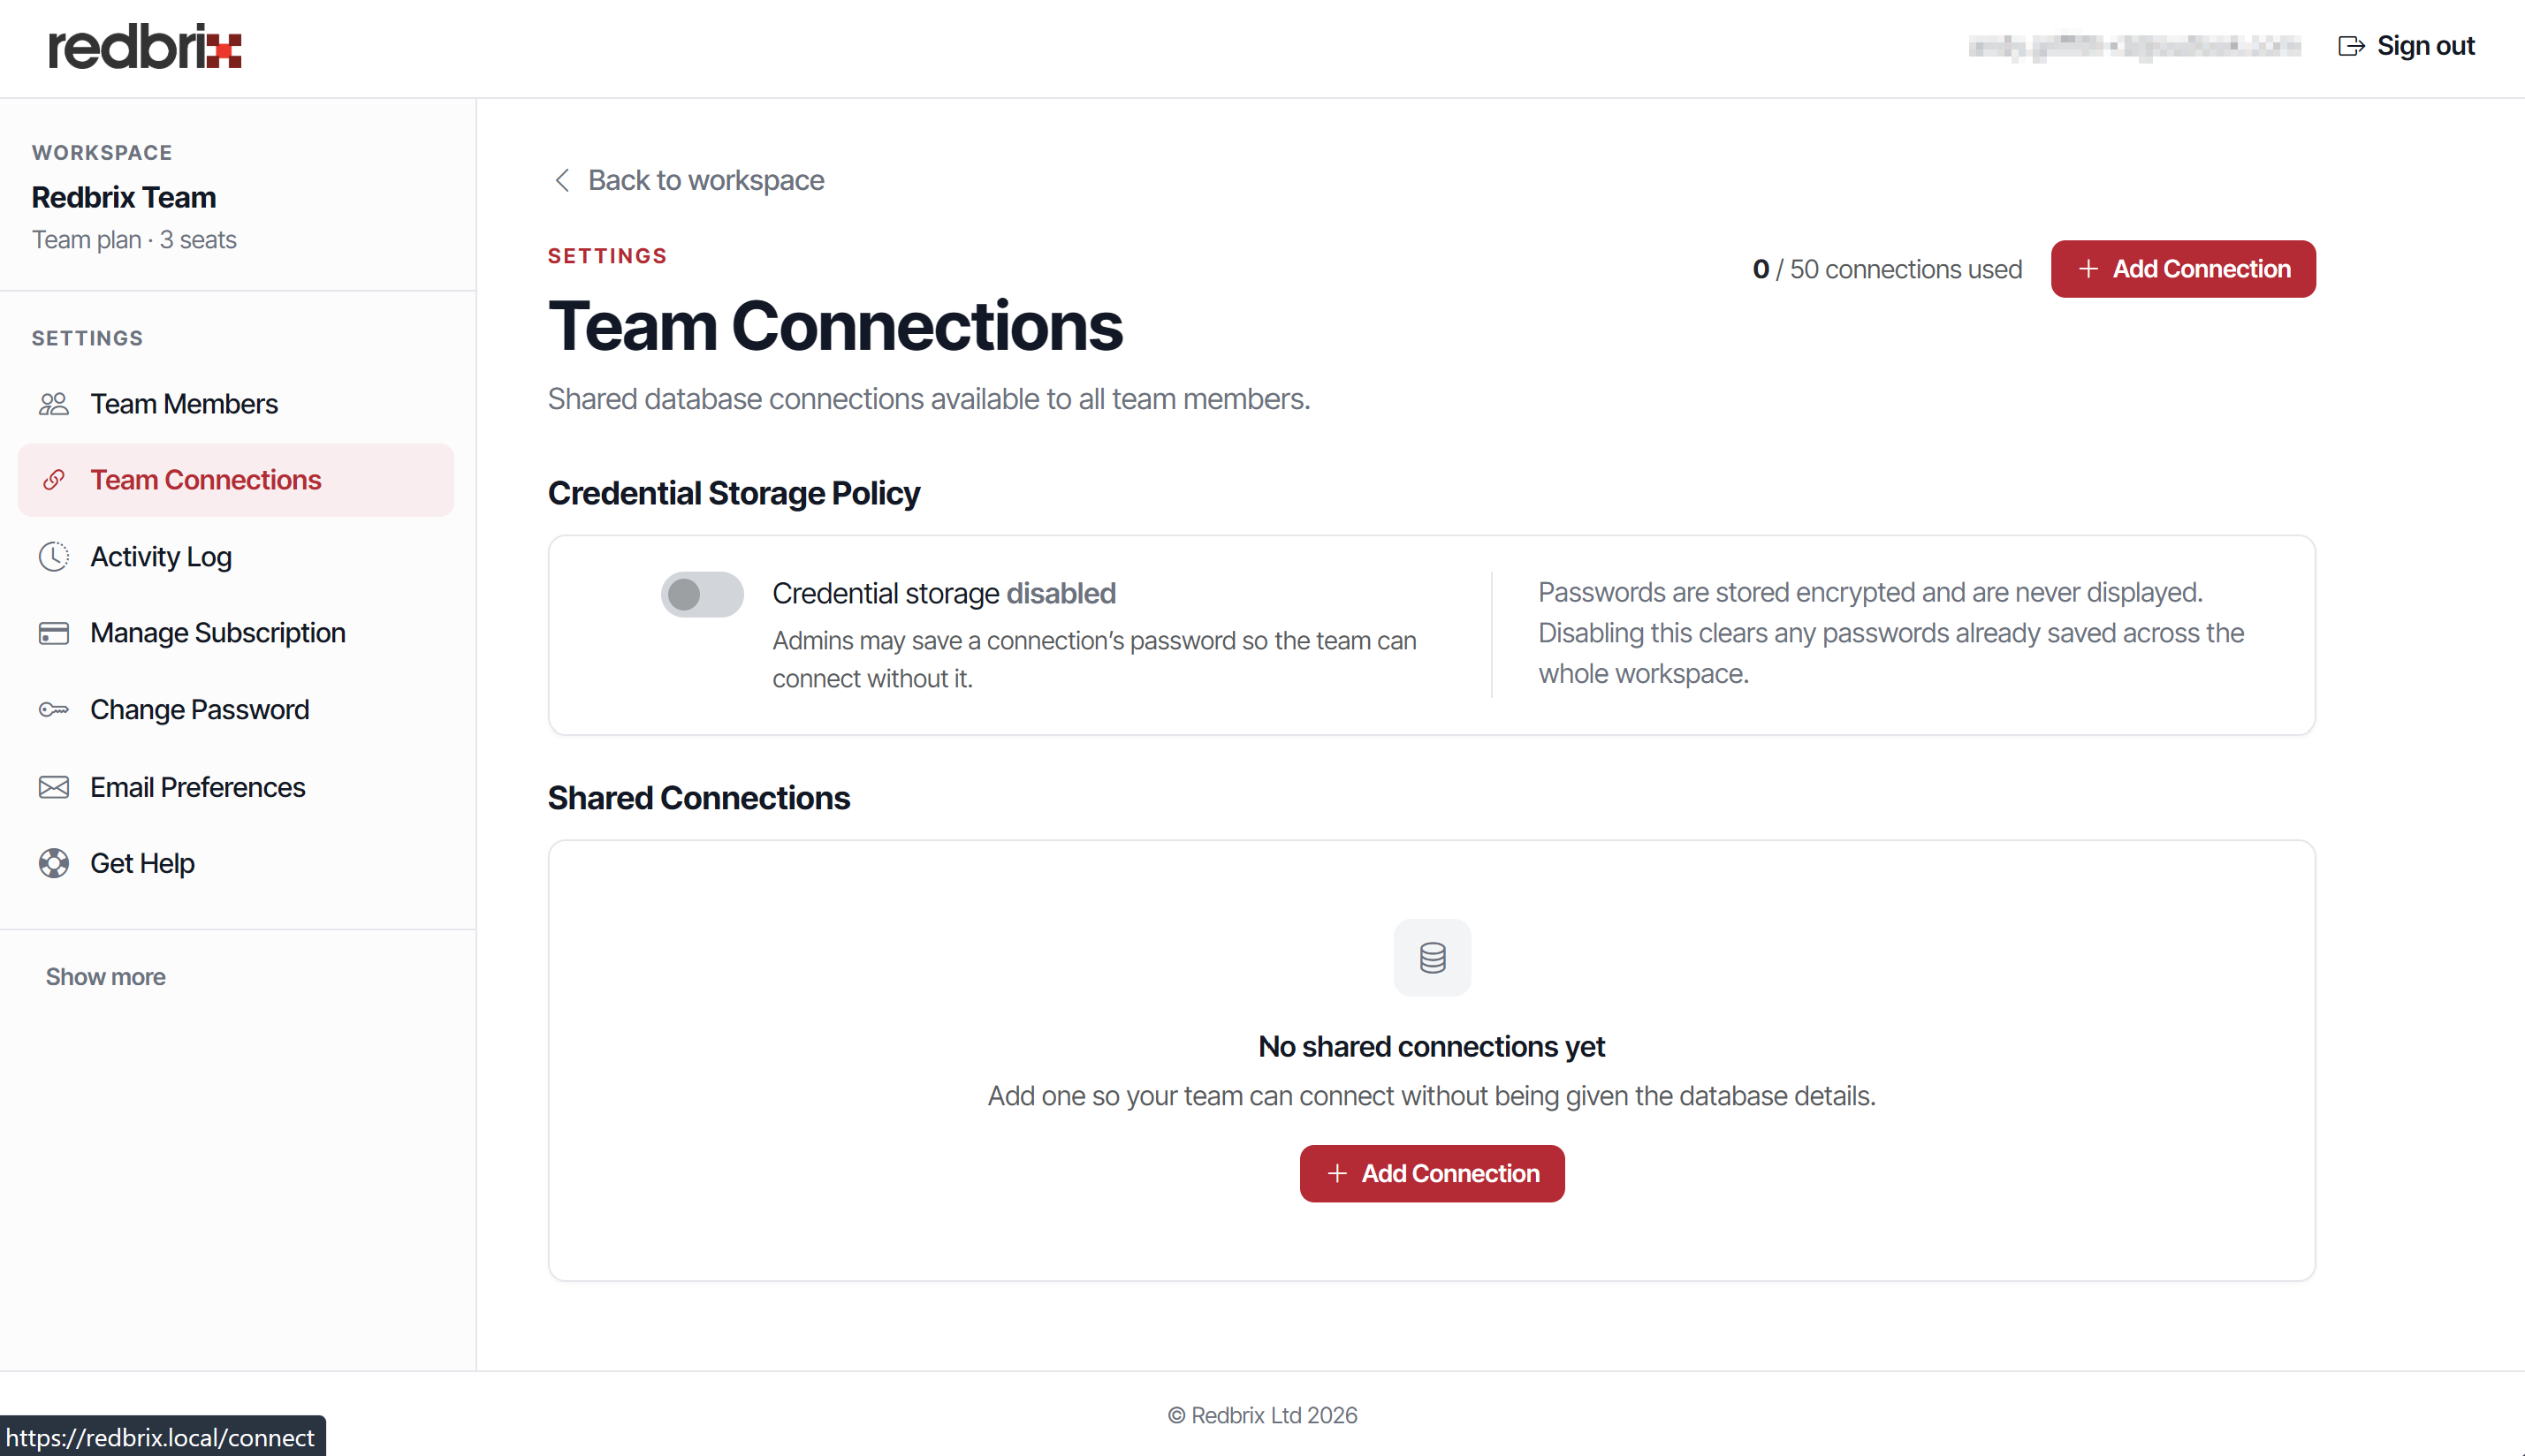
The most important decision you need to make here is whether to enable credential storage. This allows you to create connections for which the user does not need to enter the database password every time they connect. Instead, they will click the shared connection and will immediately be connected. Naturally, there is a security consideration here, as your database credentials will be stored in our database (albeit encrypted).
It is important to note that even with credential storage enabled, individual connections will, by default, still required the password to be entered — this is an option you must explicitly enable when setting up each connection.
Setting up a shared database connection
To set up a new connection, click the Add Connection button. You will see a database connection form like this:
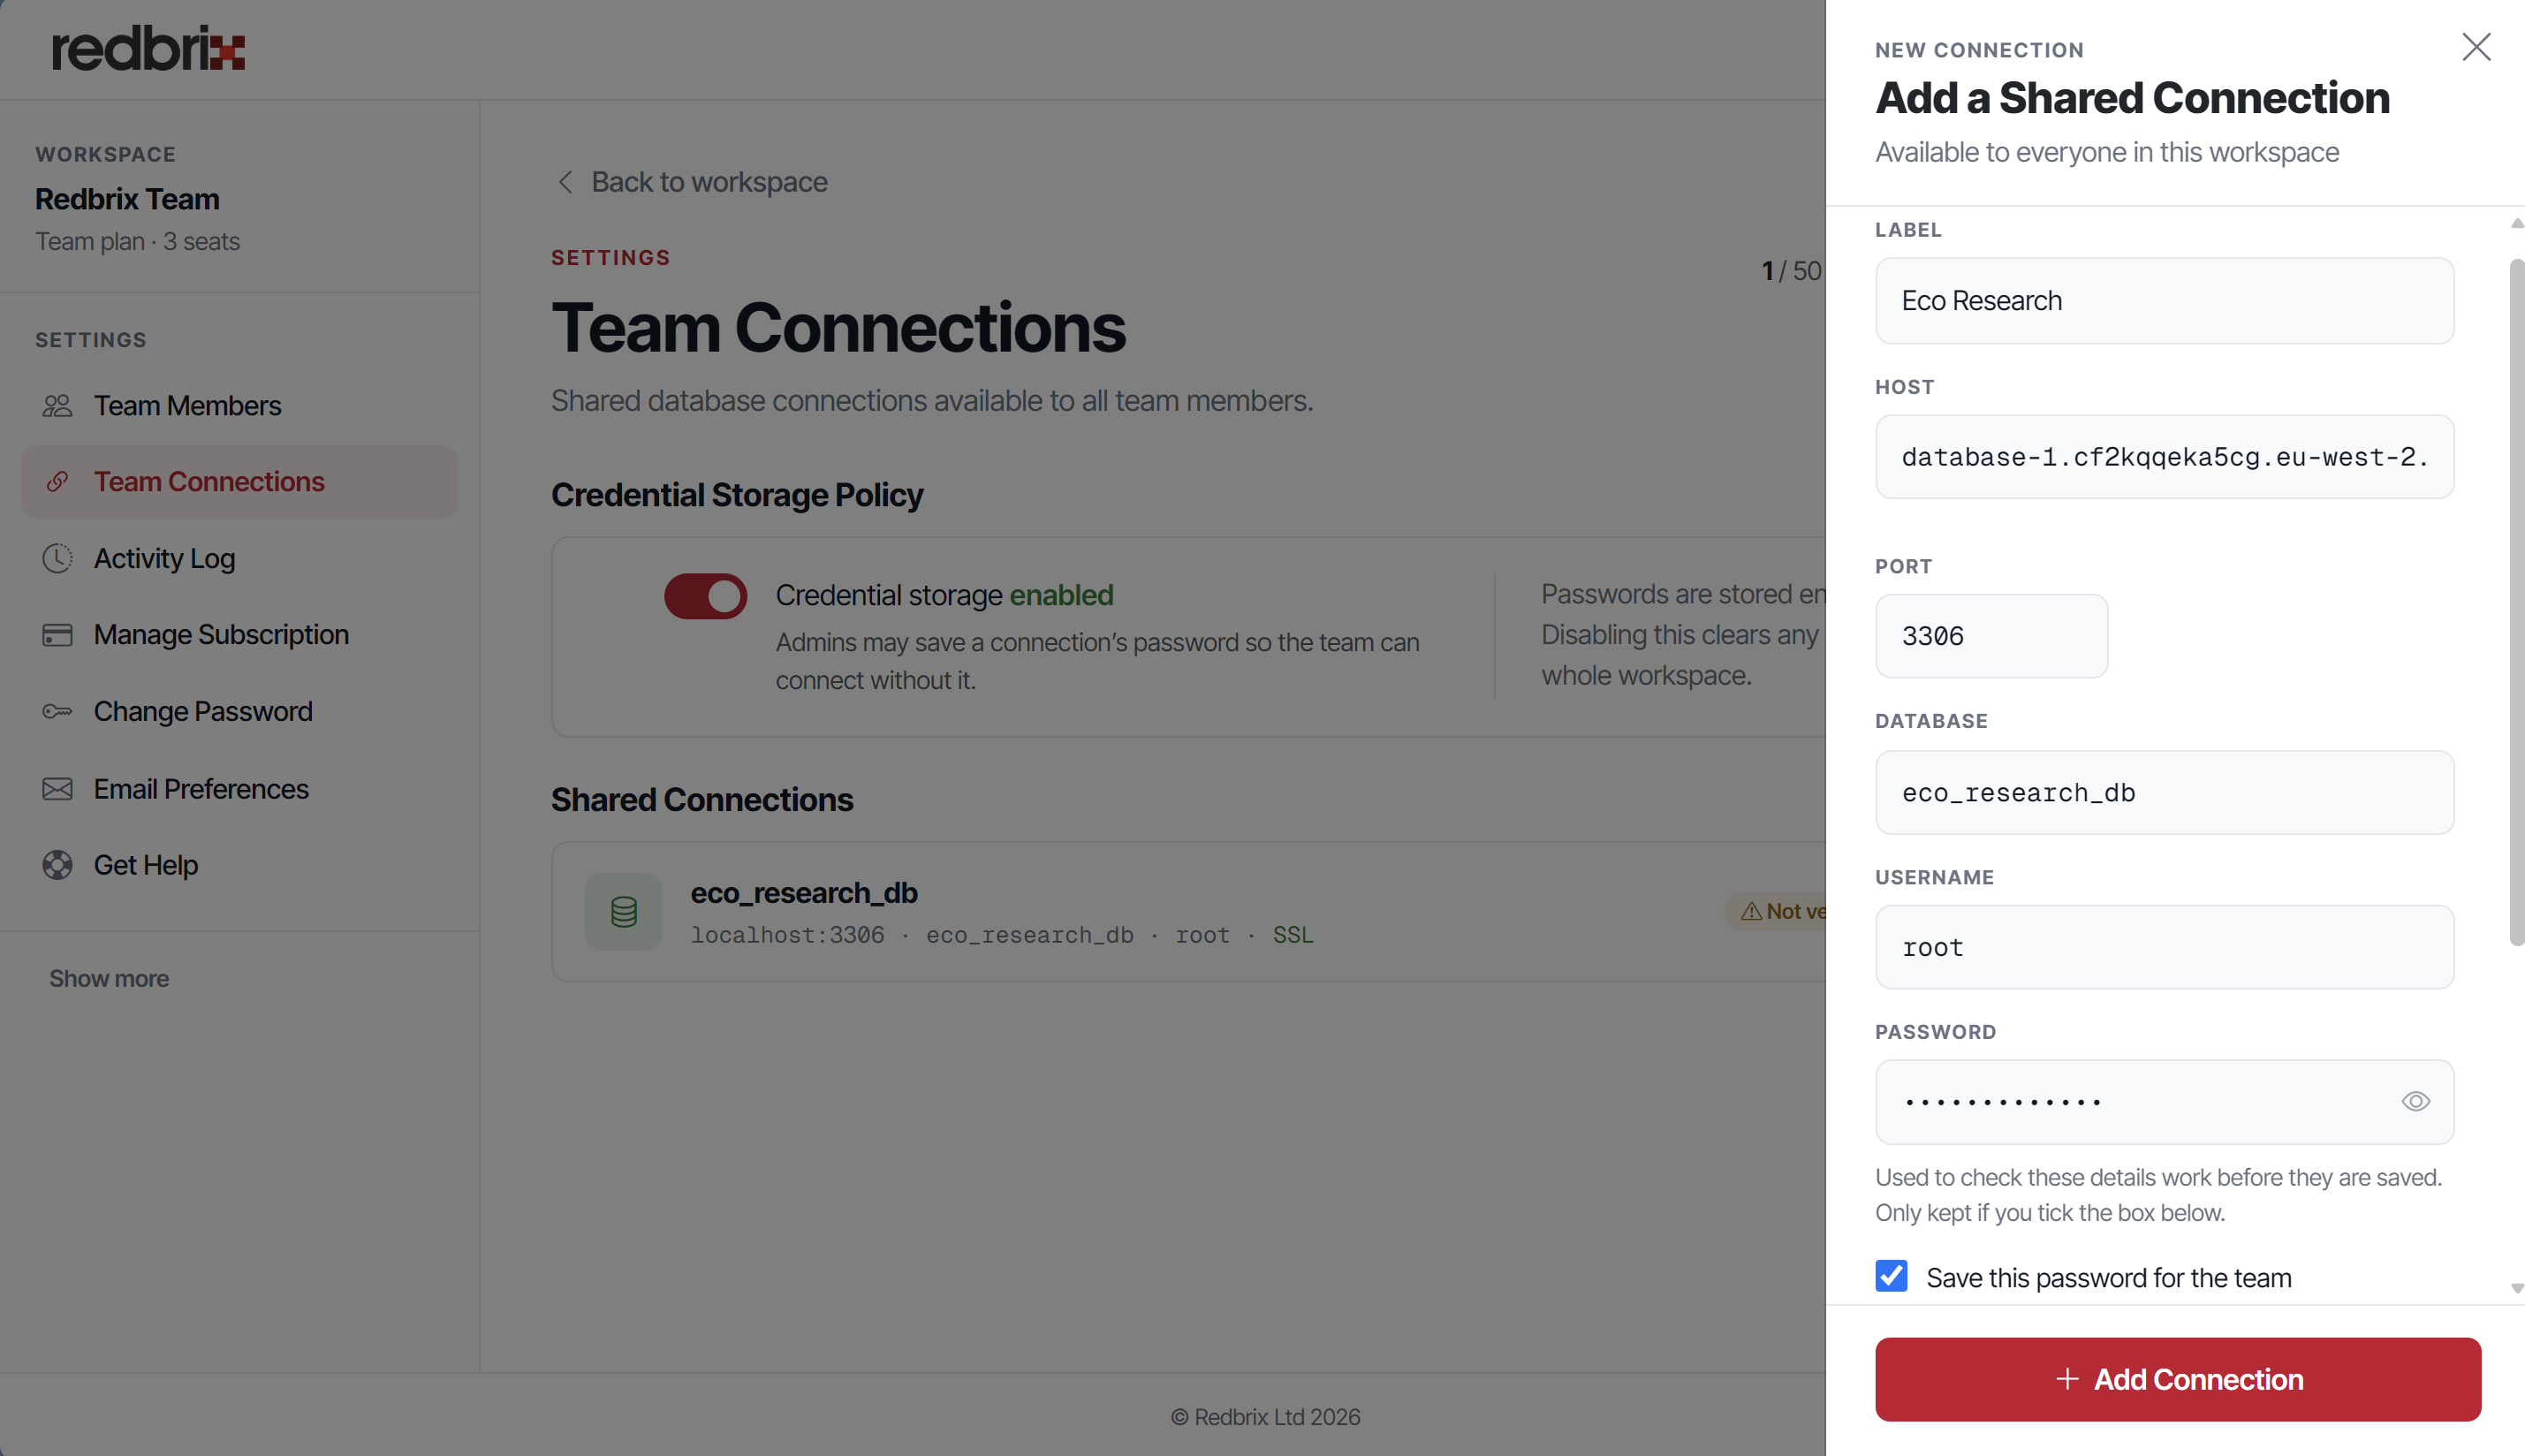
Once you've filled in the connection details, click the Add Connection button to save the shared connection. Note that the "Save this password for the team" option is selected — this means the users with whom this connection is shared will not need to enter a password each time they connect.
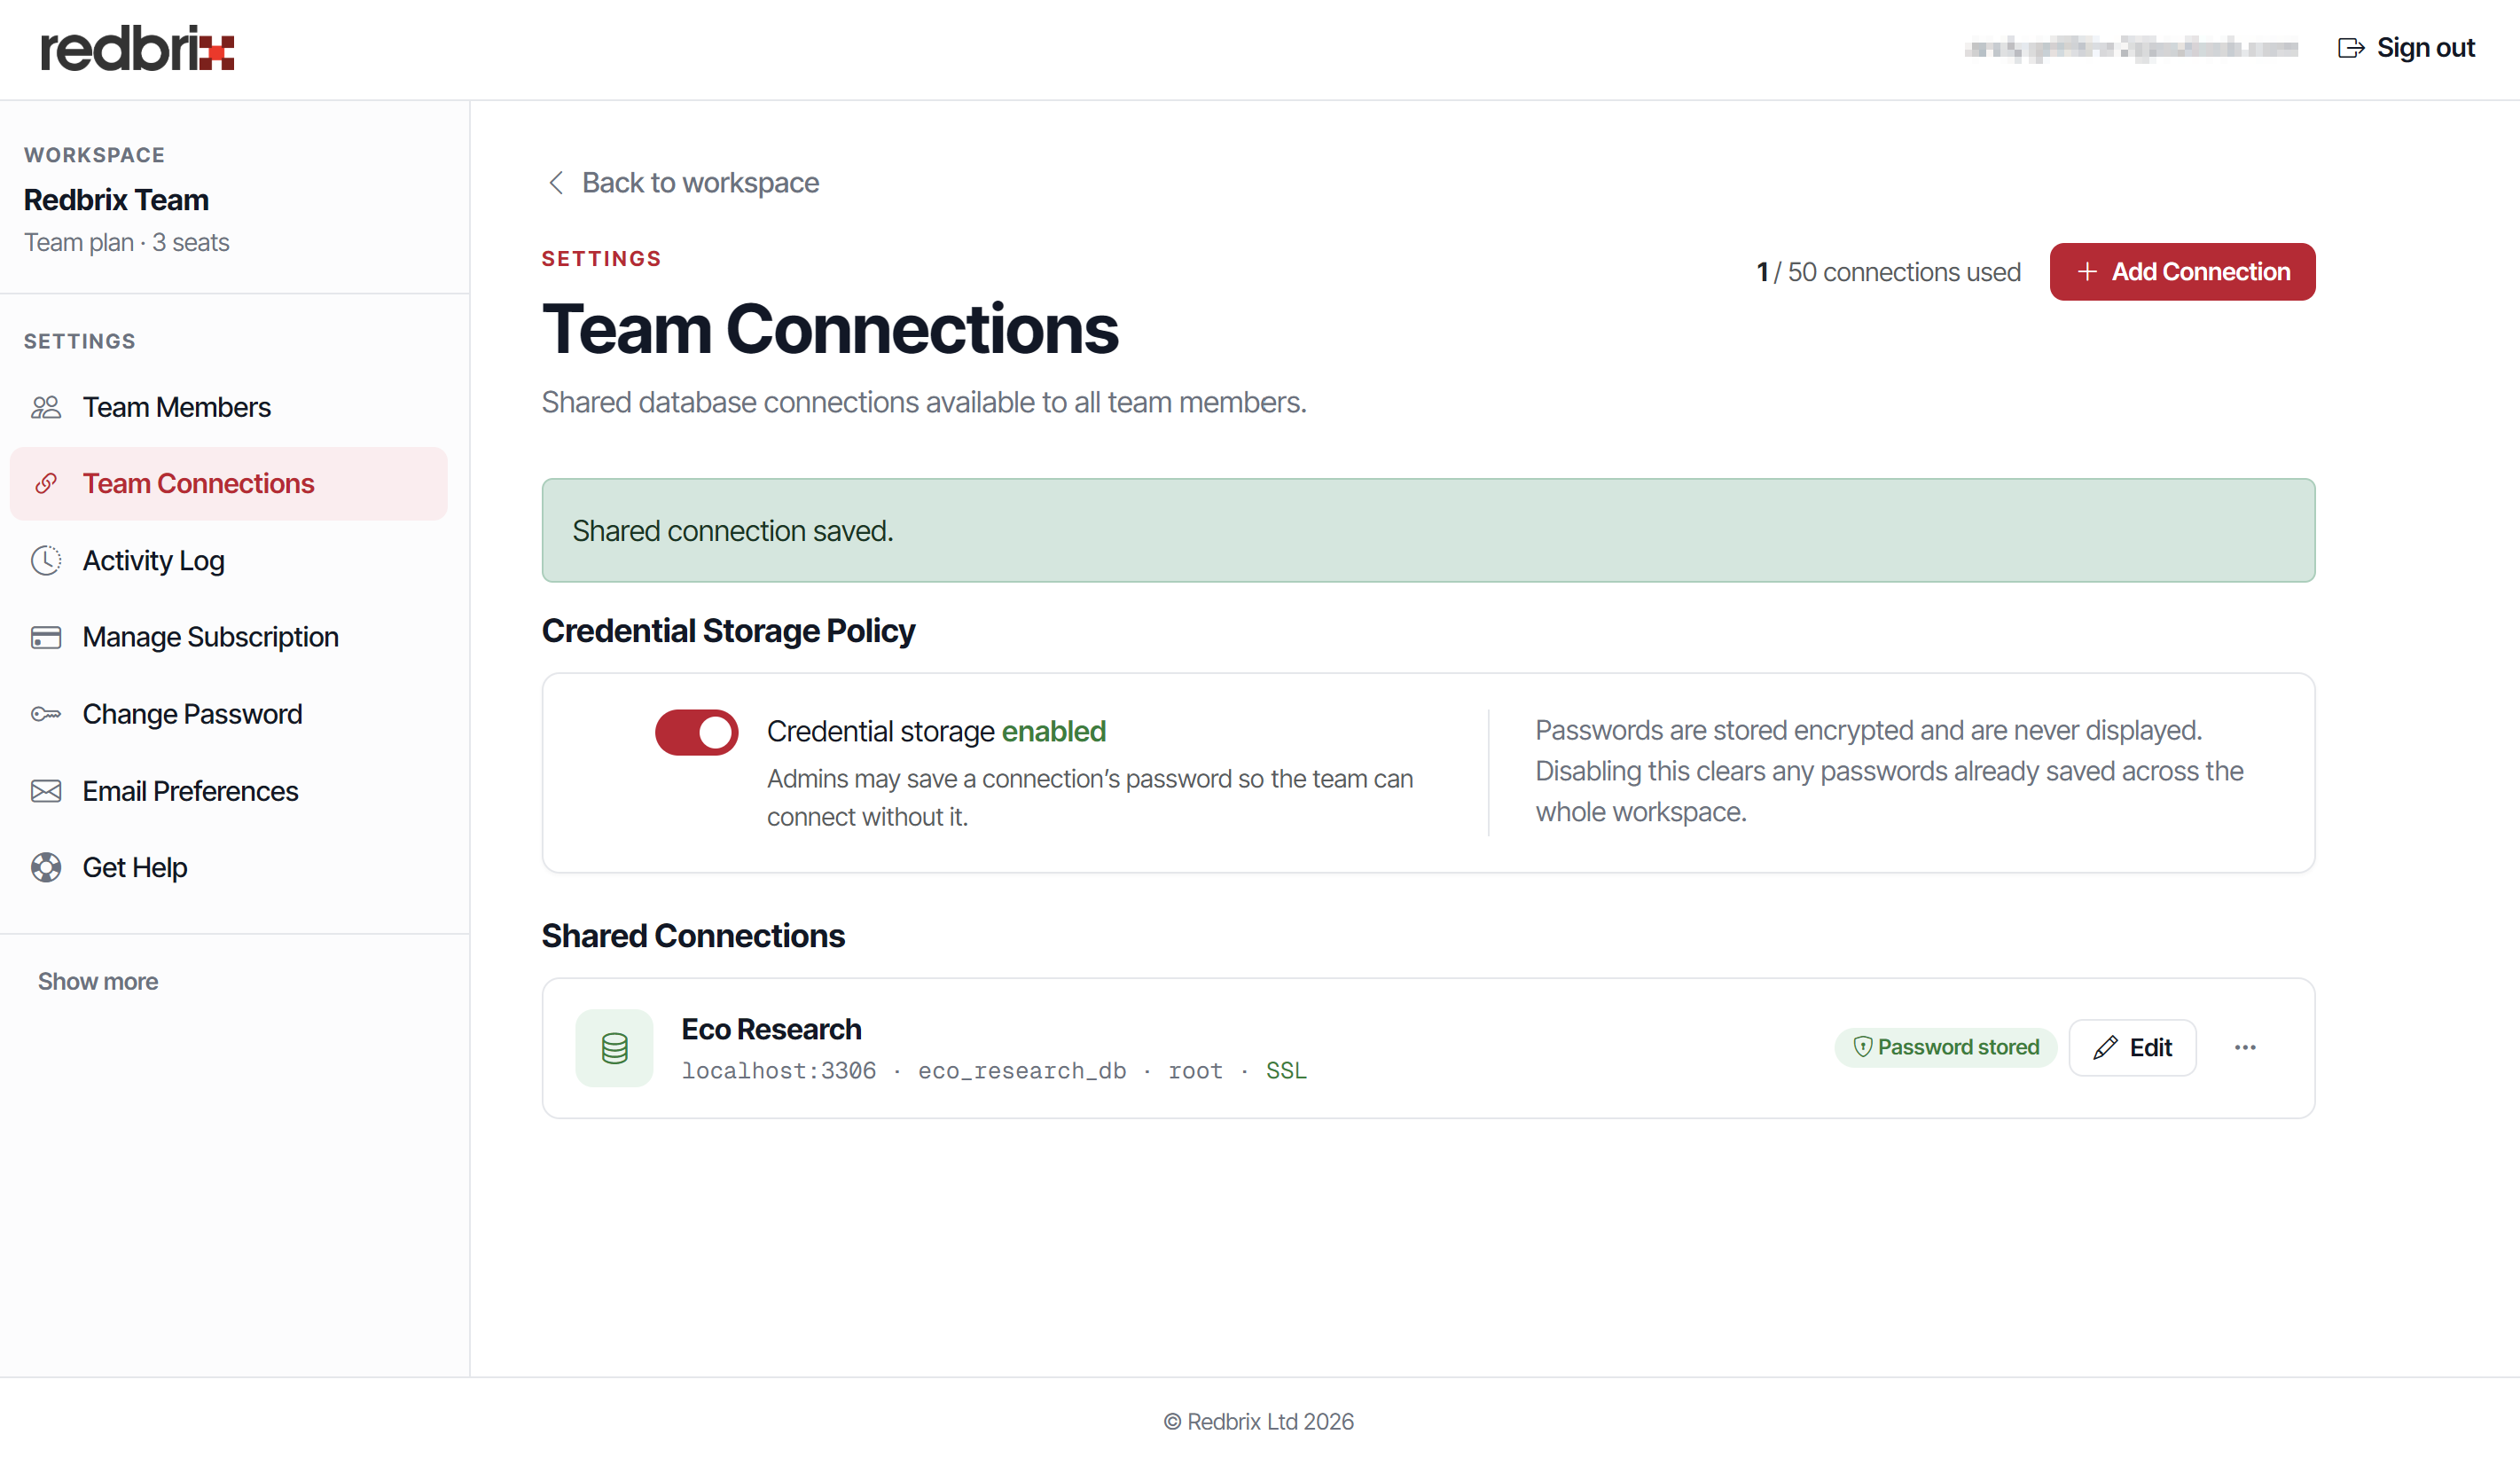
You should now see the shared connection listed among your team's connections (see below). Other team members will now be able to use it.
Role-based access control
At present, everyone in your team membership list has the same level of access, which is that of the database user with which the shared connection was created. However, Team accounts can utilize a much more granular, role-based approach that can restrict access by table and even by specific field within a table.
Role-based access control allows you to define different roles for your team members and assign specific permissions to each role. This ensures that team members only have access to the resources and actions that are relevant to their role.
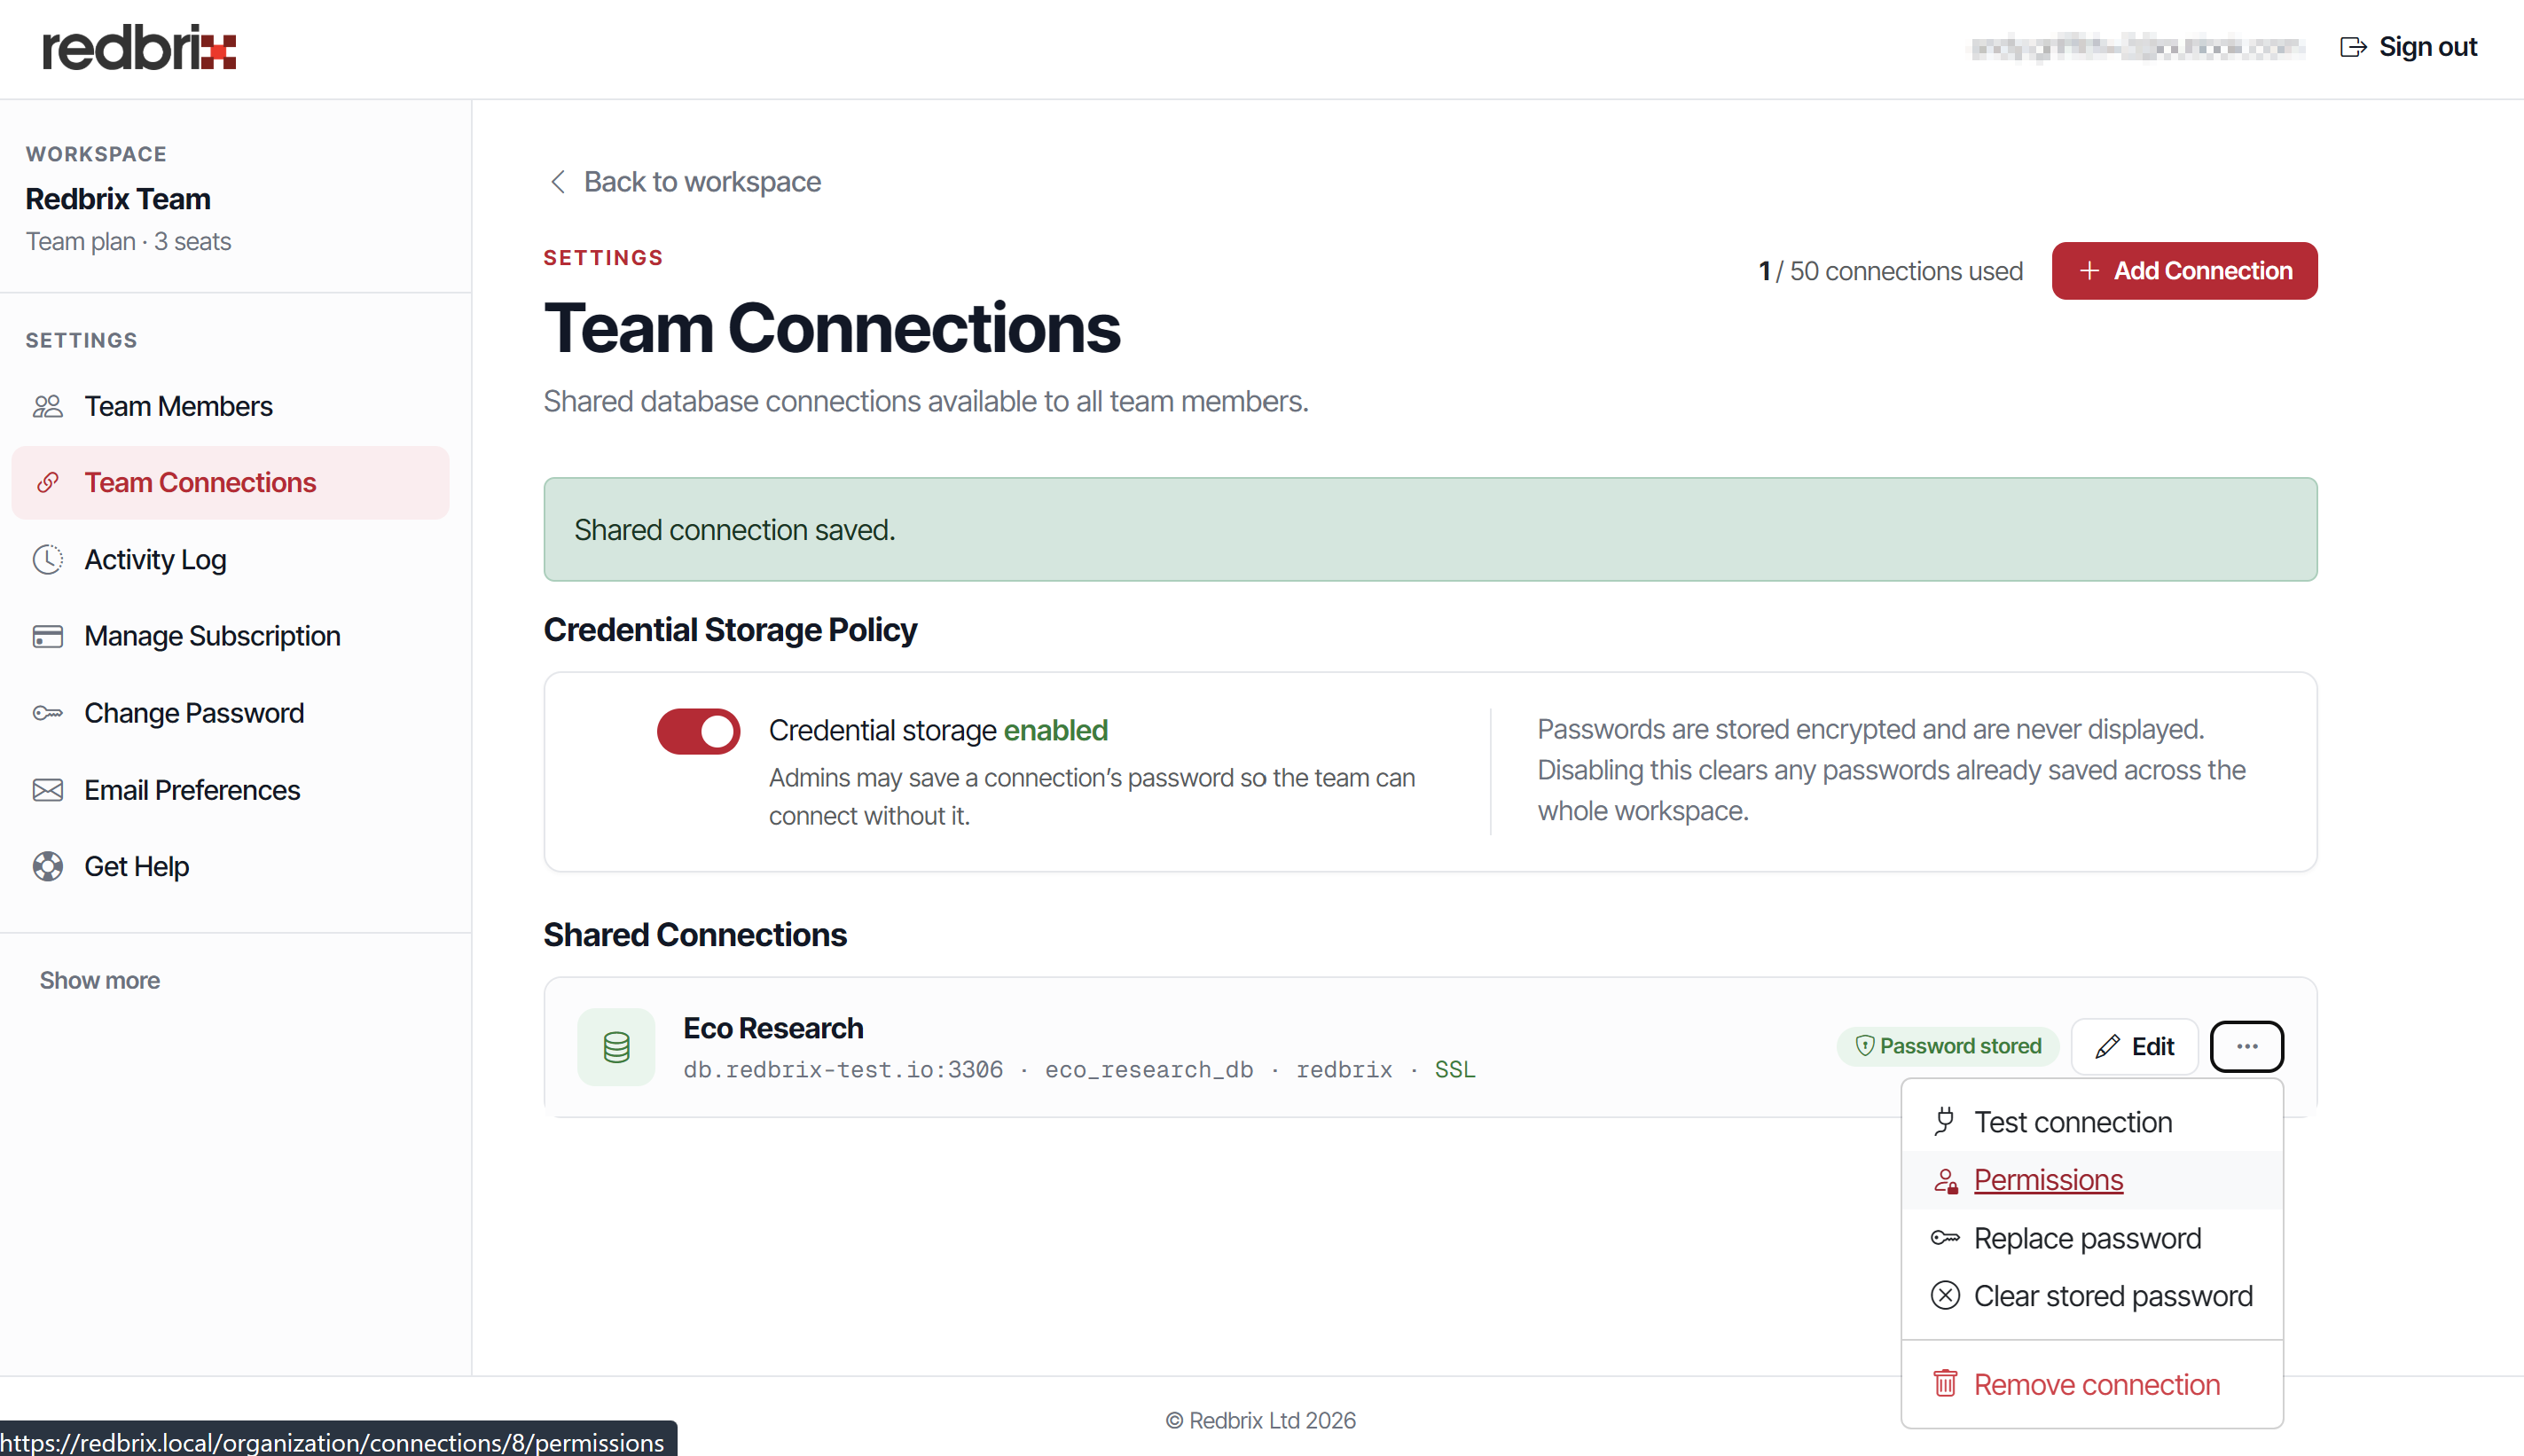
In order to switch to role-based access, you need to navigate to the Team Connections page and click the three-dots menu on the right of the shared connection card, then click Permissions:
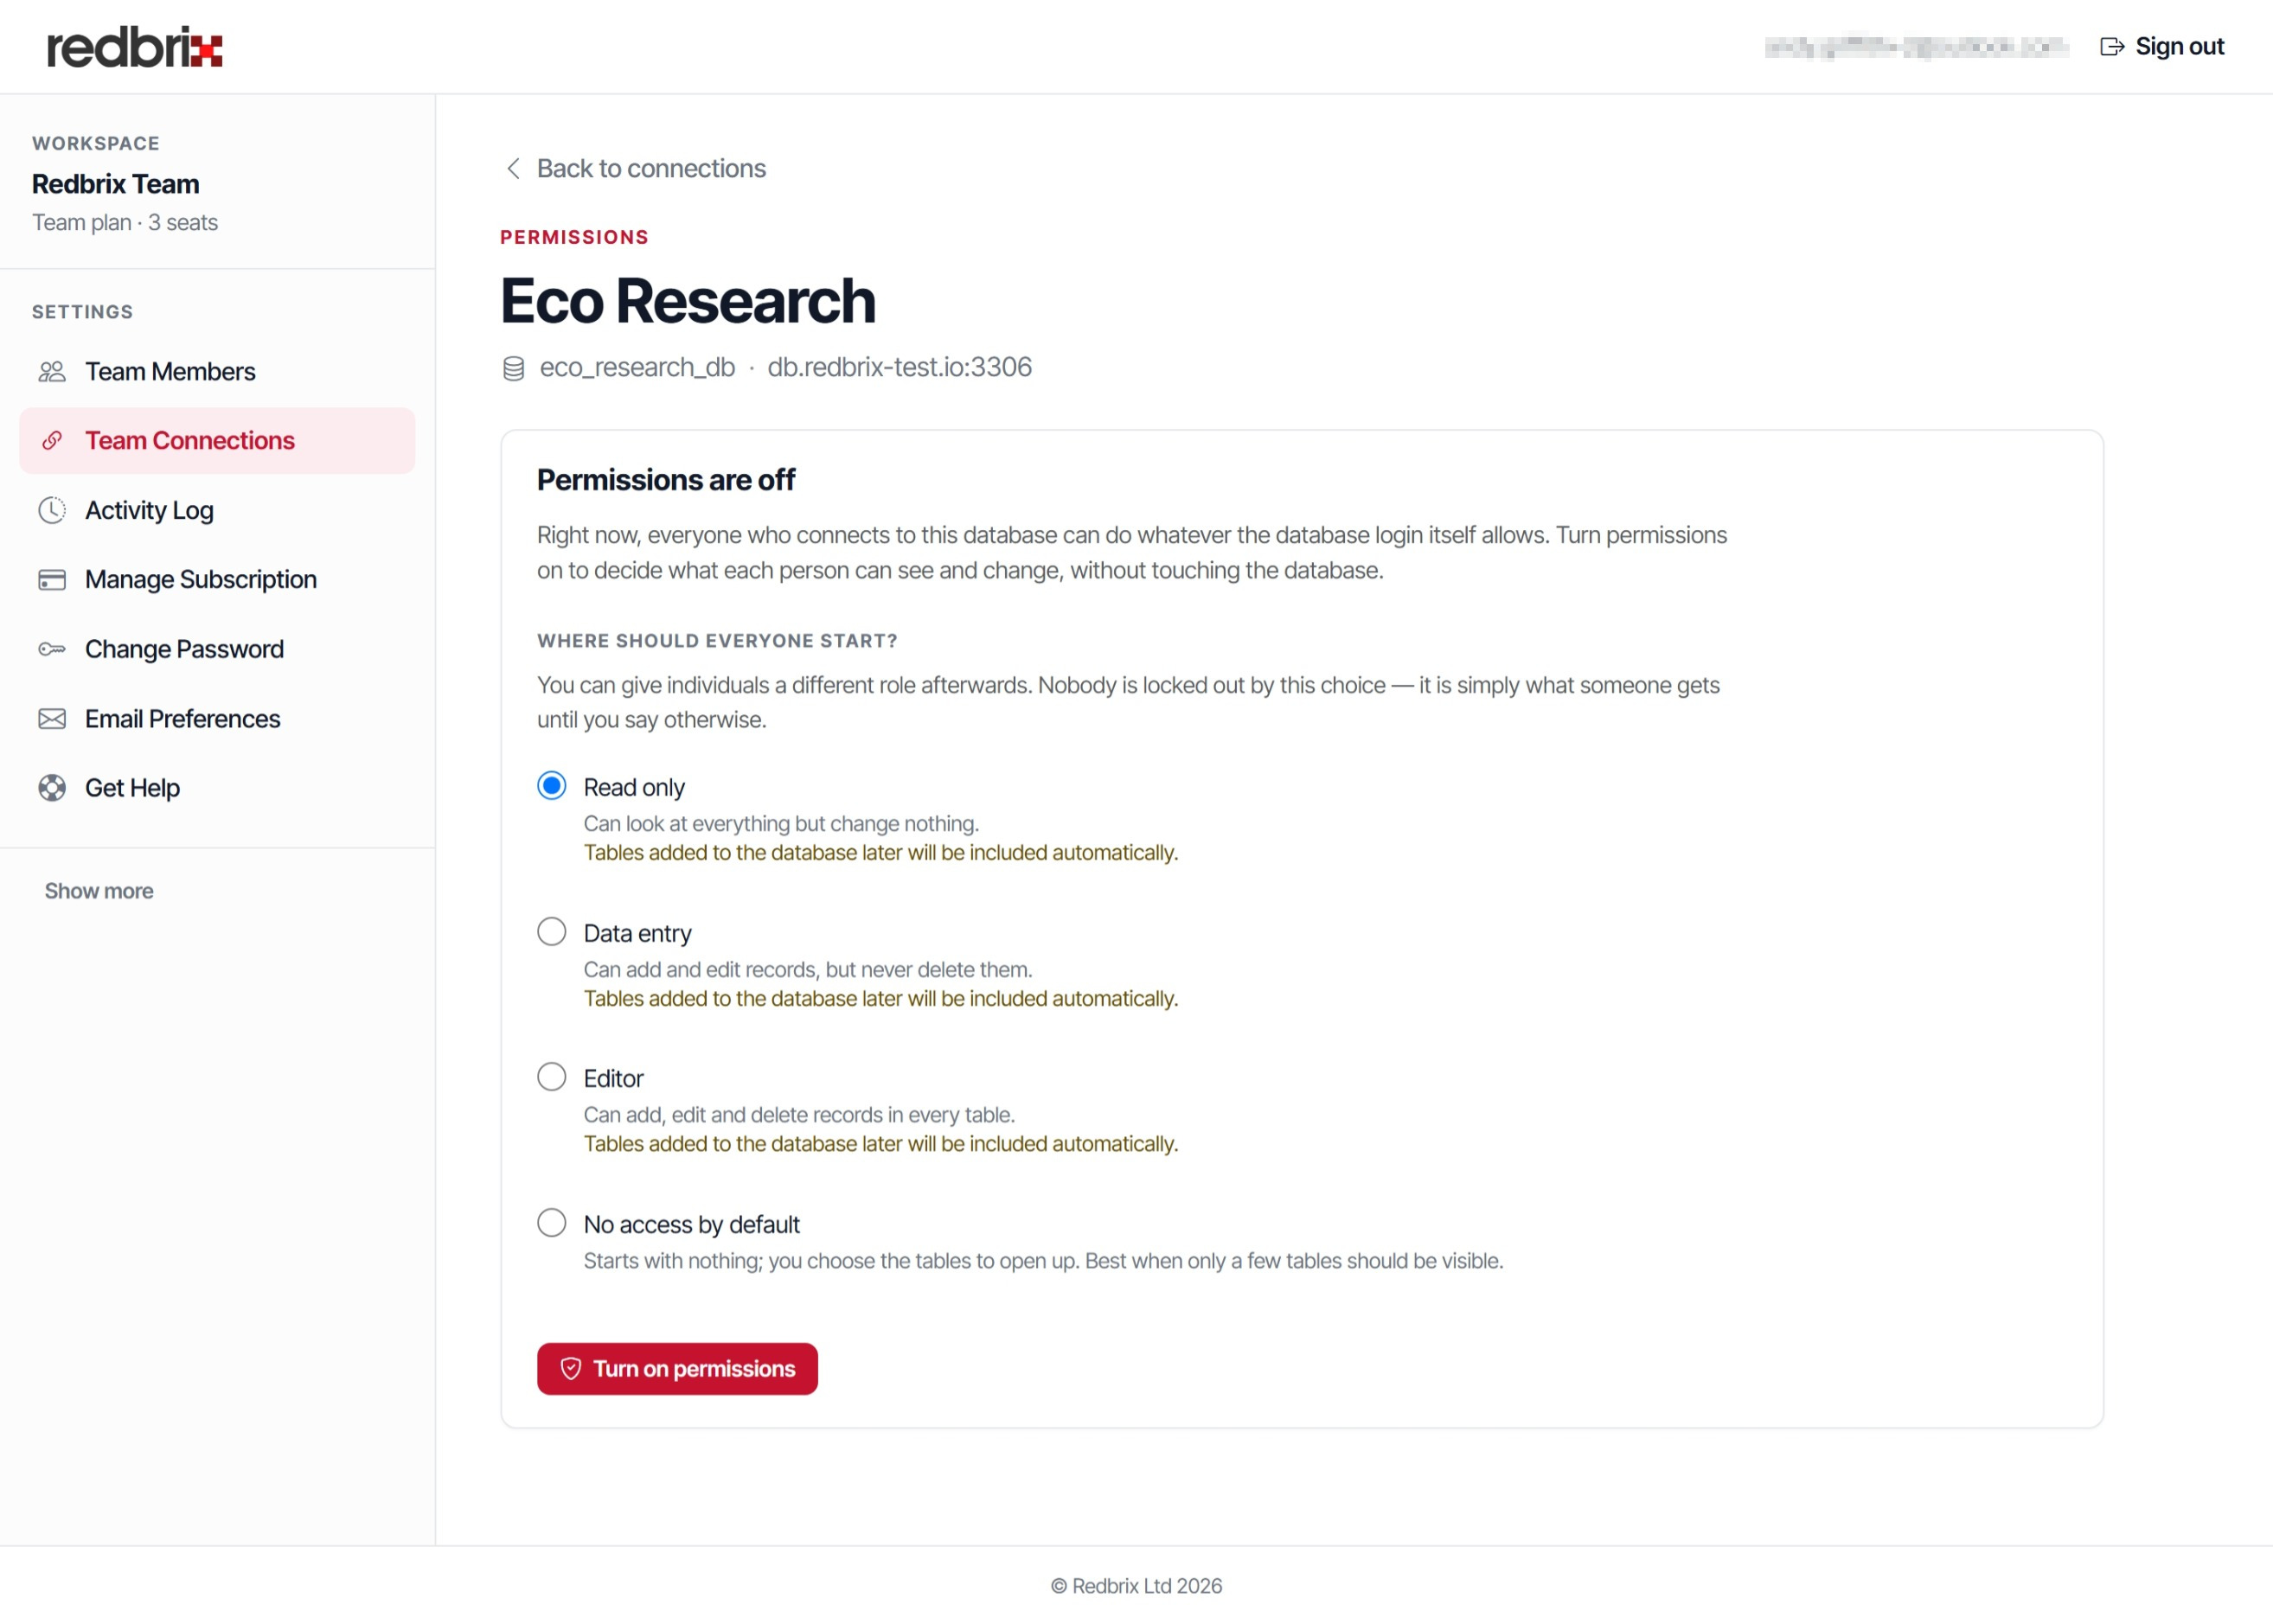
This opens up the permissions page, on which you will see a message: "Permissions are off". To turn on role-based access, select the default access level you want to assign to your users, then click the Turn on permissions button.
As stated in the description of each level, any tables subsequently added to the database will inherit the default access level you set here.
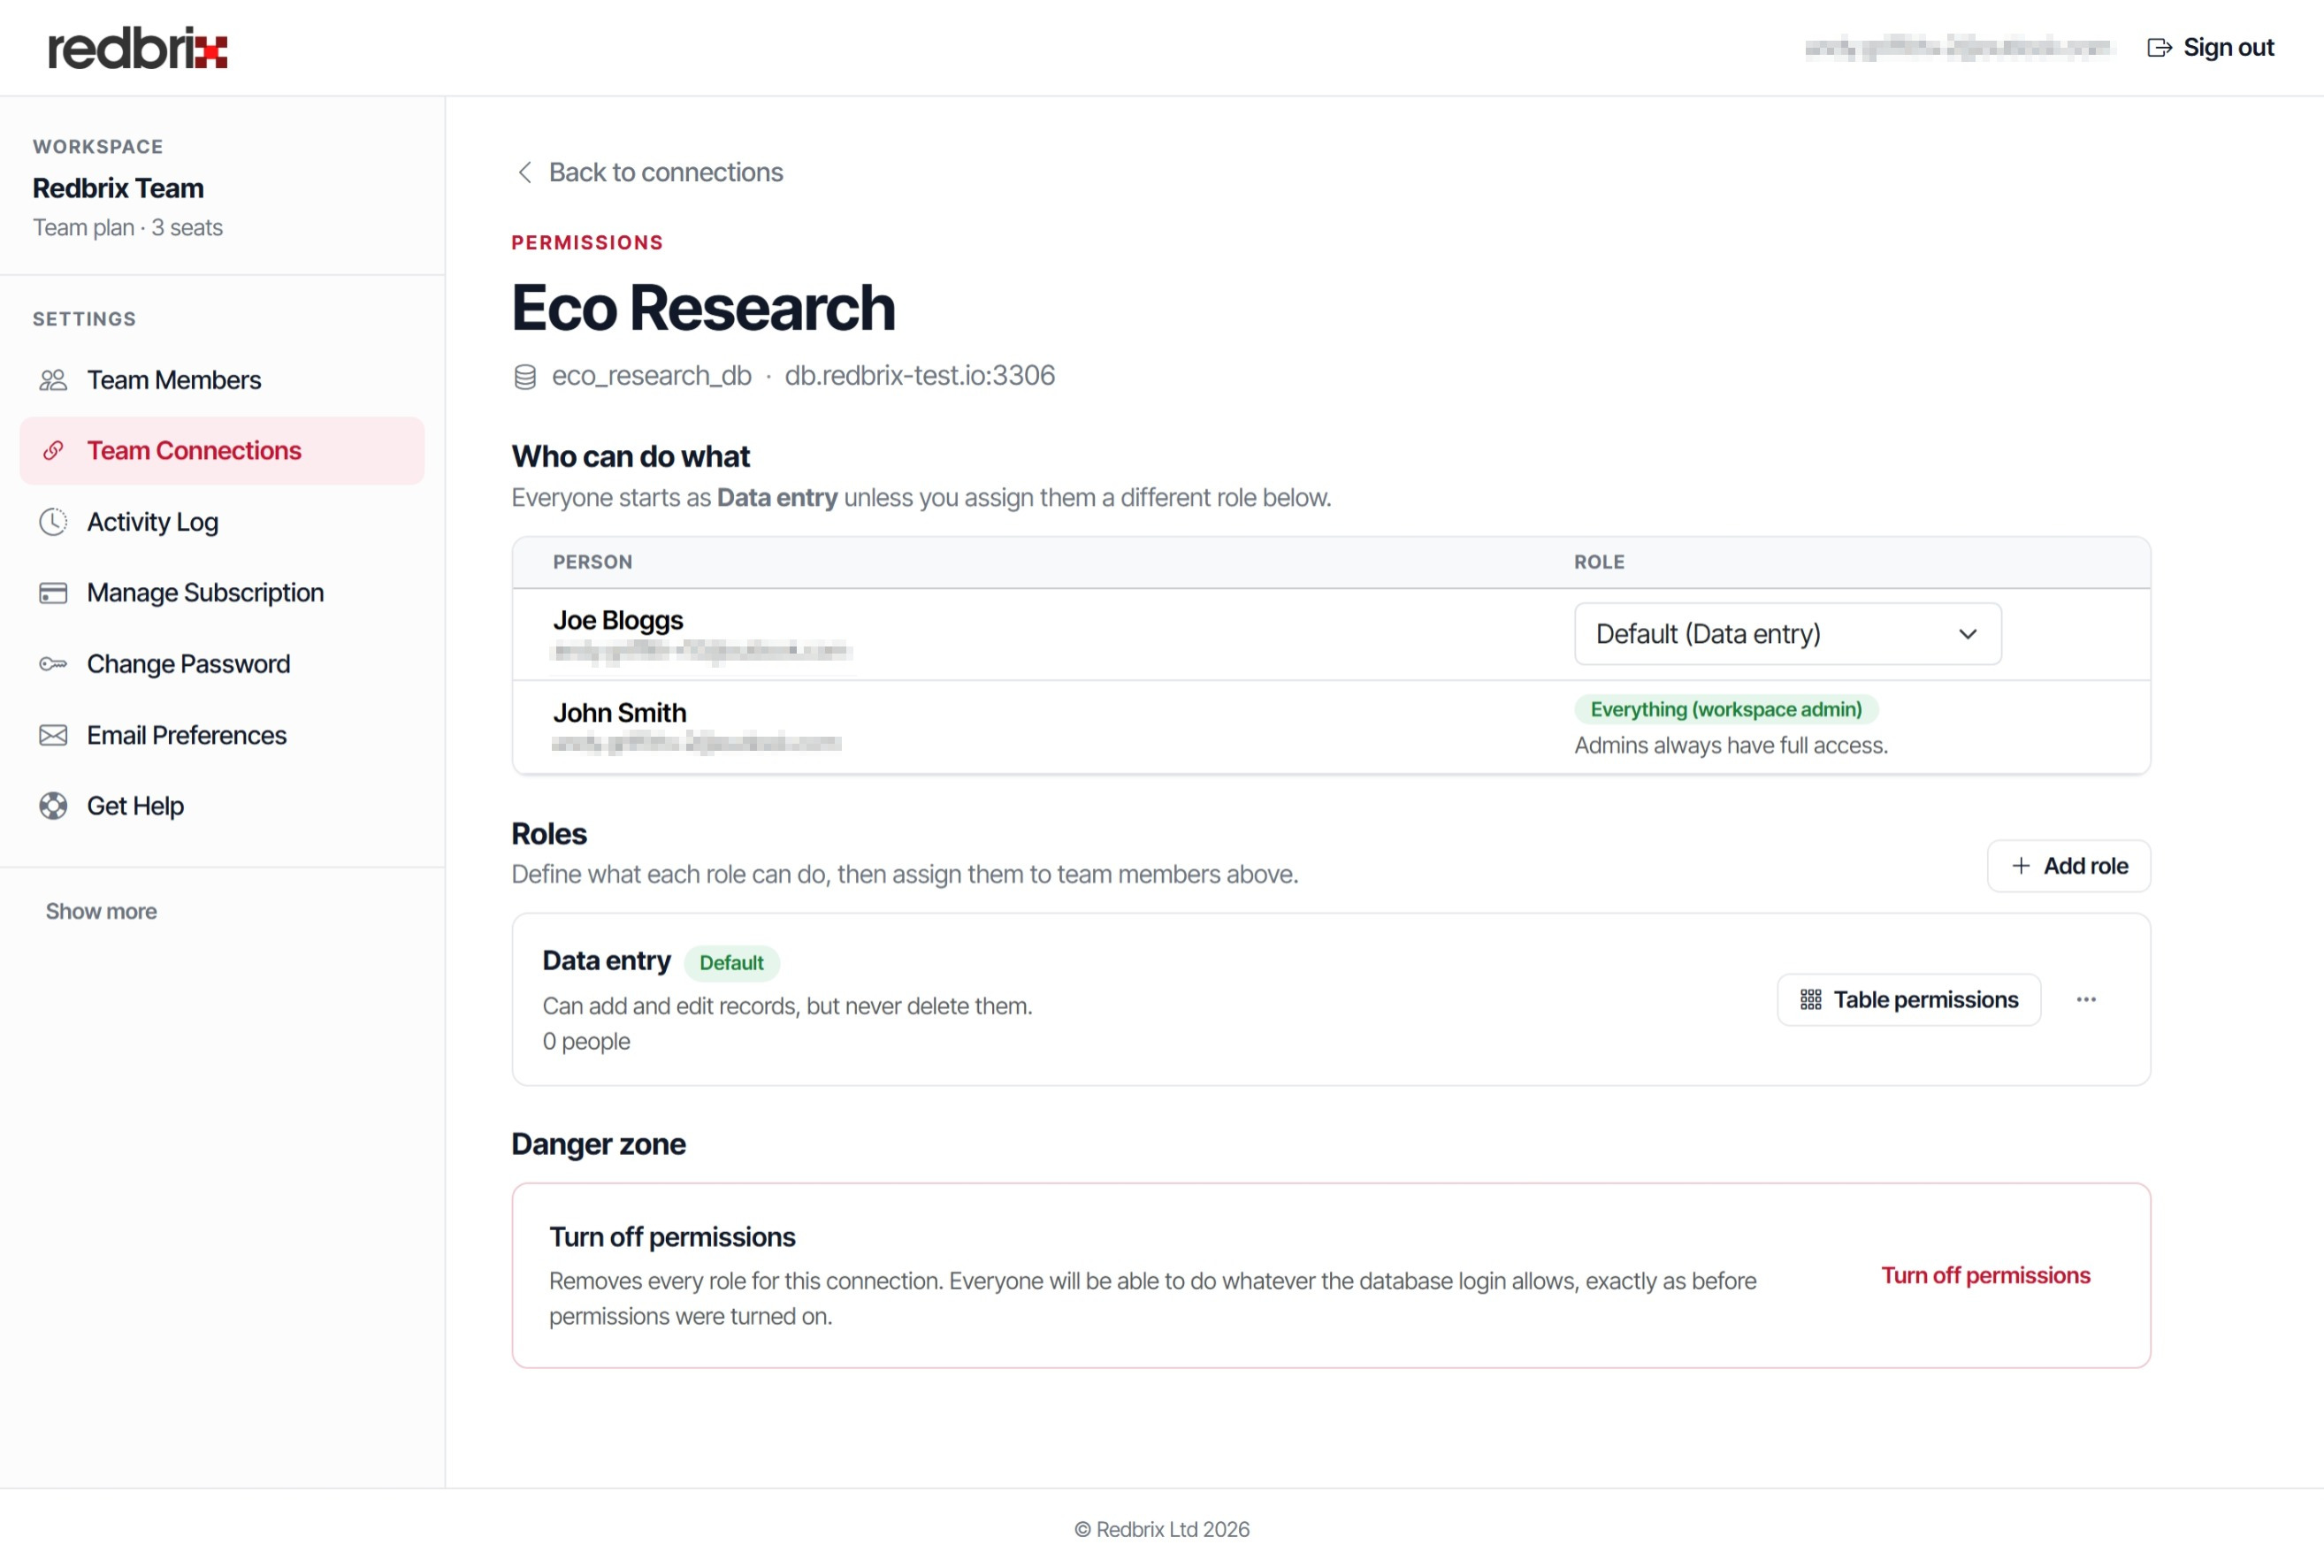
Once role-based access is enabled, you can manage the permissions for each role and adjust them as needed to ensure that team members have the appropriate level of access.
The Permissions page is divided into three sections:
- Who can do what: A list of users and their assigned role.
- Roles: This is where you define and manage the different roles within your team.
- Danger zone: This is where you'll find the button for turning off permissions. This deletes all roles and assignments and cannot be undone. When this is turned off, each user will again inherit the permissions of the database user associated with the connection.
Initially, there will be just one role configured: the default one you selected when turning on role-based access.
To add a new role, click the New role button. You can then define the permissions for this role and assign users to it.
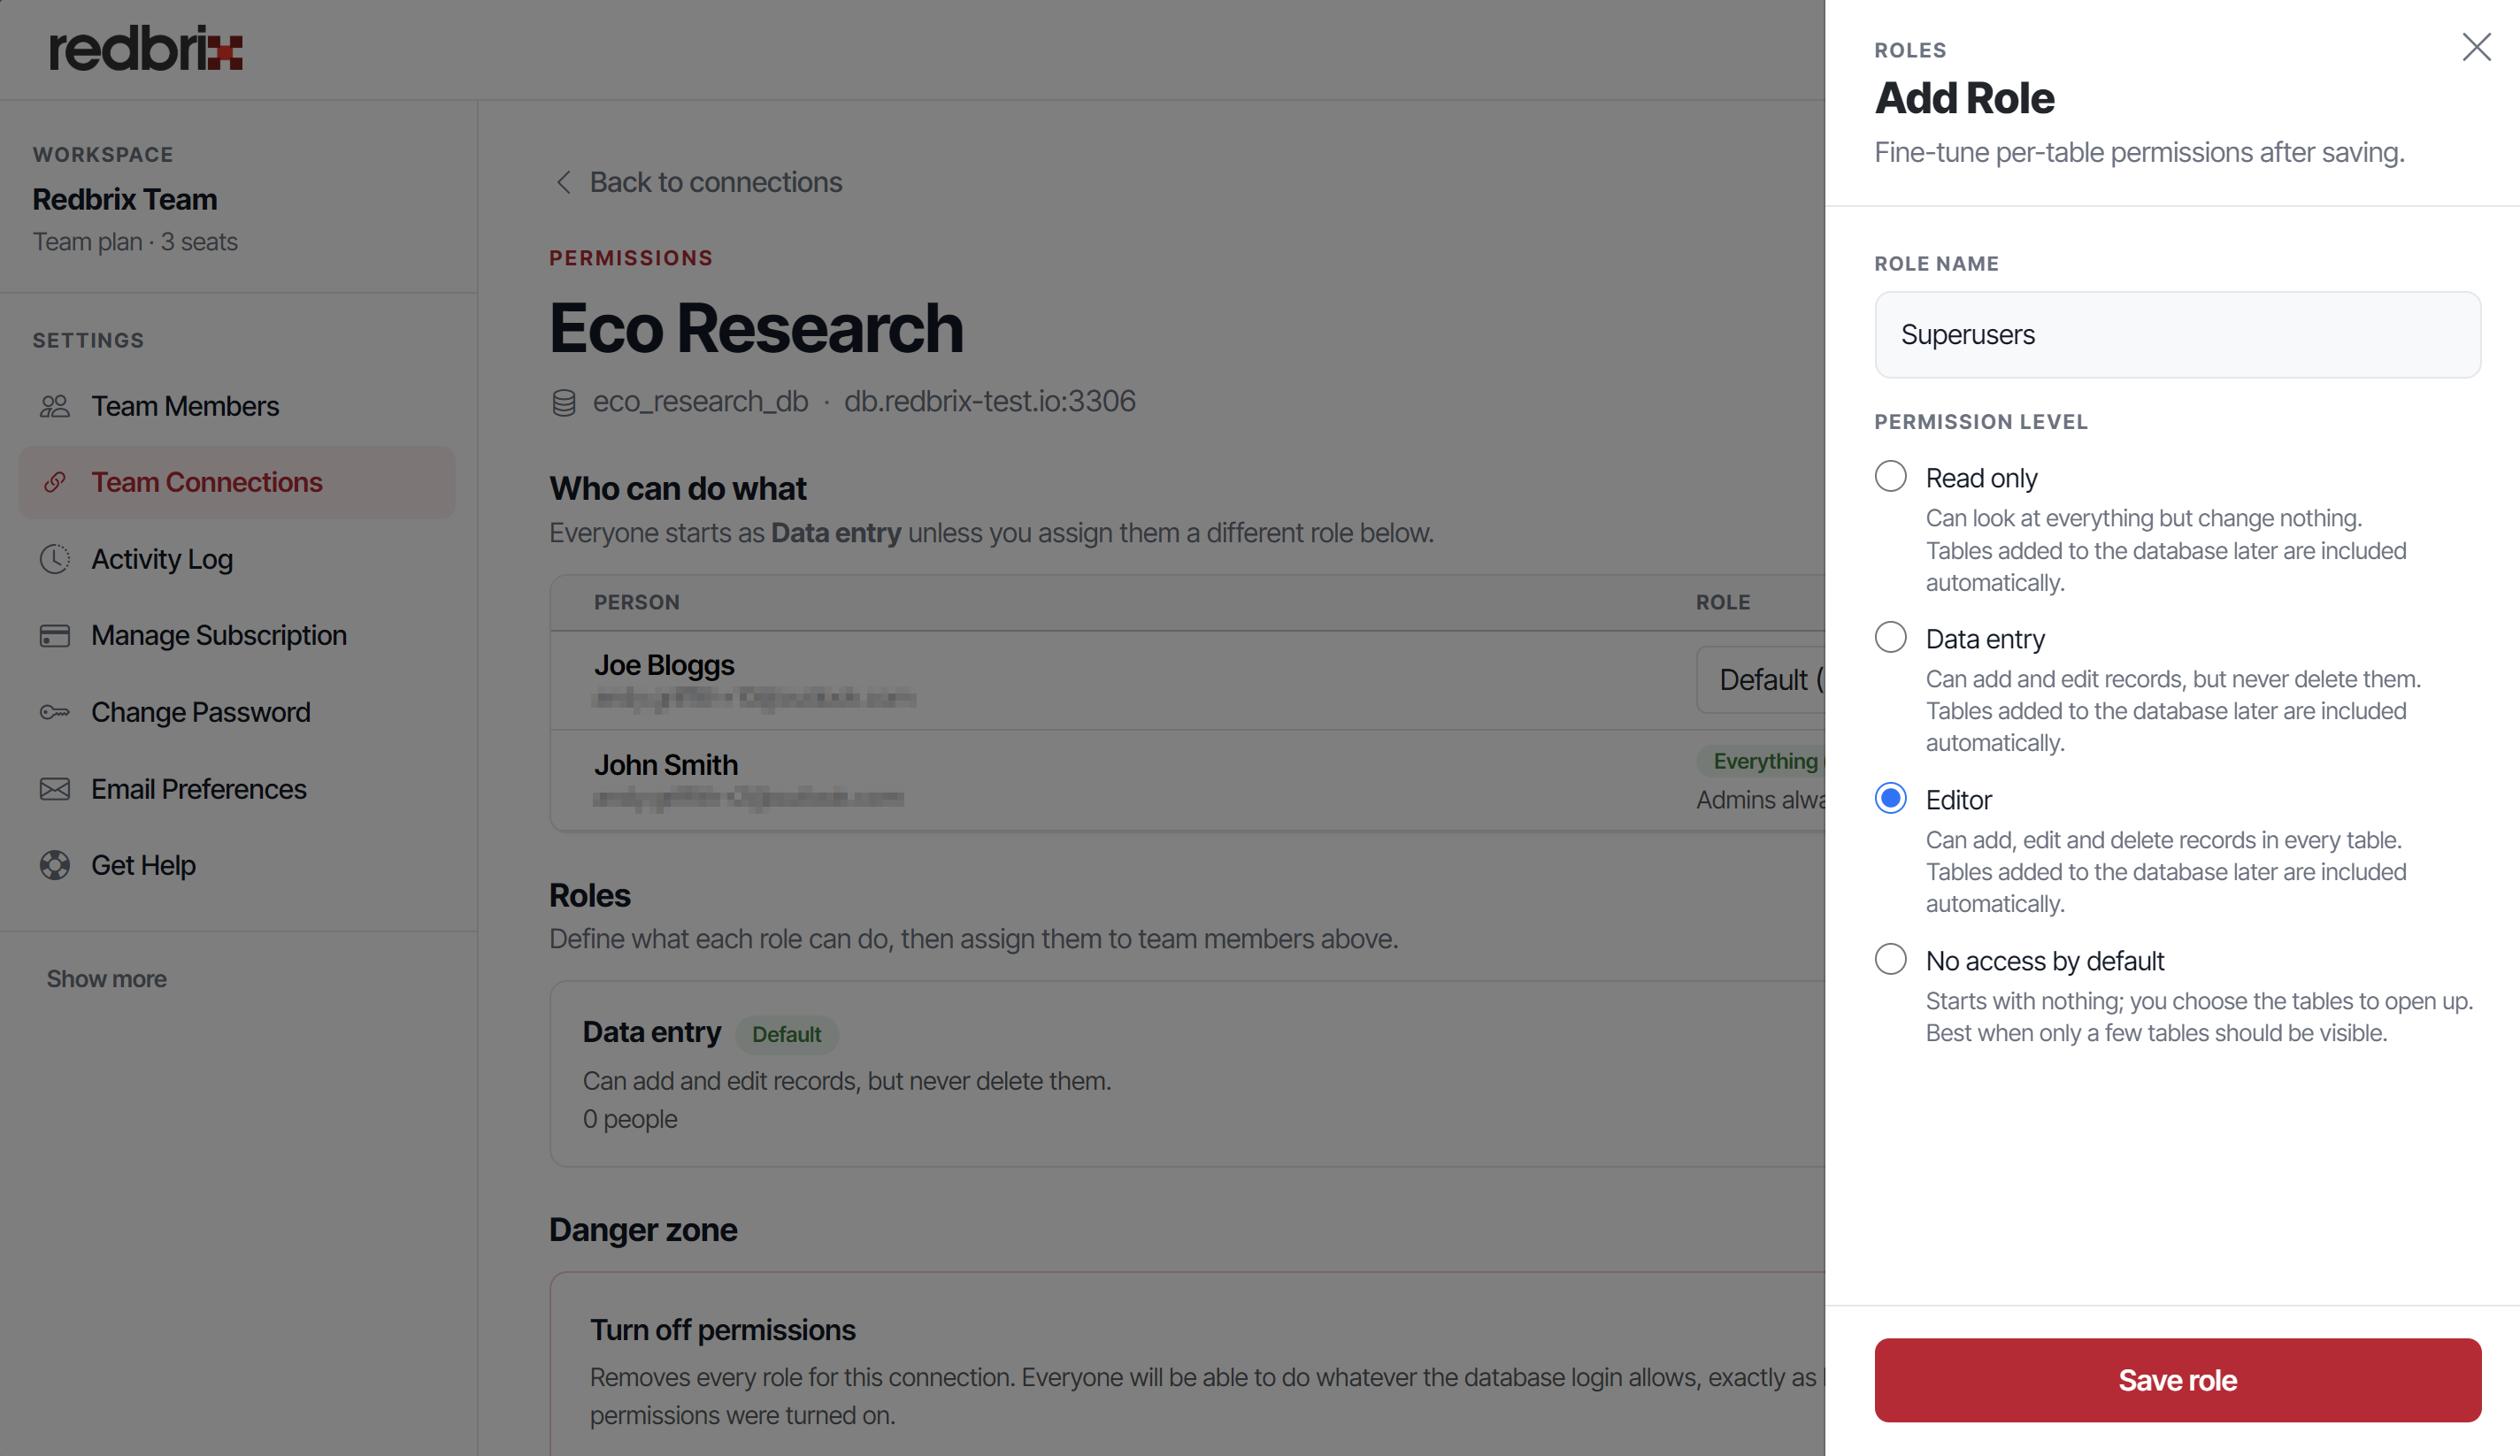
You can now assign users to the newly created role.
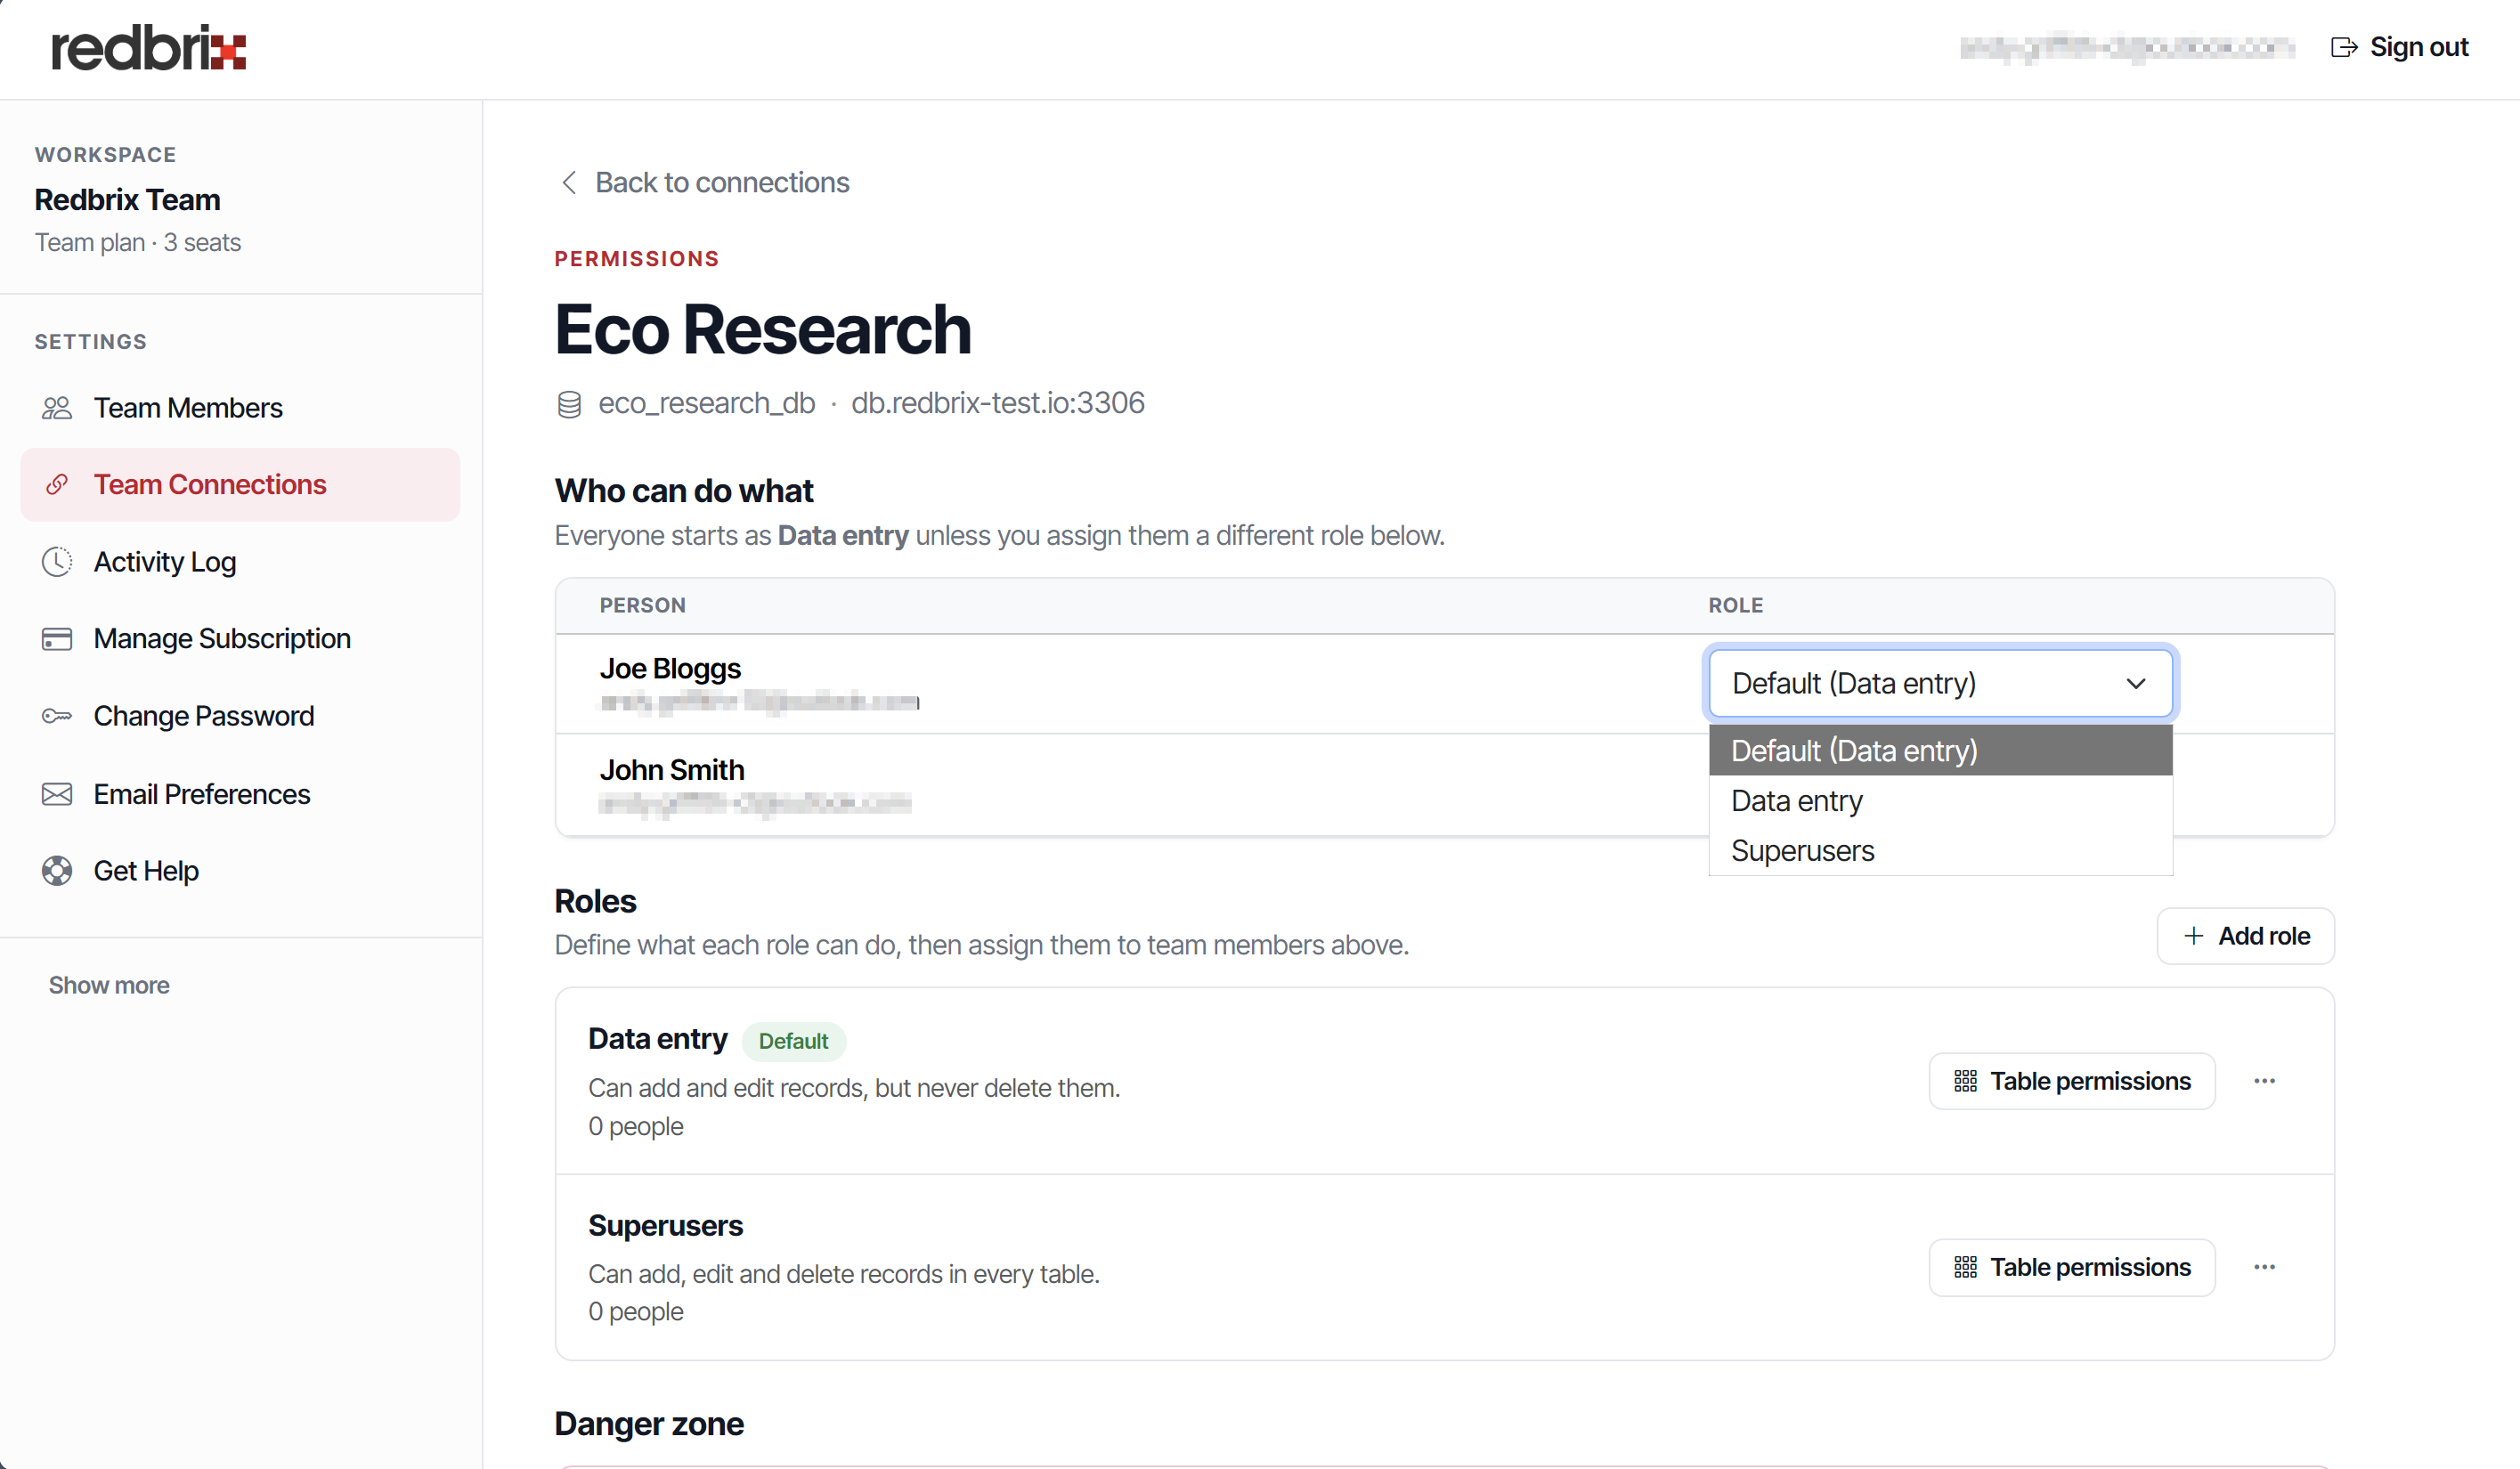
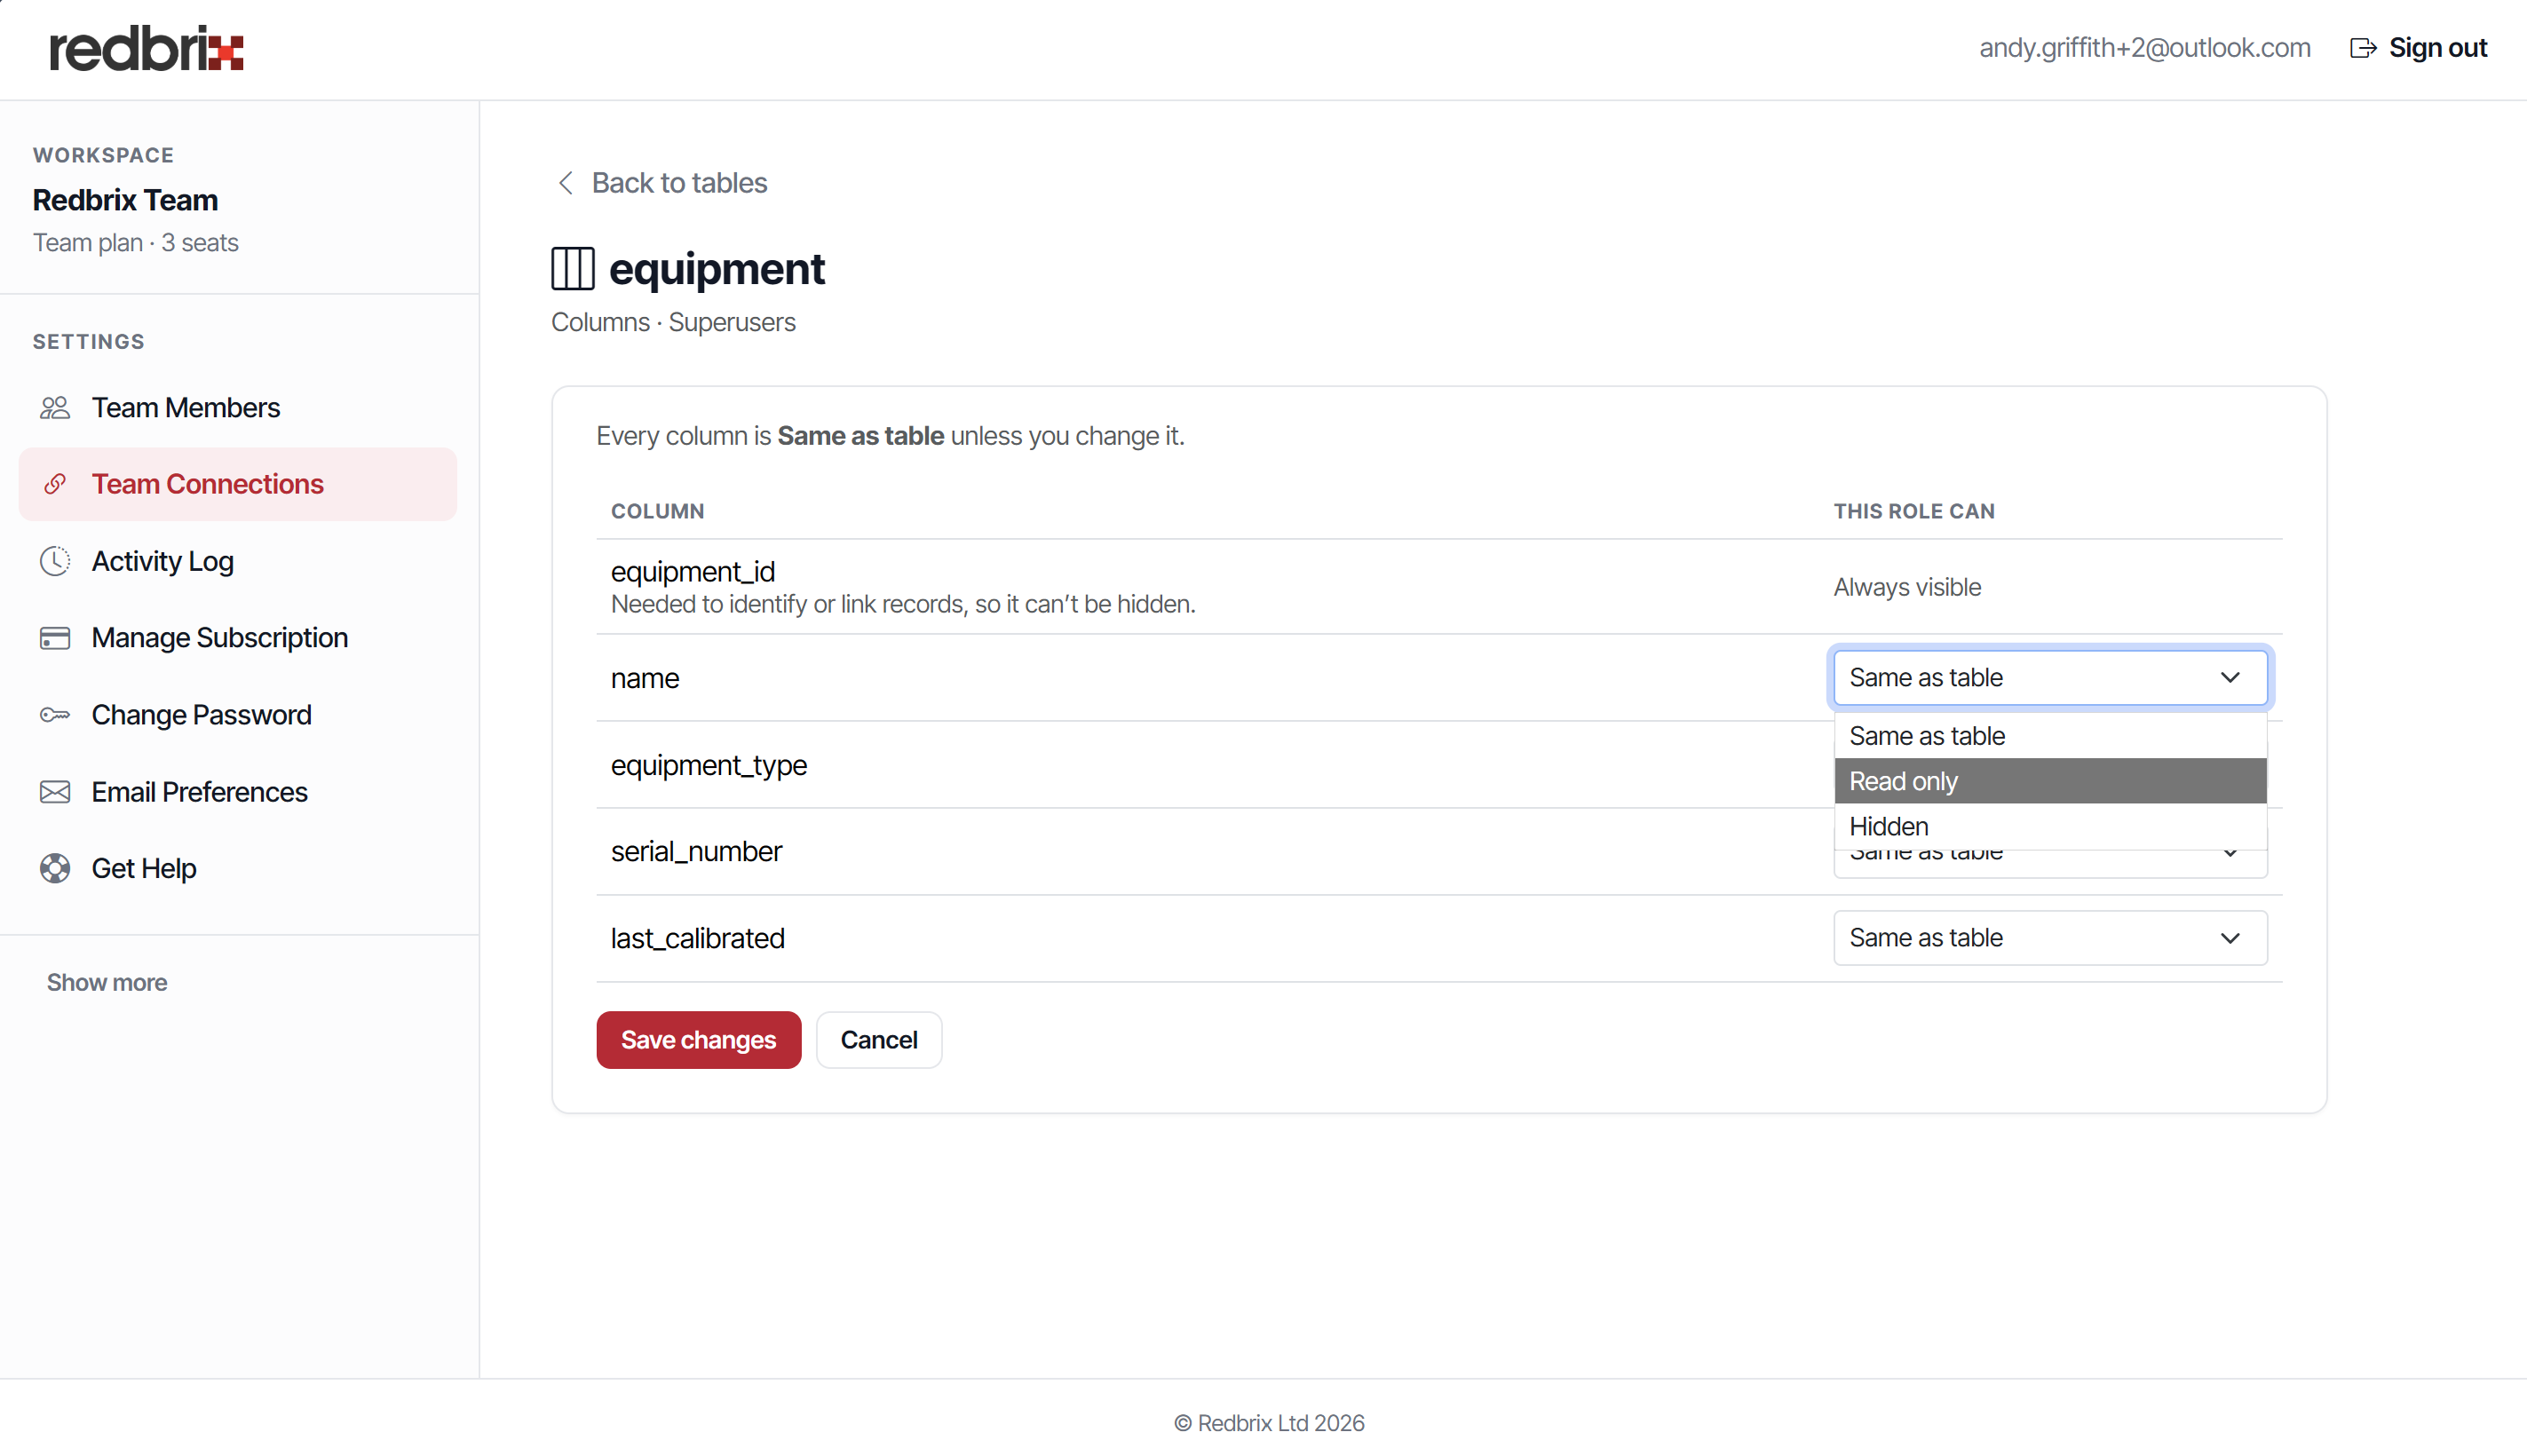
After selecting a role, you can modify its permissions at table and field levels by clicking the Table permissions button alongside each role. This opens up a list of tables in the database for which you can set specific permissions.
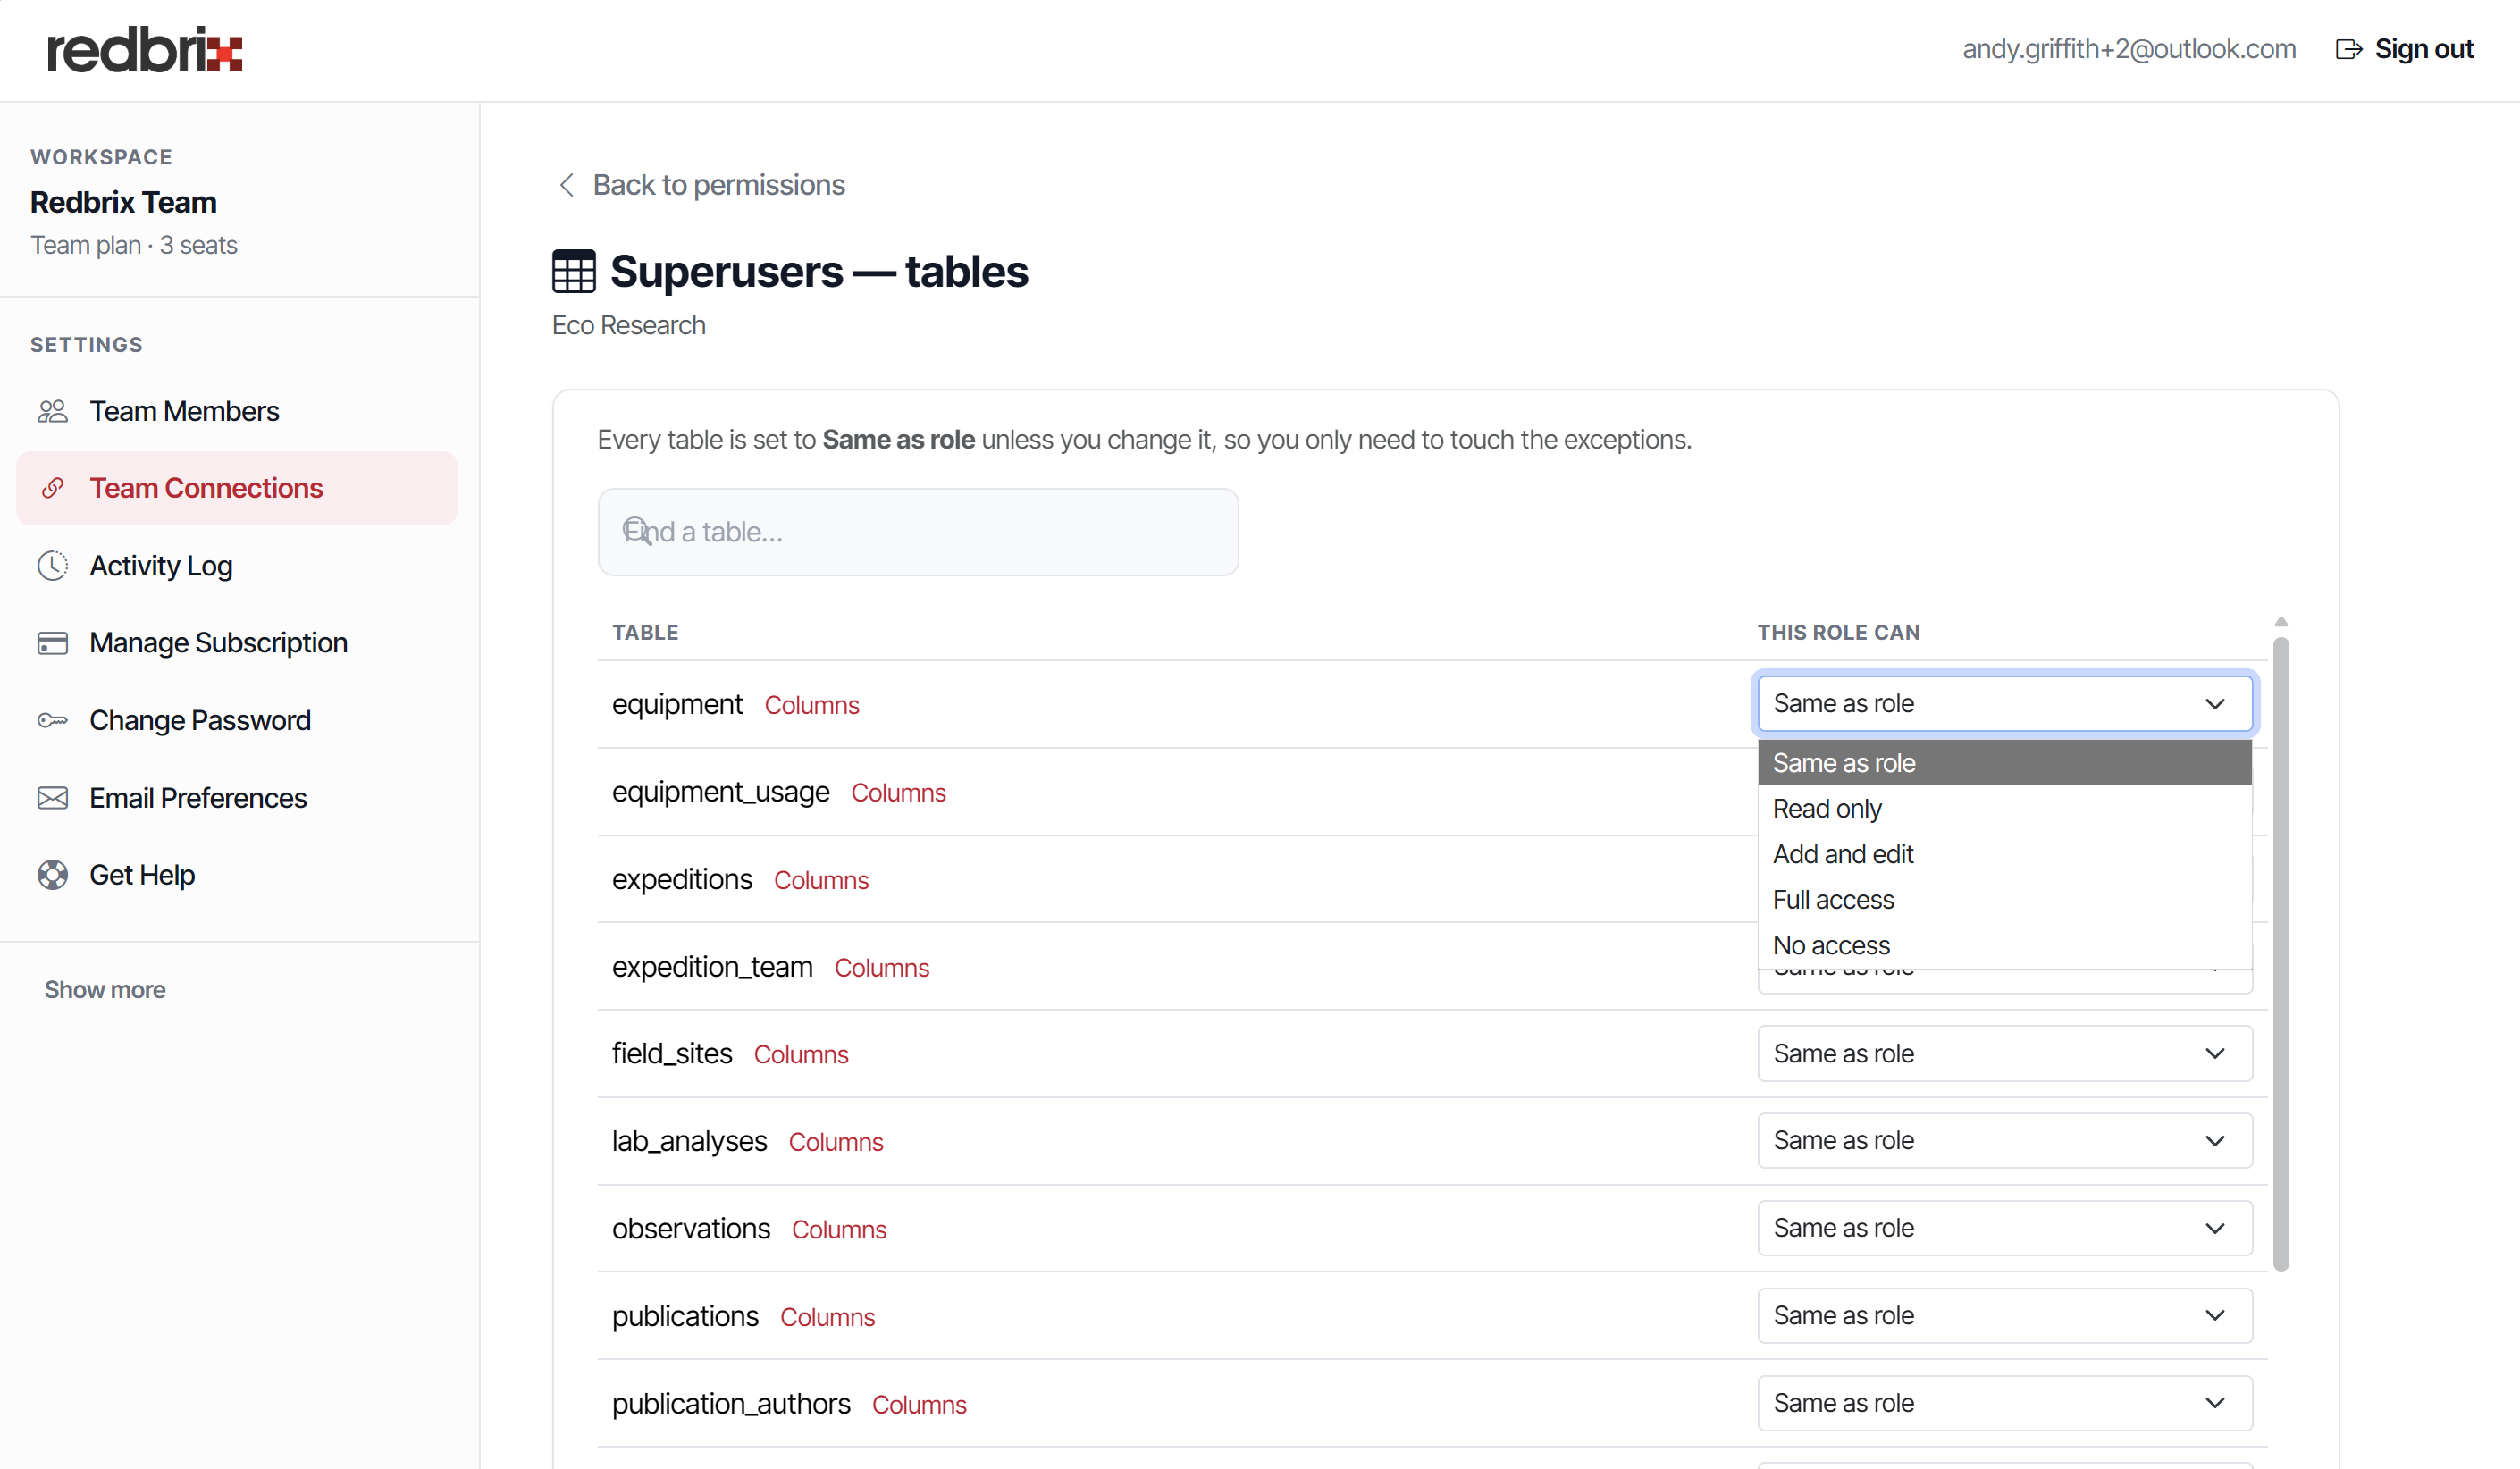
Similarly, you can modify field-level permissions by clicking the Columns link next to each table name. Note that you can only downgrade the field permissions; you cannot grant more access than permitted at the table level.