Once you have connected your database, you can start using Redbrix to manage and interact with your data. The main dashboard provides an overview of your database structure, including tables and their relationships.
You can click on any table to view its contents, add new records, edit existing records, or delete records. Redbrix also offers powerful filtering and sorting capabilities, allowing you to easily find the data you need.
The homepage
When you first connect to a database, you will land on the homepage. The exact layout and content will depend on the database you are connecting to and your permissions with the database. For example, if you are not given the admin role, you will not see the Admin button in the header bar.
On the left-hand side of the screen you will see the navigation panel, which comprises information relating to your current connection, a home button to return to this homepage and a section listing all the tables available to view in your database.
Note: If there are more than 12 tables available to view, the tables will be in a collapsible section labelled "All". To view the tables, simply open the "All" section. If there are more than 50 tables available, they will be grouped by function -- for example, all user-related tables might be grouped together under the heading "Users". Again, just open the section to see the tables inside.
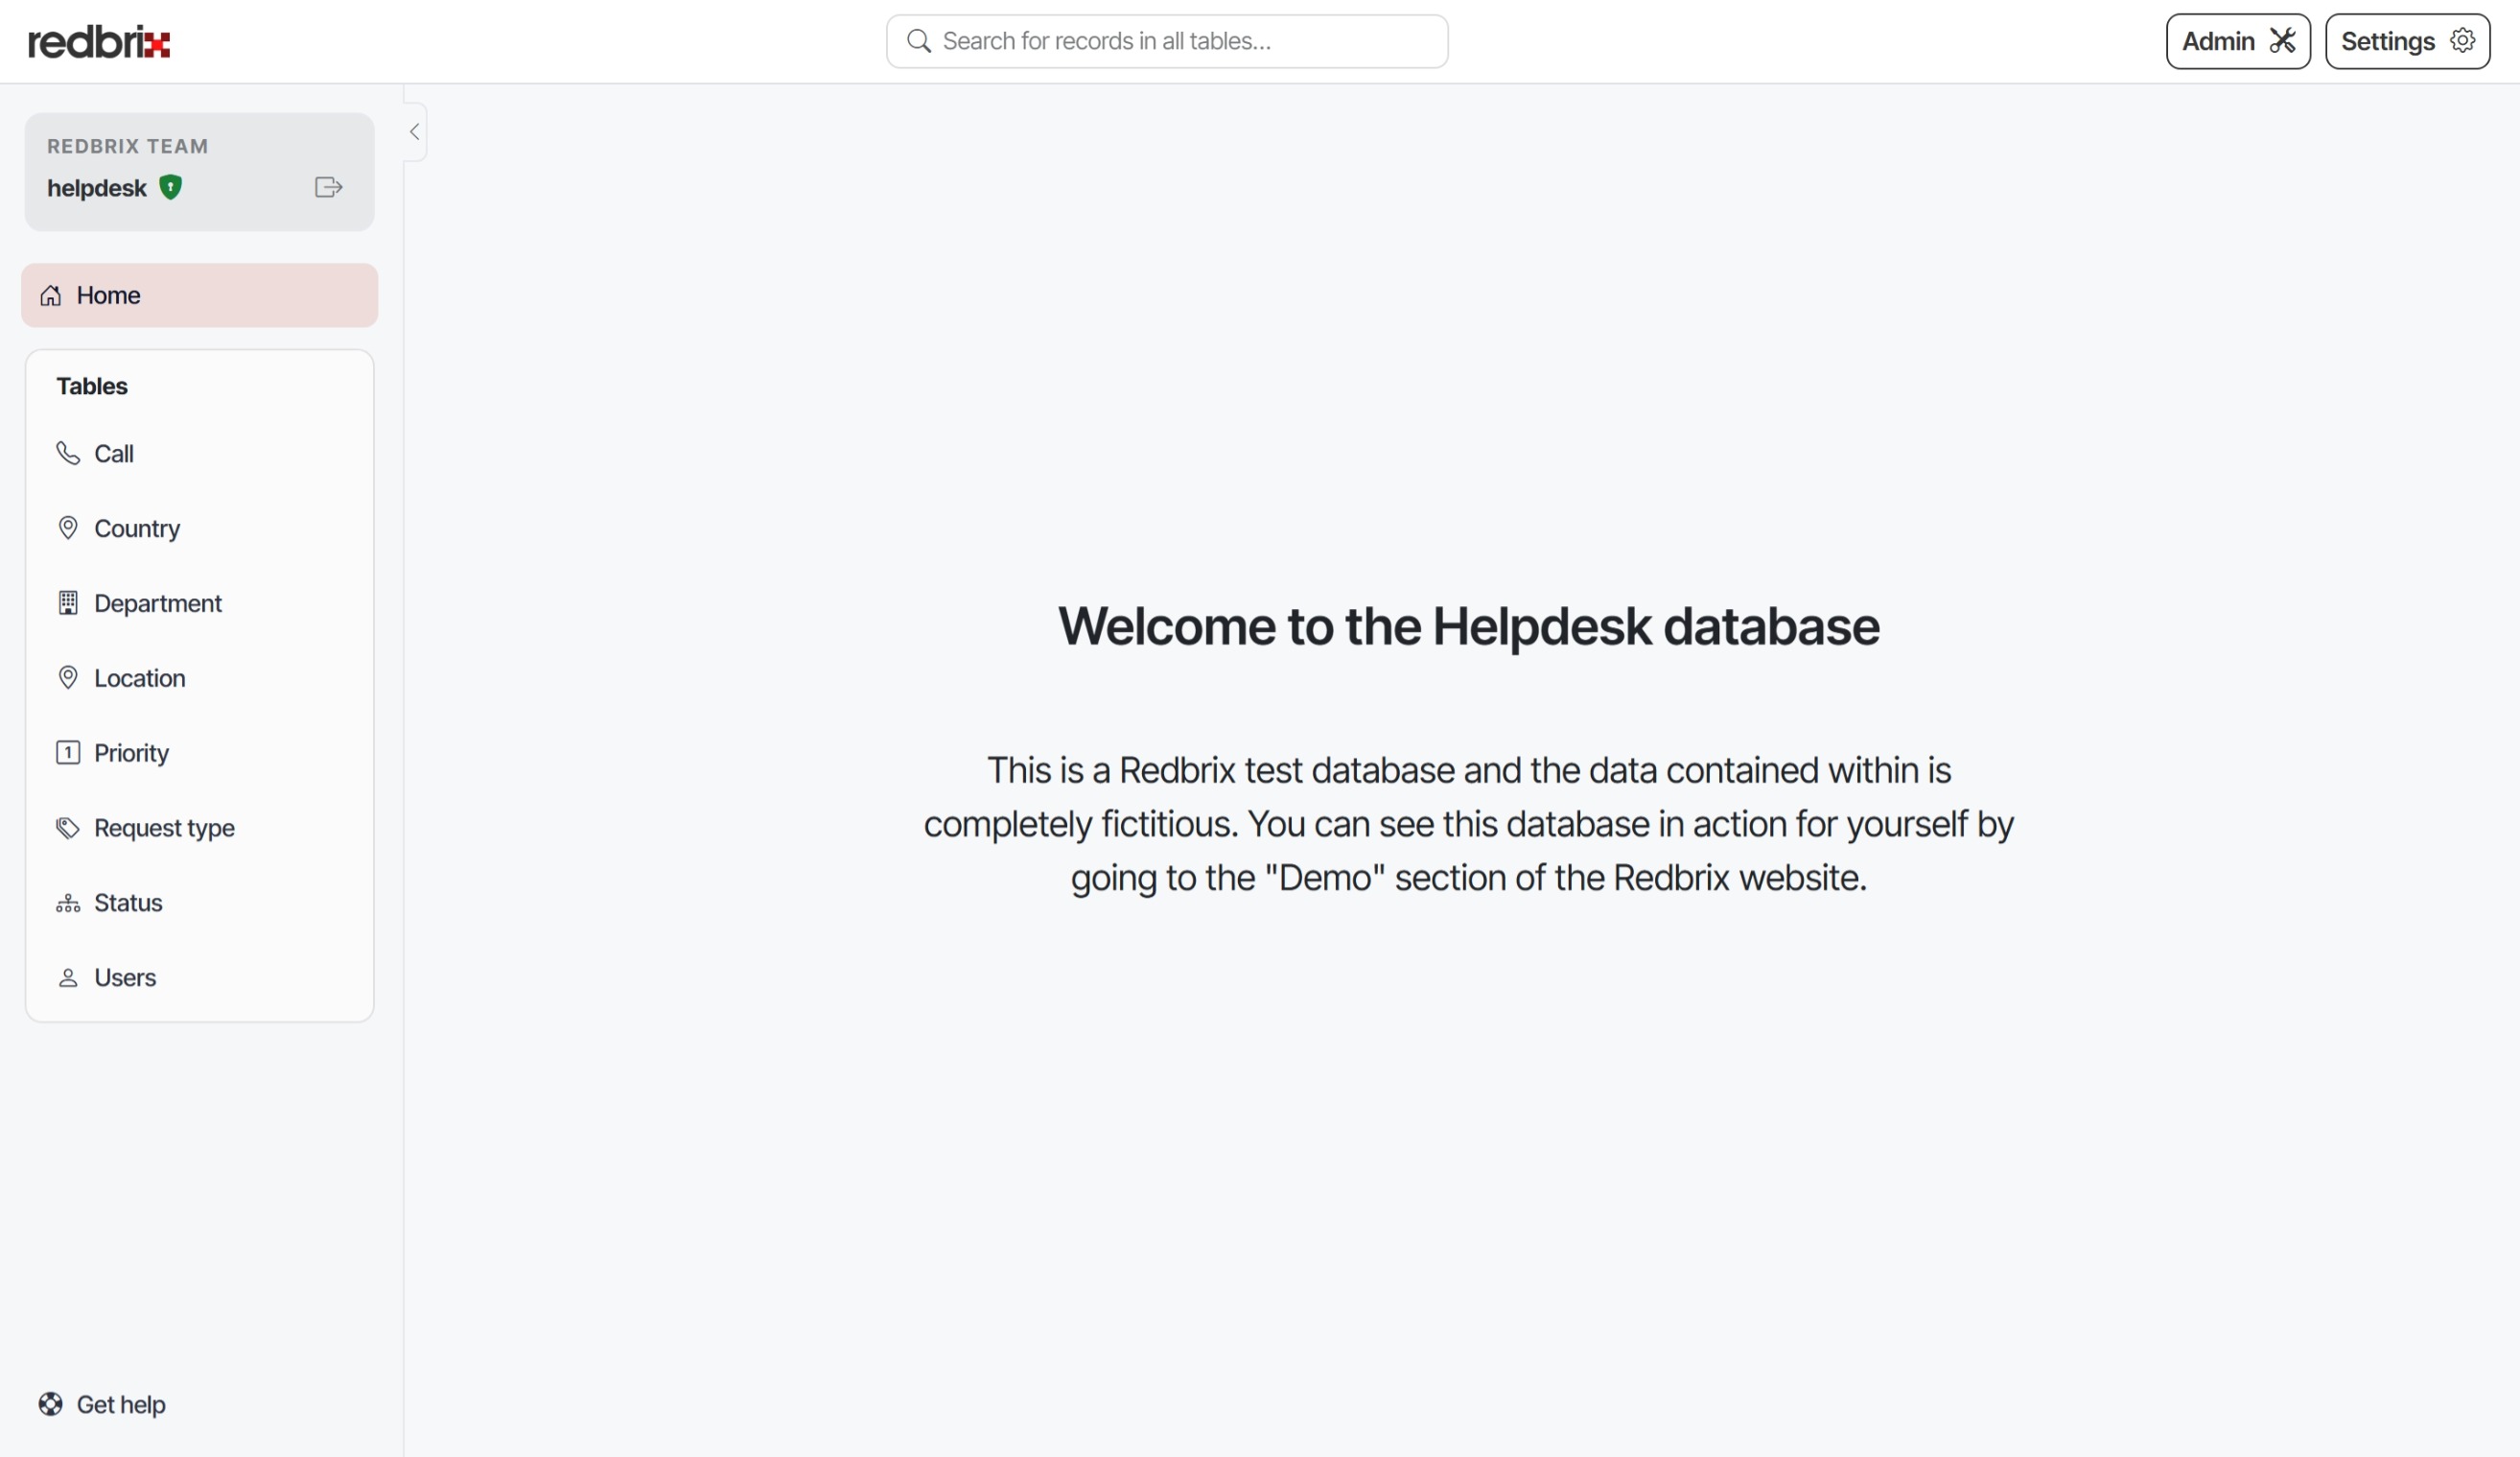
Viewing tables
Clicking on one of these entries will display the contents of that table:
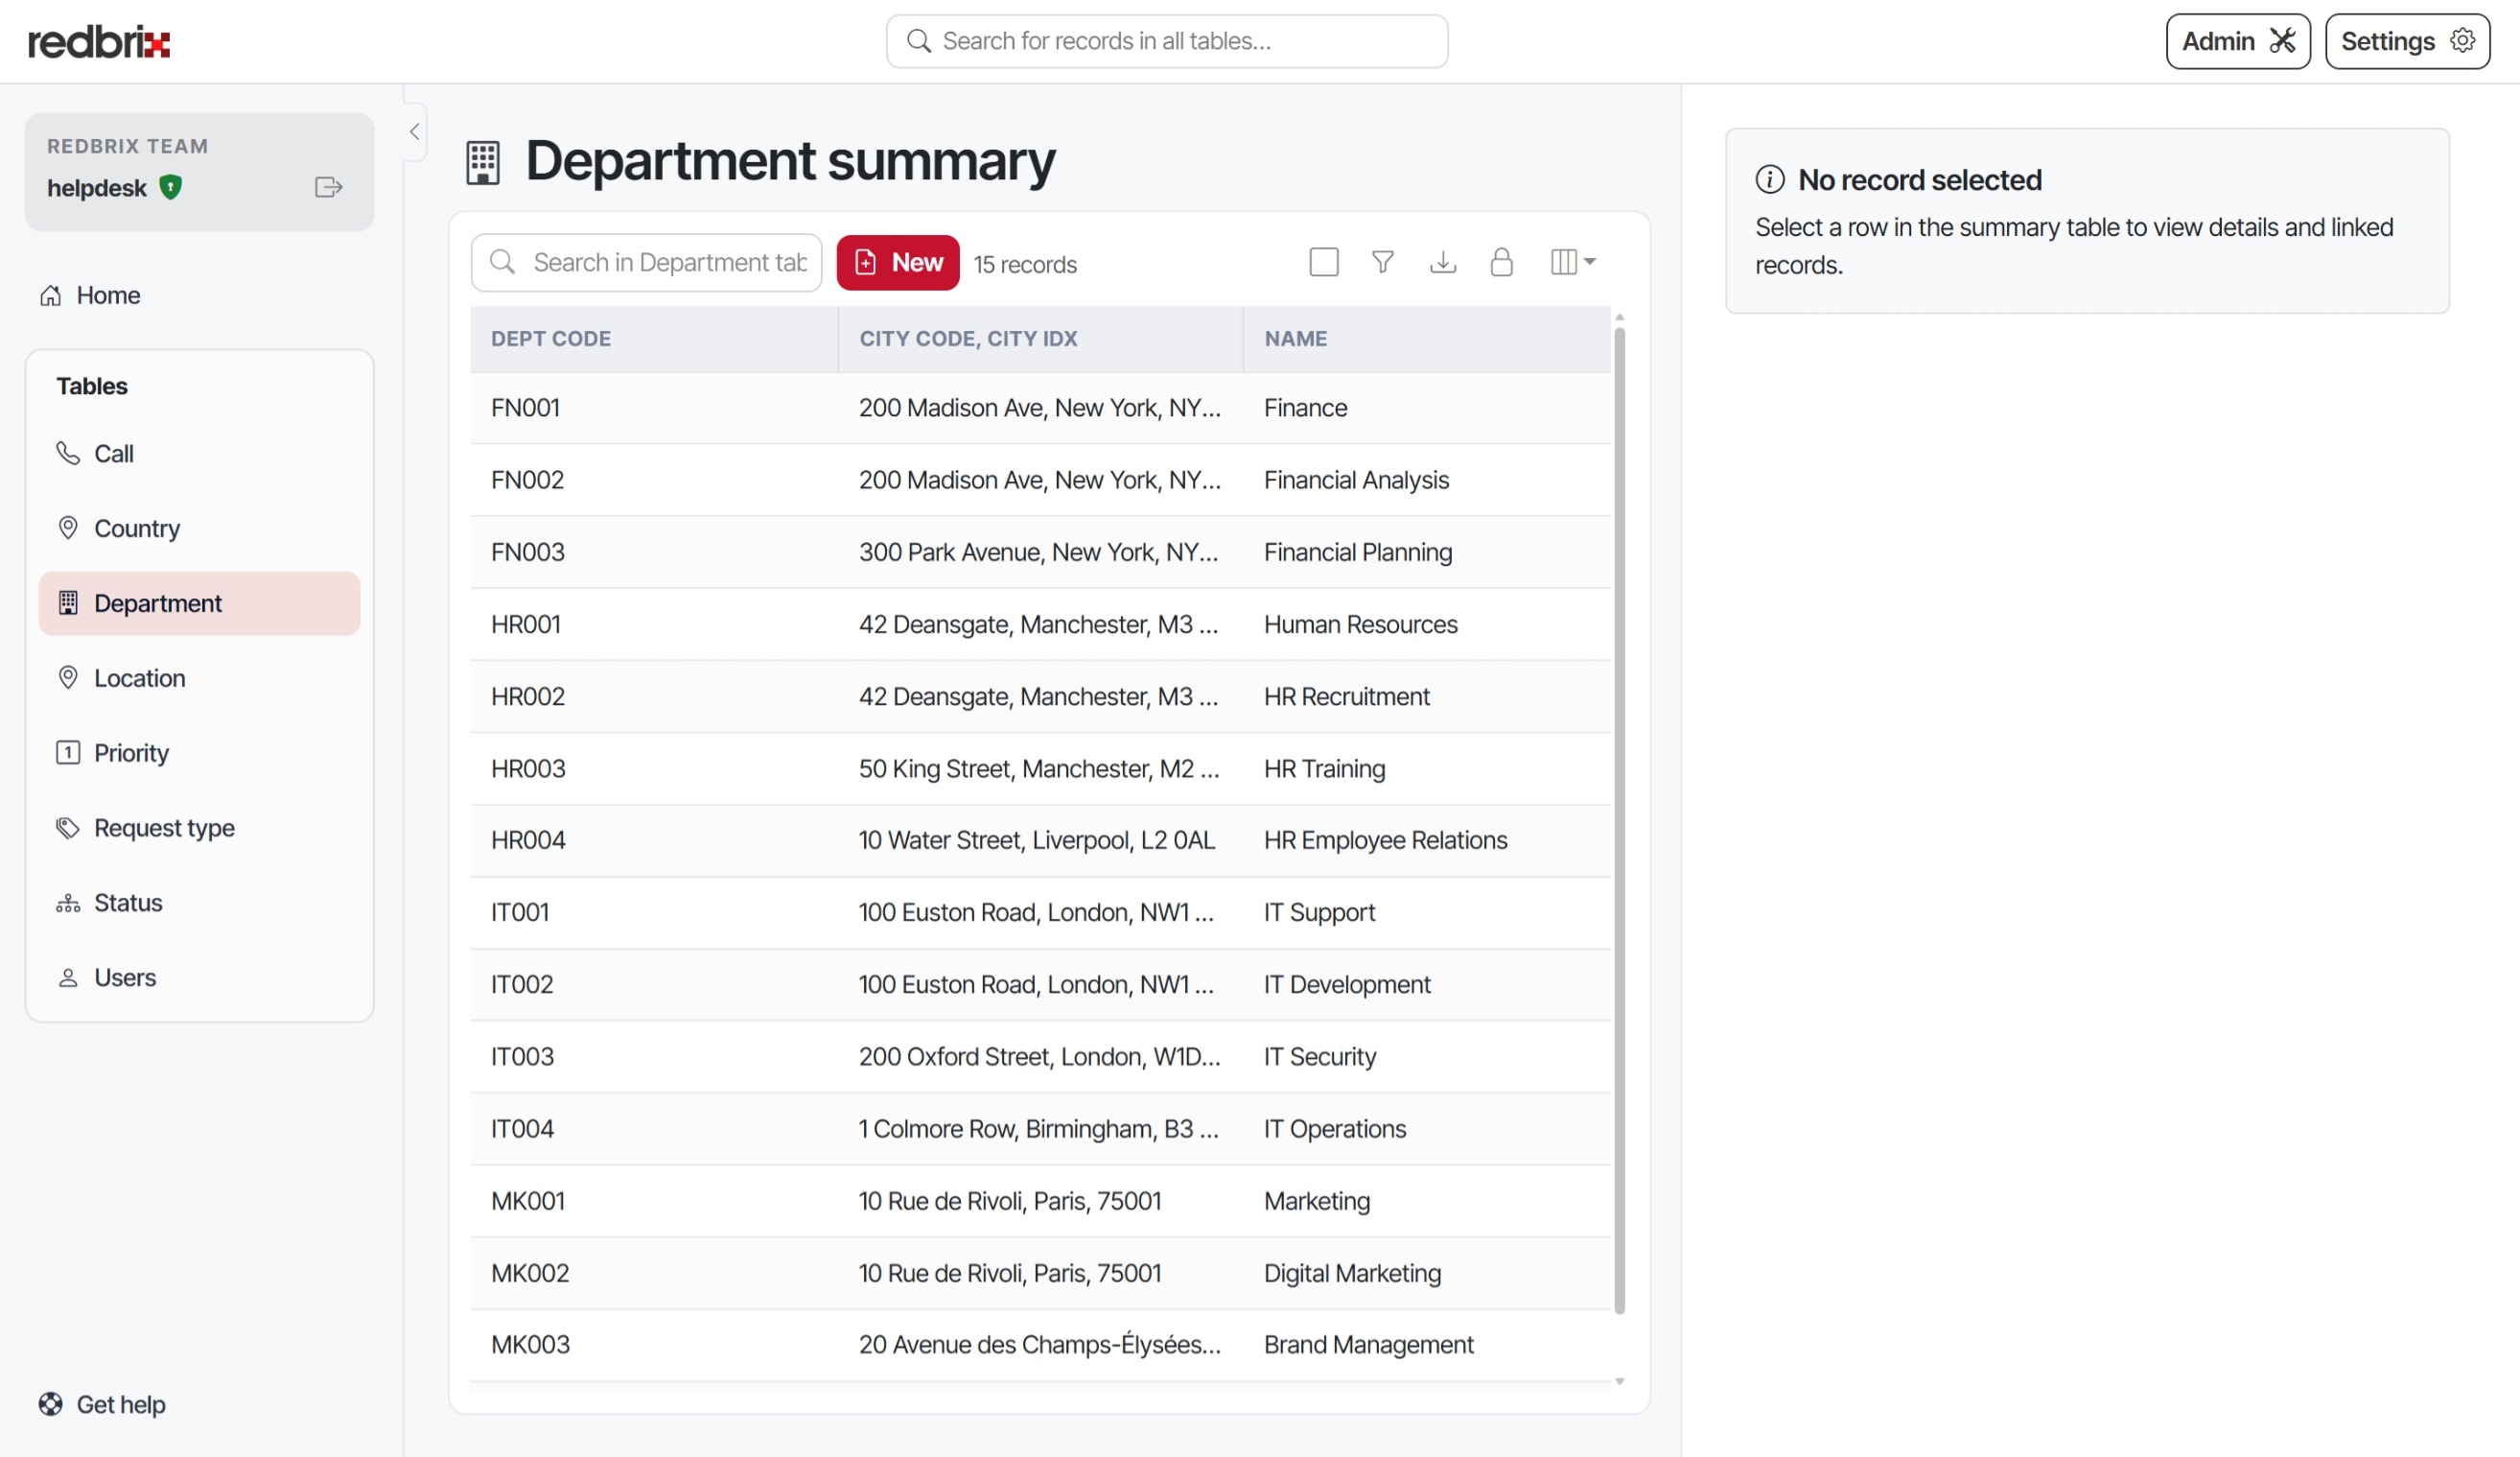
The first time you open a table for viewing, the right hand panel is empty (as shown above). If you click on a row, however, the right hand panel will display the details of the selected record.
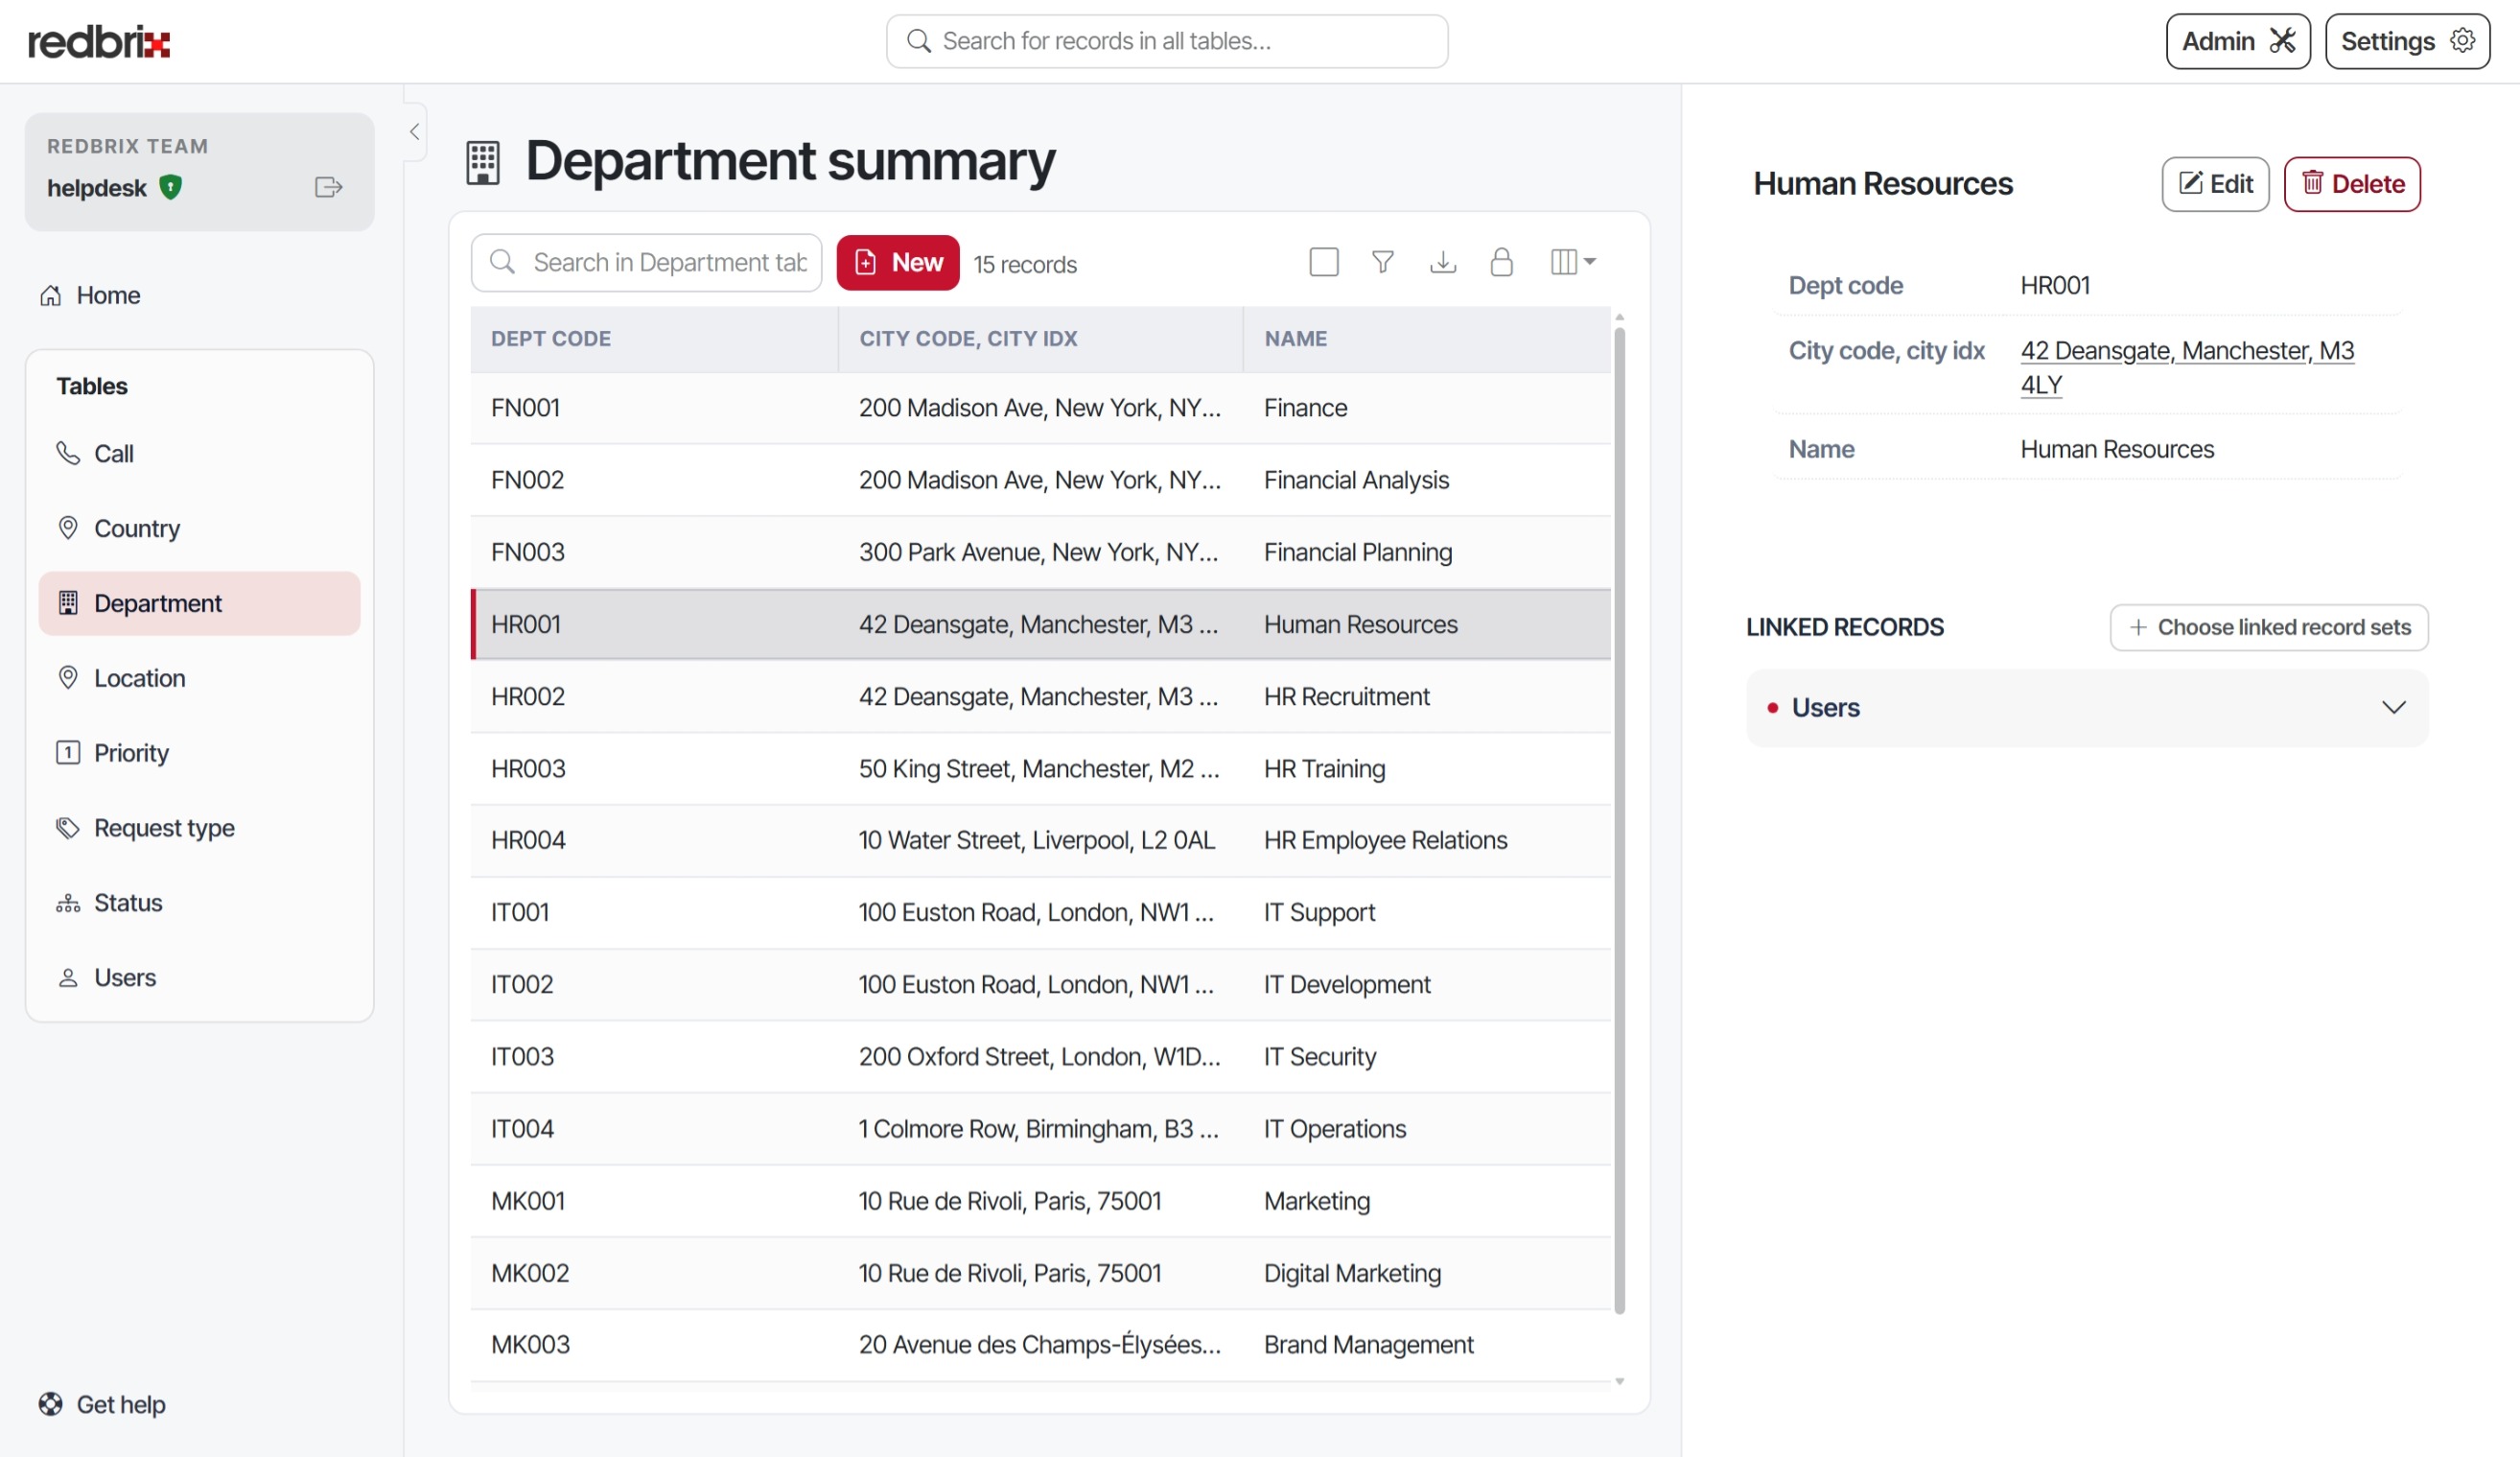
Depending on the structure of your database, the record may have linked records that reference the selected one. If this is the case, you will see a section below the selected record details, entitled "Linked Records". This contains one or more record sets that you can open by clicking the arrow on the right-hand side of the card:
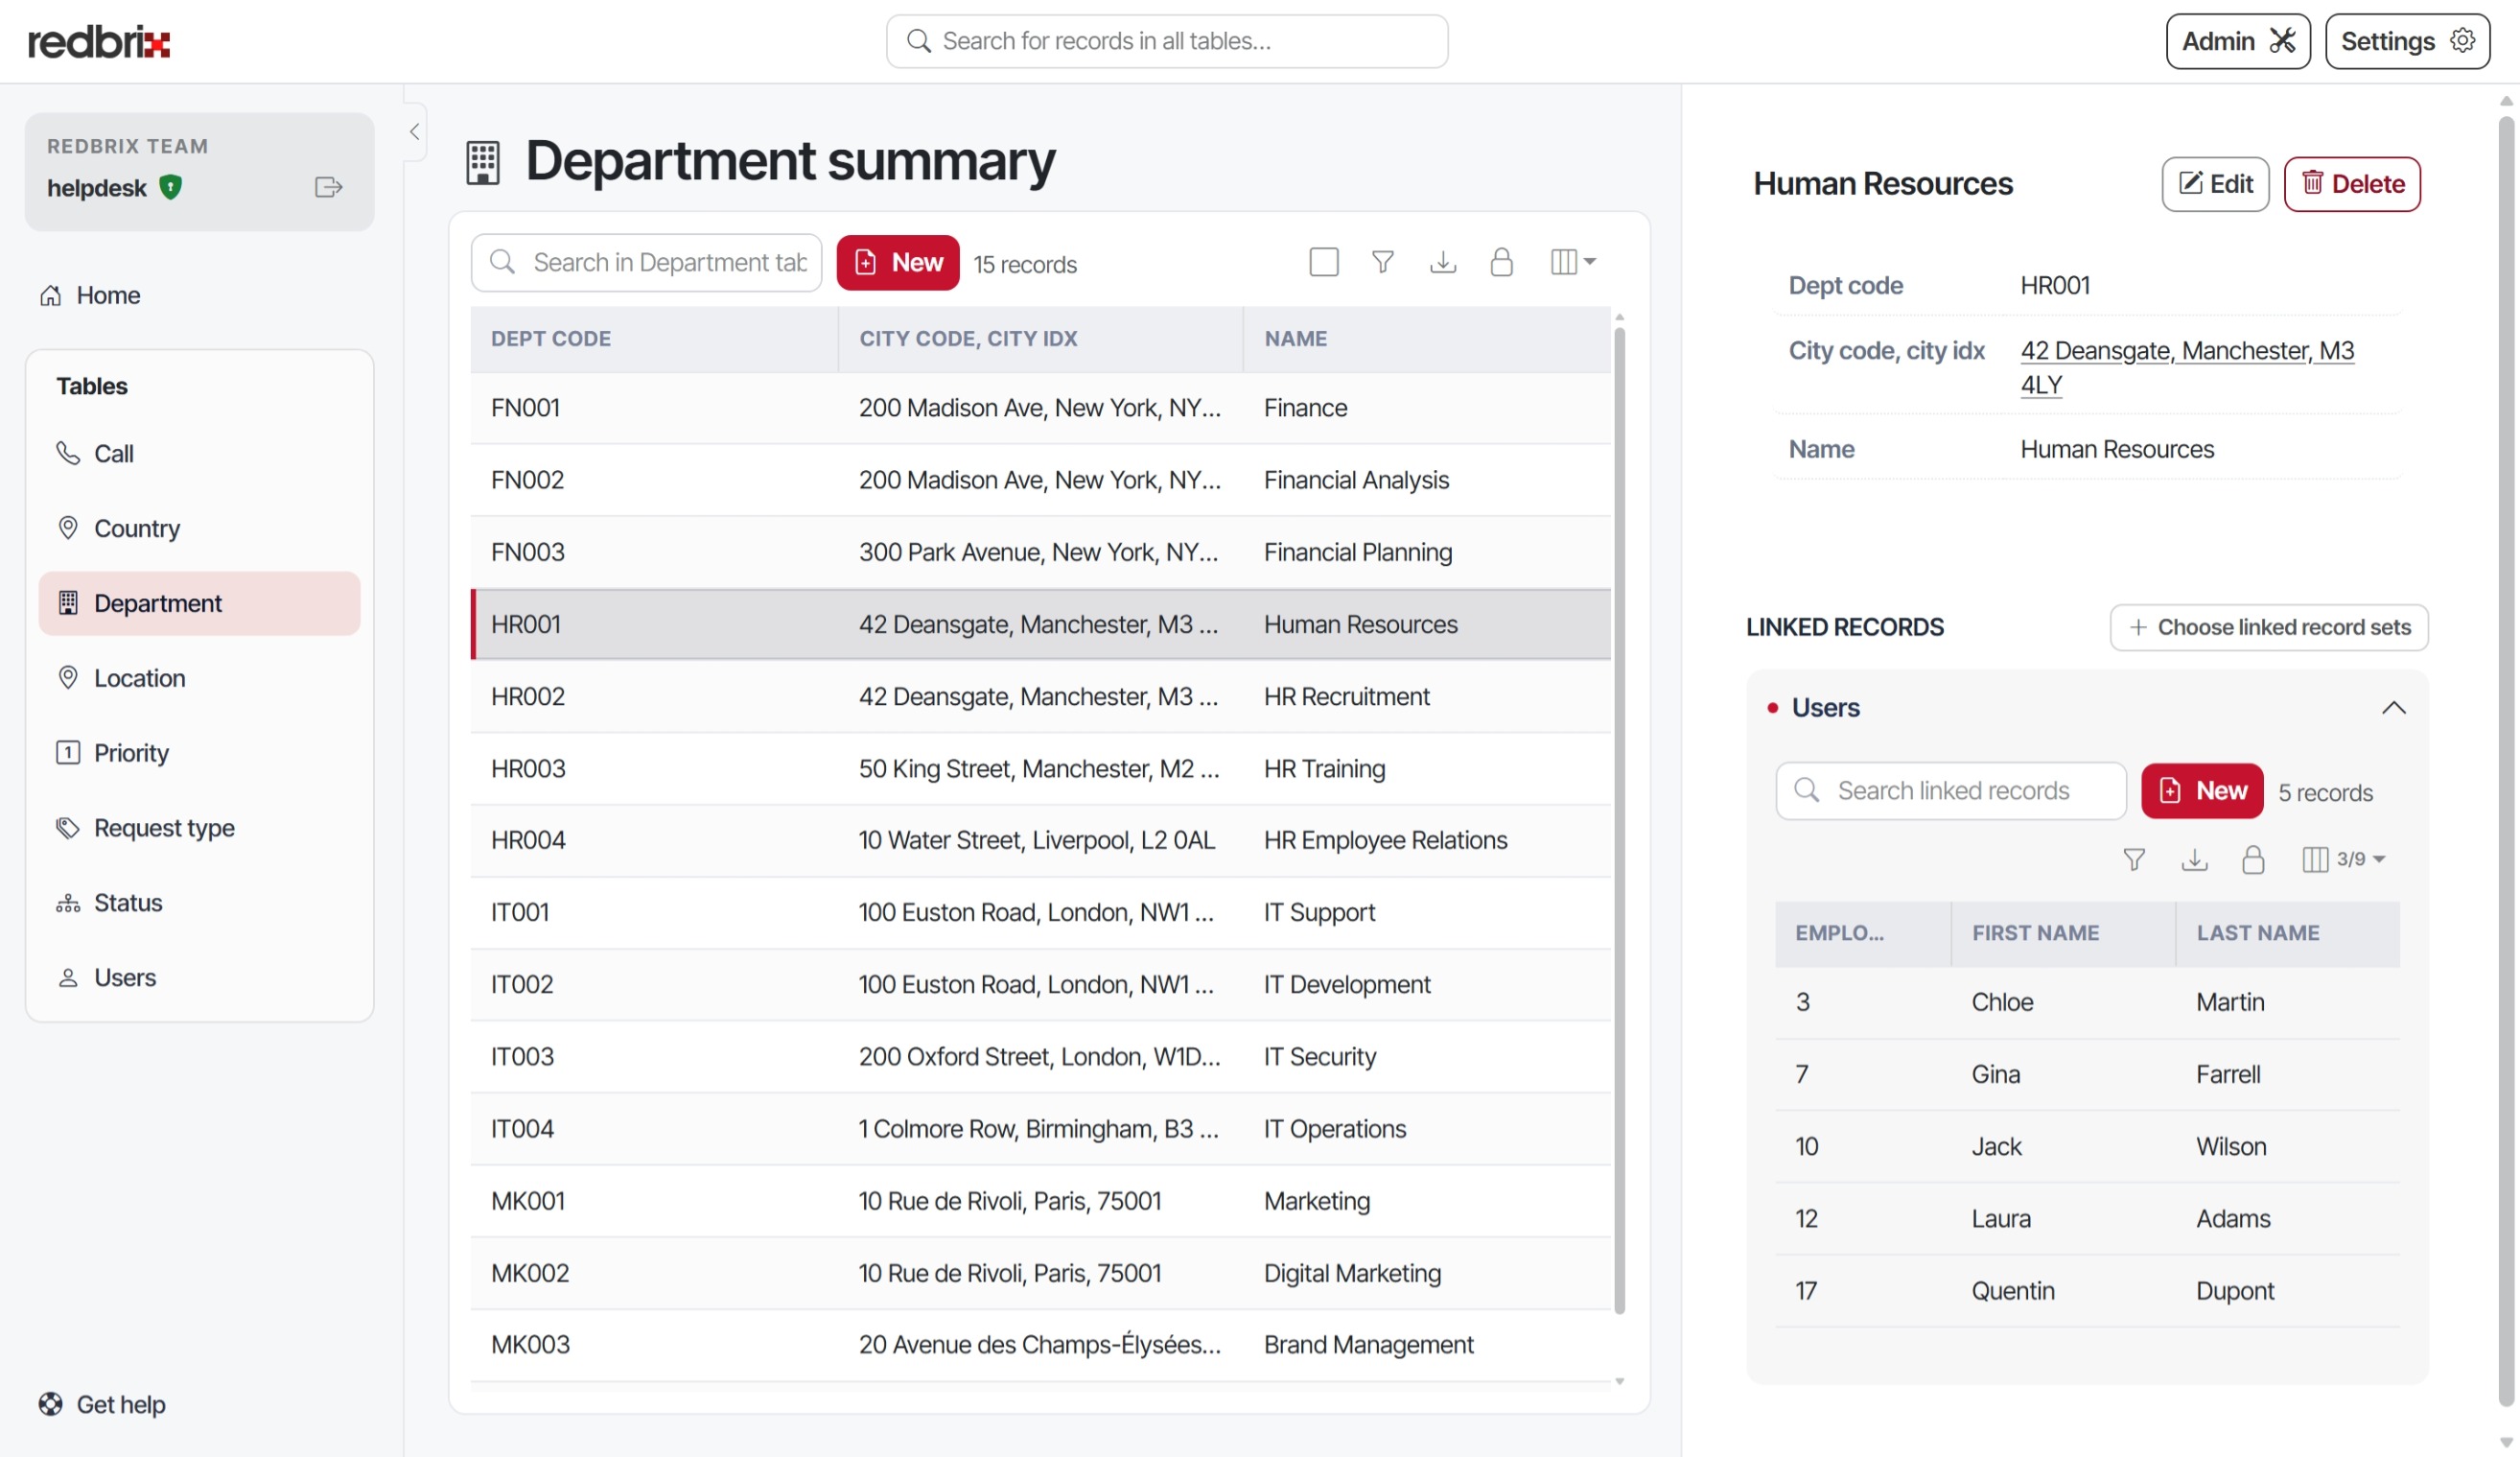
Toolbar icons
Both the summary table and each linked record set carry the same toolbar above them, and the same cluster of icon controls at its right-hand edge. They appear in the order below. The linked records toolbar omits the first of them, because a linked set has no tick column.

- Select rows. When this is enabled, a column of checkboxes is displayed to the left of the summary rows, allowing you to select records to export to CSV (see below). Note that the tick column only applies to the current page of rows. The number of selected records is displayed in a counter next to the icon.
- Filters. This allows you to define filters to apply to the current record set. The type of filter available will depend on the column data type and it is possible to set more than one condition per column, and filter by more than one column at a time. When active, this icon is displayed filled in, with a count indicating the number of active filters.
- Export to CSV. This allows you to export the current record set to a CSV file. You can choose to export
- Selected rows: Exports only the records selected after enabling the tick column.
- This page: All the rows visible on the current page.
- Everything matching the current filter: Exactly what it says. Note: this will be all records in the table if no filters are set.
- Edit lock. If an administrator has enabled this feature via the "global admin" page, this displays a padlock icon indicating whether the table is currently locked for editing. If unlocked, users may edit the table's cells in place.
- Choose columns This icon allows you to choose the columns currently displayed for this table. If not all columns are visible, it will also show a count indicating the total number of columns, e.g. "4/9" if four columns are currently showing out of nine available.
Creating and editing records
This section explains how to create new records and edit existing ones within the table.
Creating records
You can add new records by clicking the "New" button in the toolbar above the summary table. Clicking this will generate a form where you can input the details for the new record.
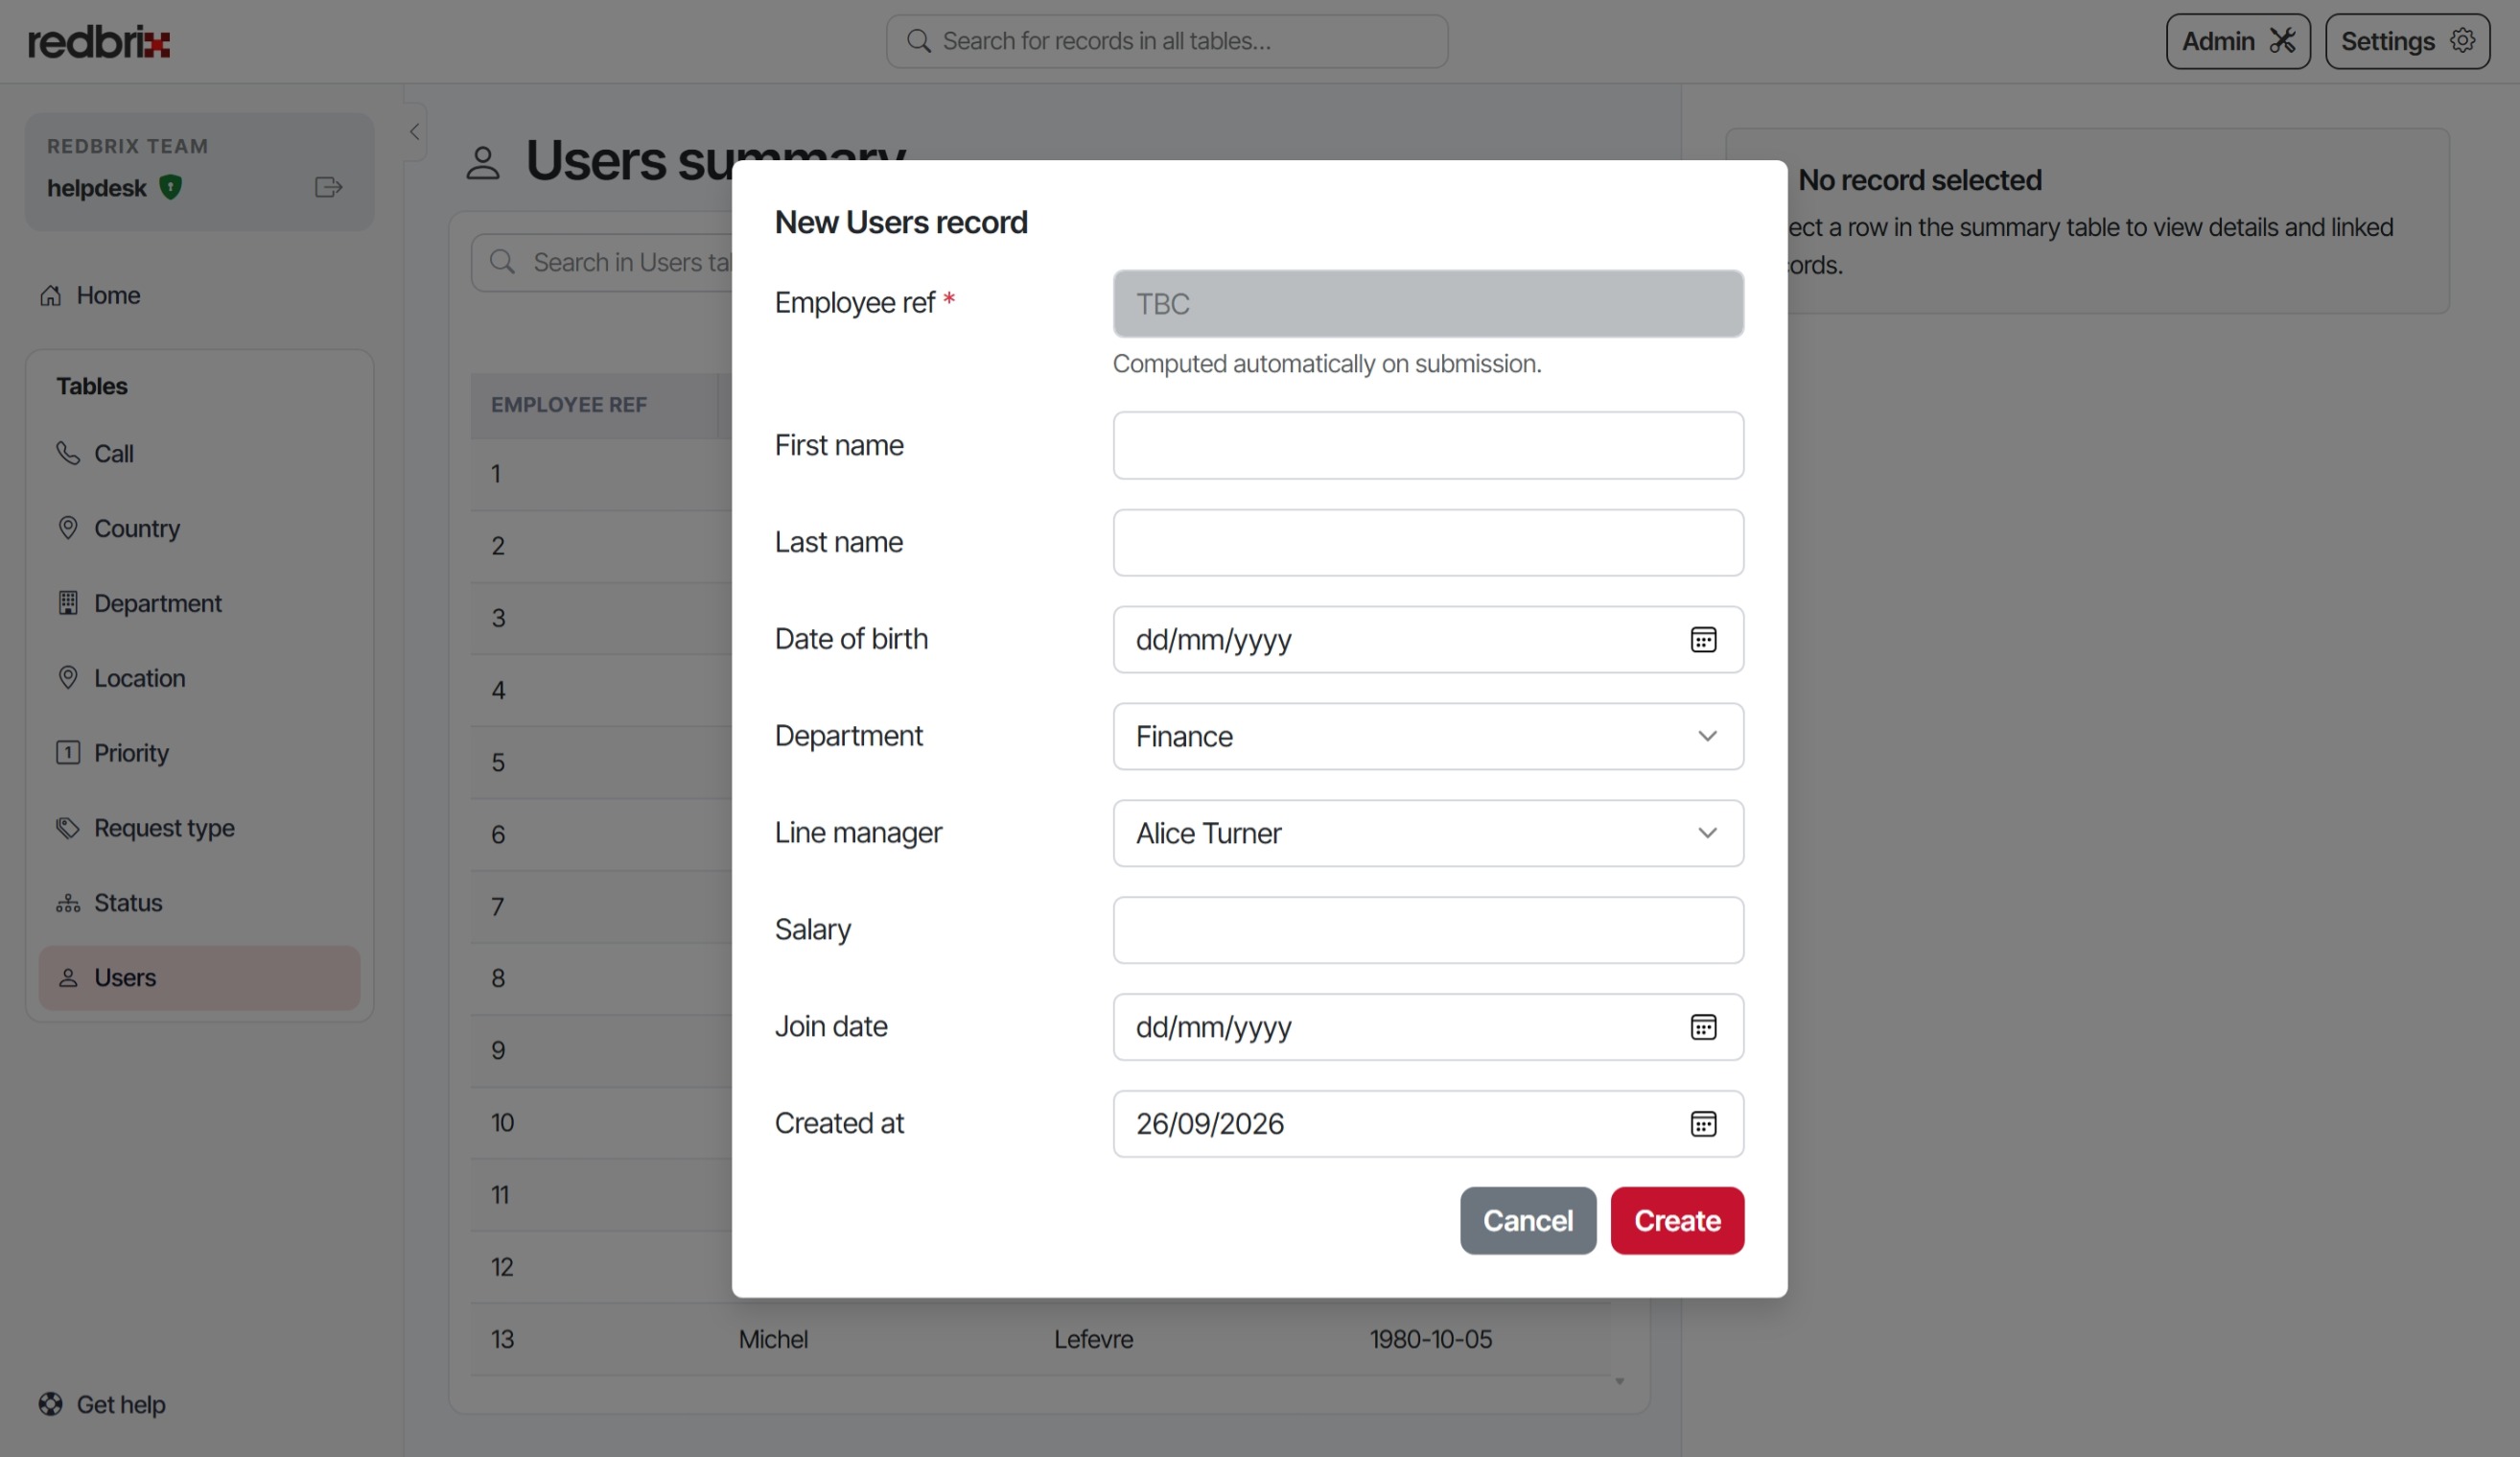
Note that each field in the form corresponds to a column in the summary table. All fields that are defined as not accepting null values in the database are deemed required and are displayed with an asterisk denoting them as such.
Editing records
To edit an existing record, click on the record in the summary table. This will open a form pre-filled with the current details of the record.
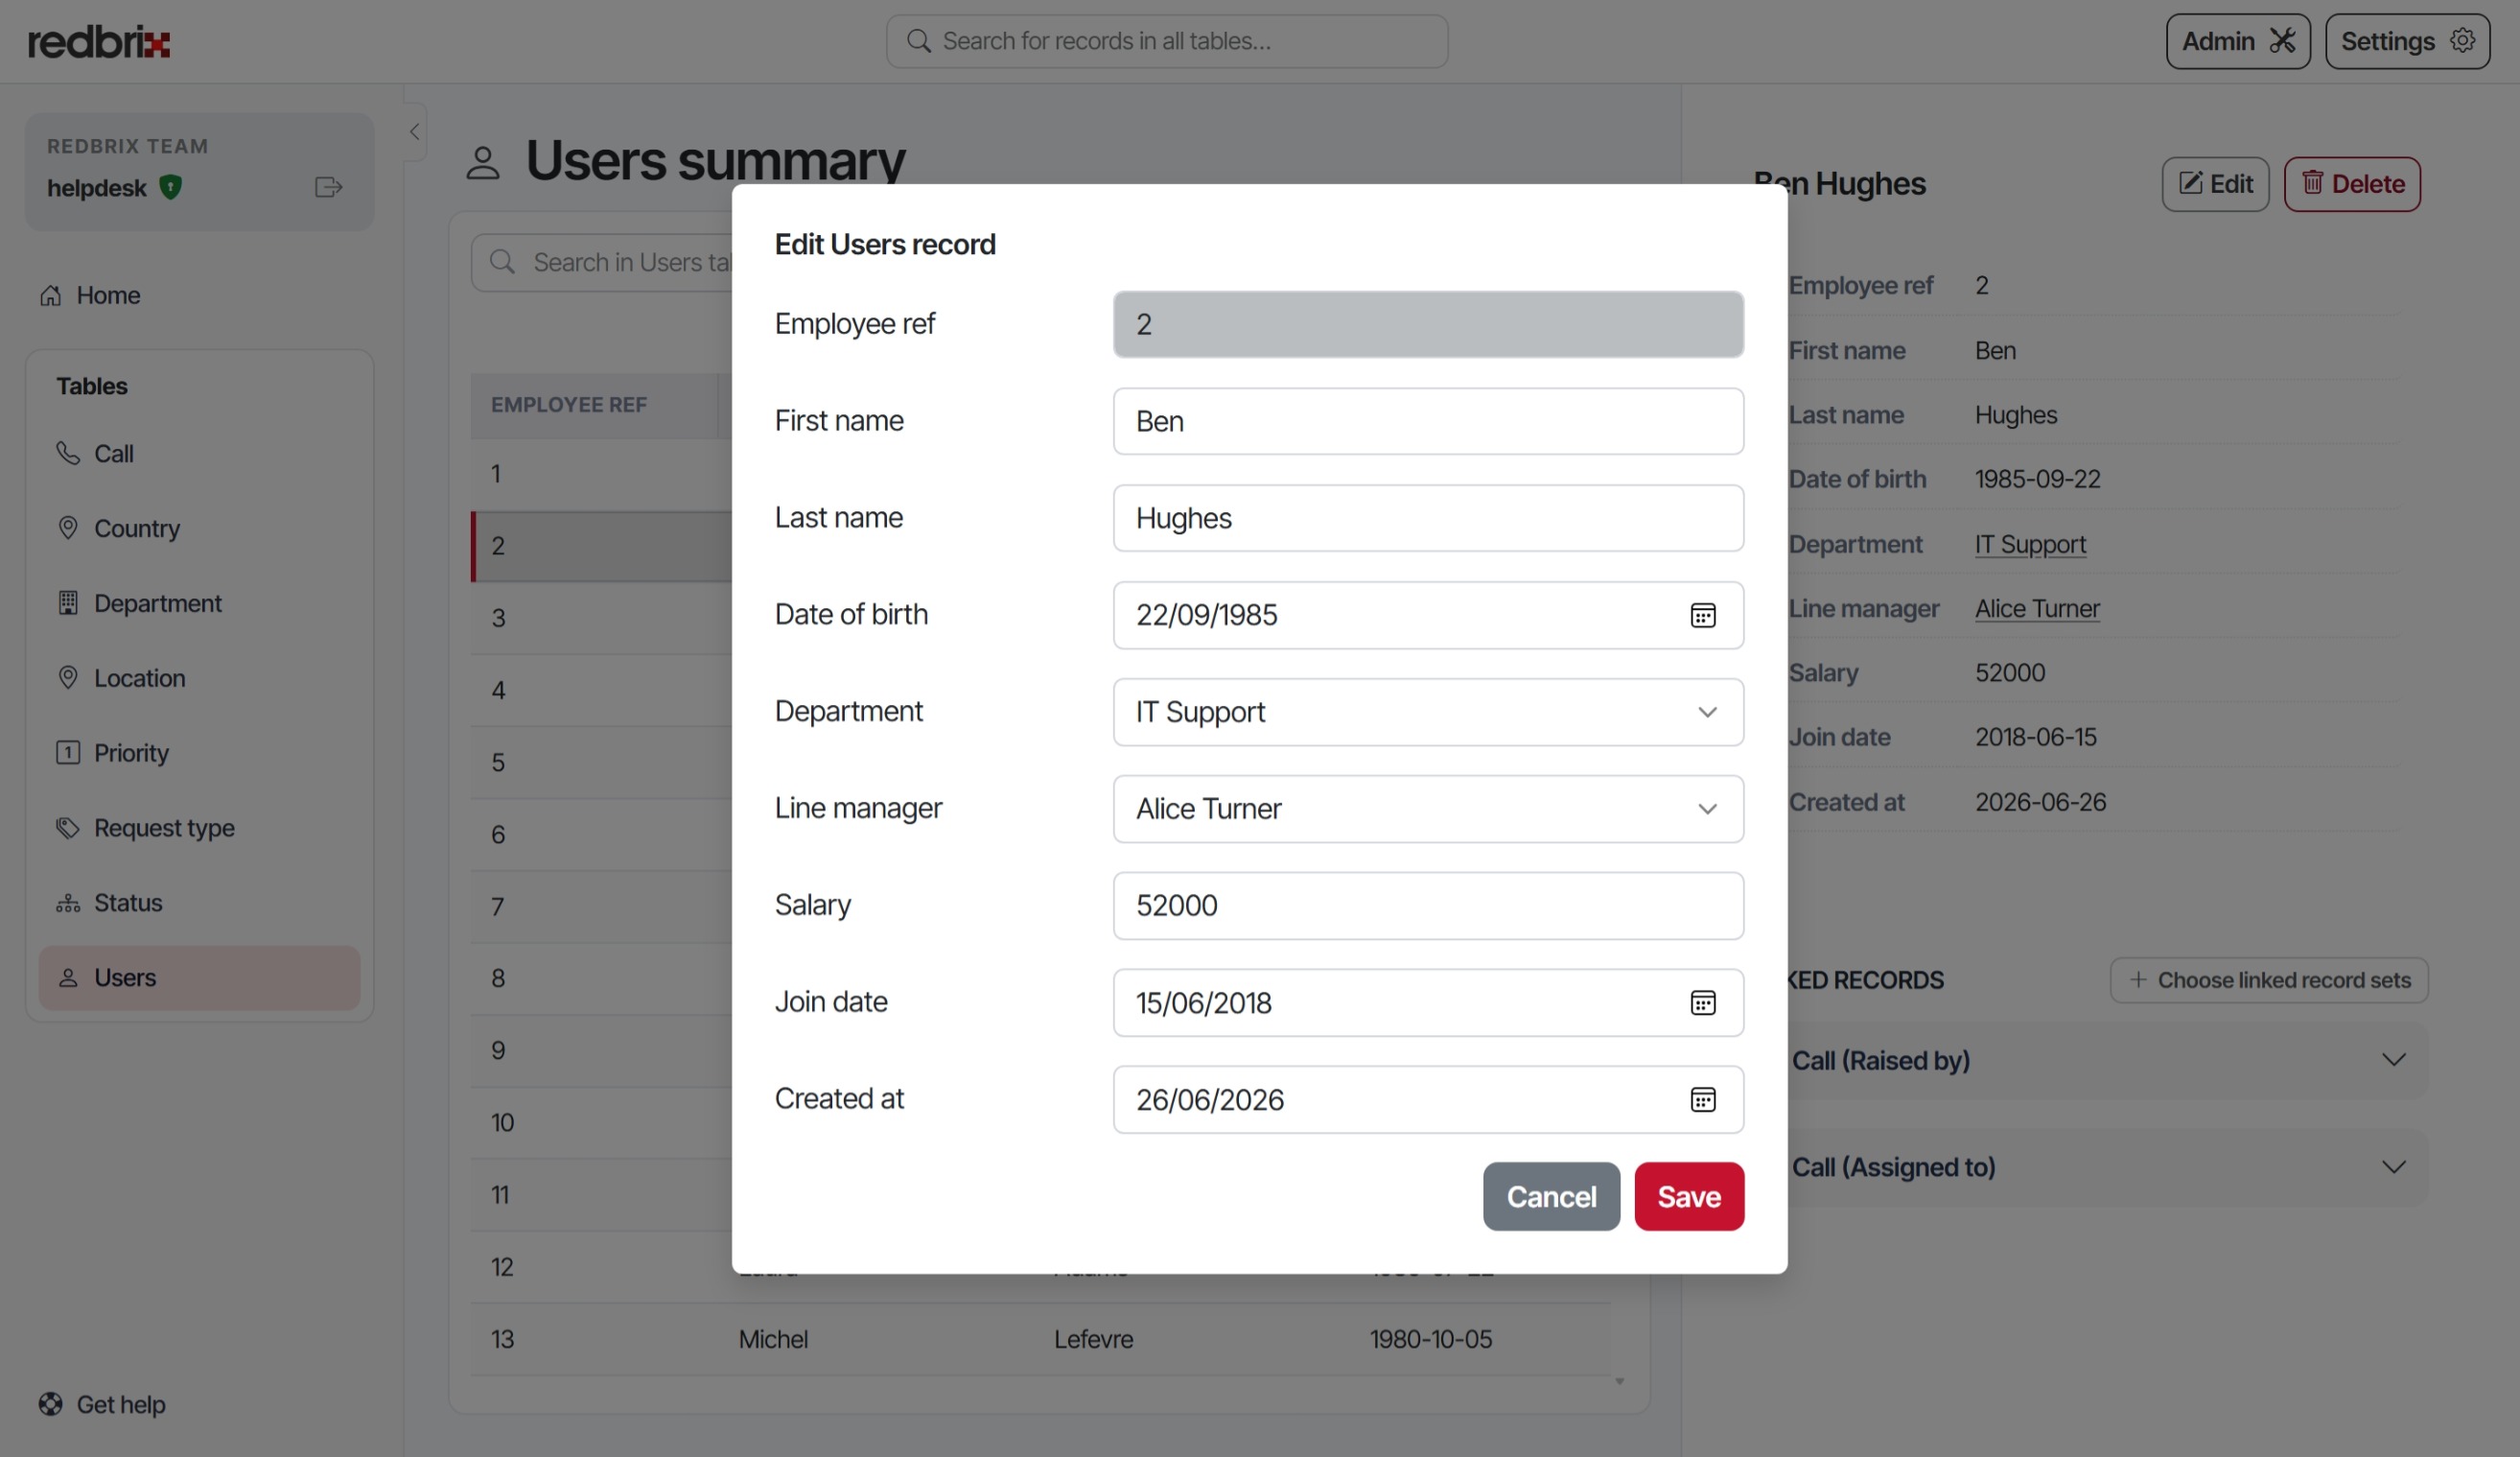
After making the necessary changes, click Save. The summary table will then be updated to reflect the changes.
Deleting records
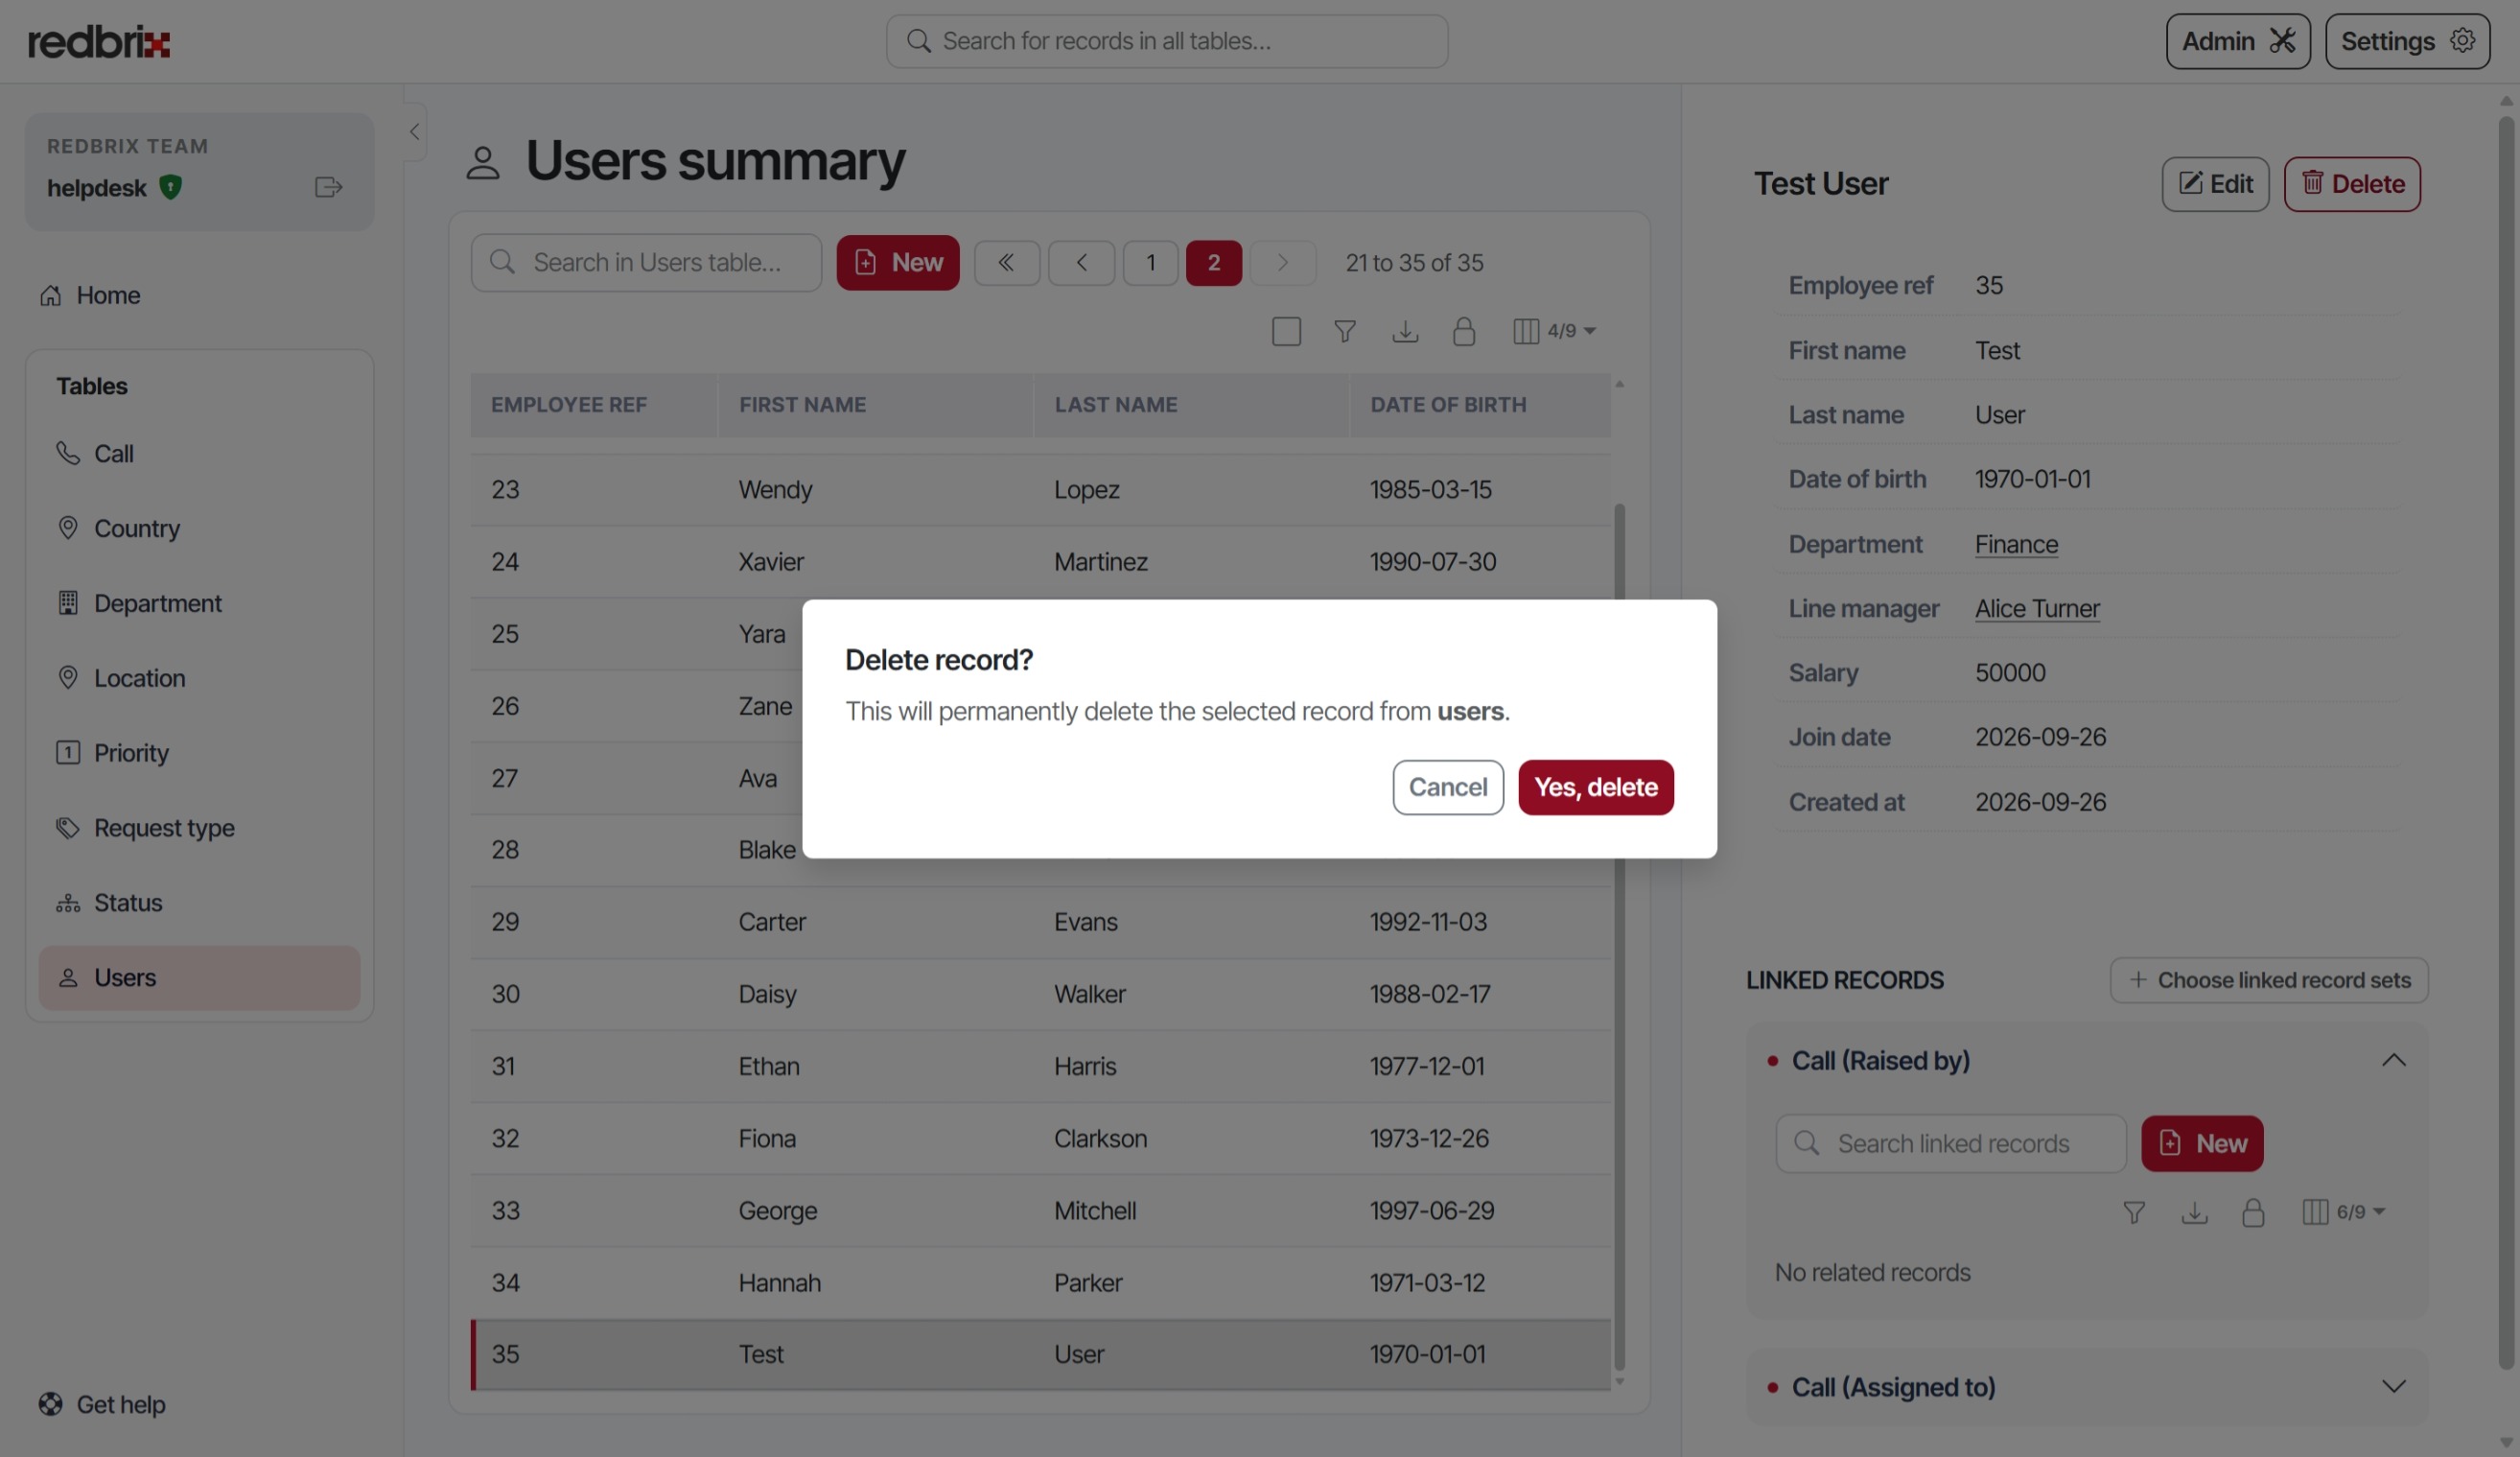
Only users with the appropriate permissions can delete records. This means either being logged into the database as a user with the DELETE permission (Free and Pro tiers) or belonging to a role with record deletion permissions. Either way, deleting a record is irreversible; make sure you really want to delete the record before confirming.
To delete a record, select the record in the summary table and click the Delete button. You will be prompted to confirm the deletion. Once confirmed, the record will be removed from the table.
Using filters
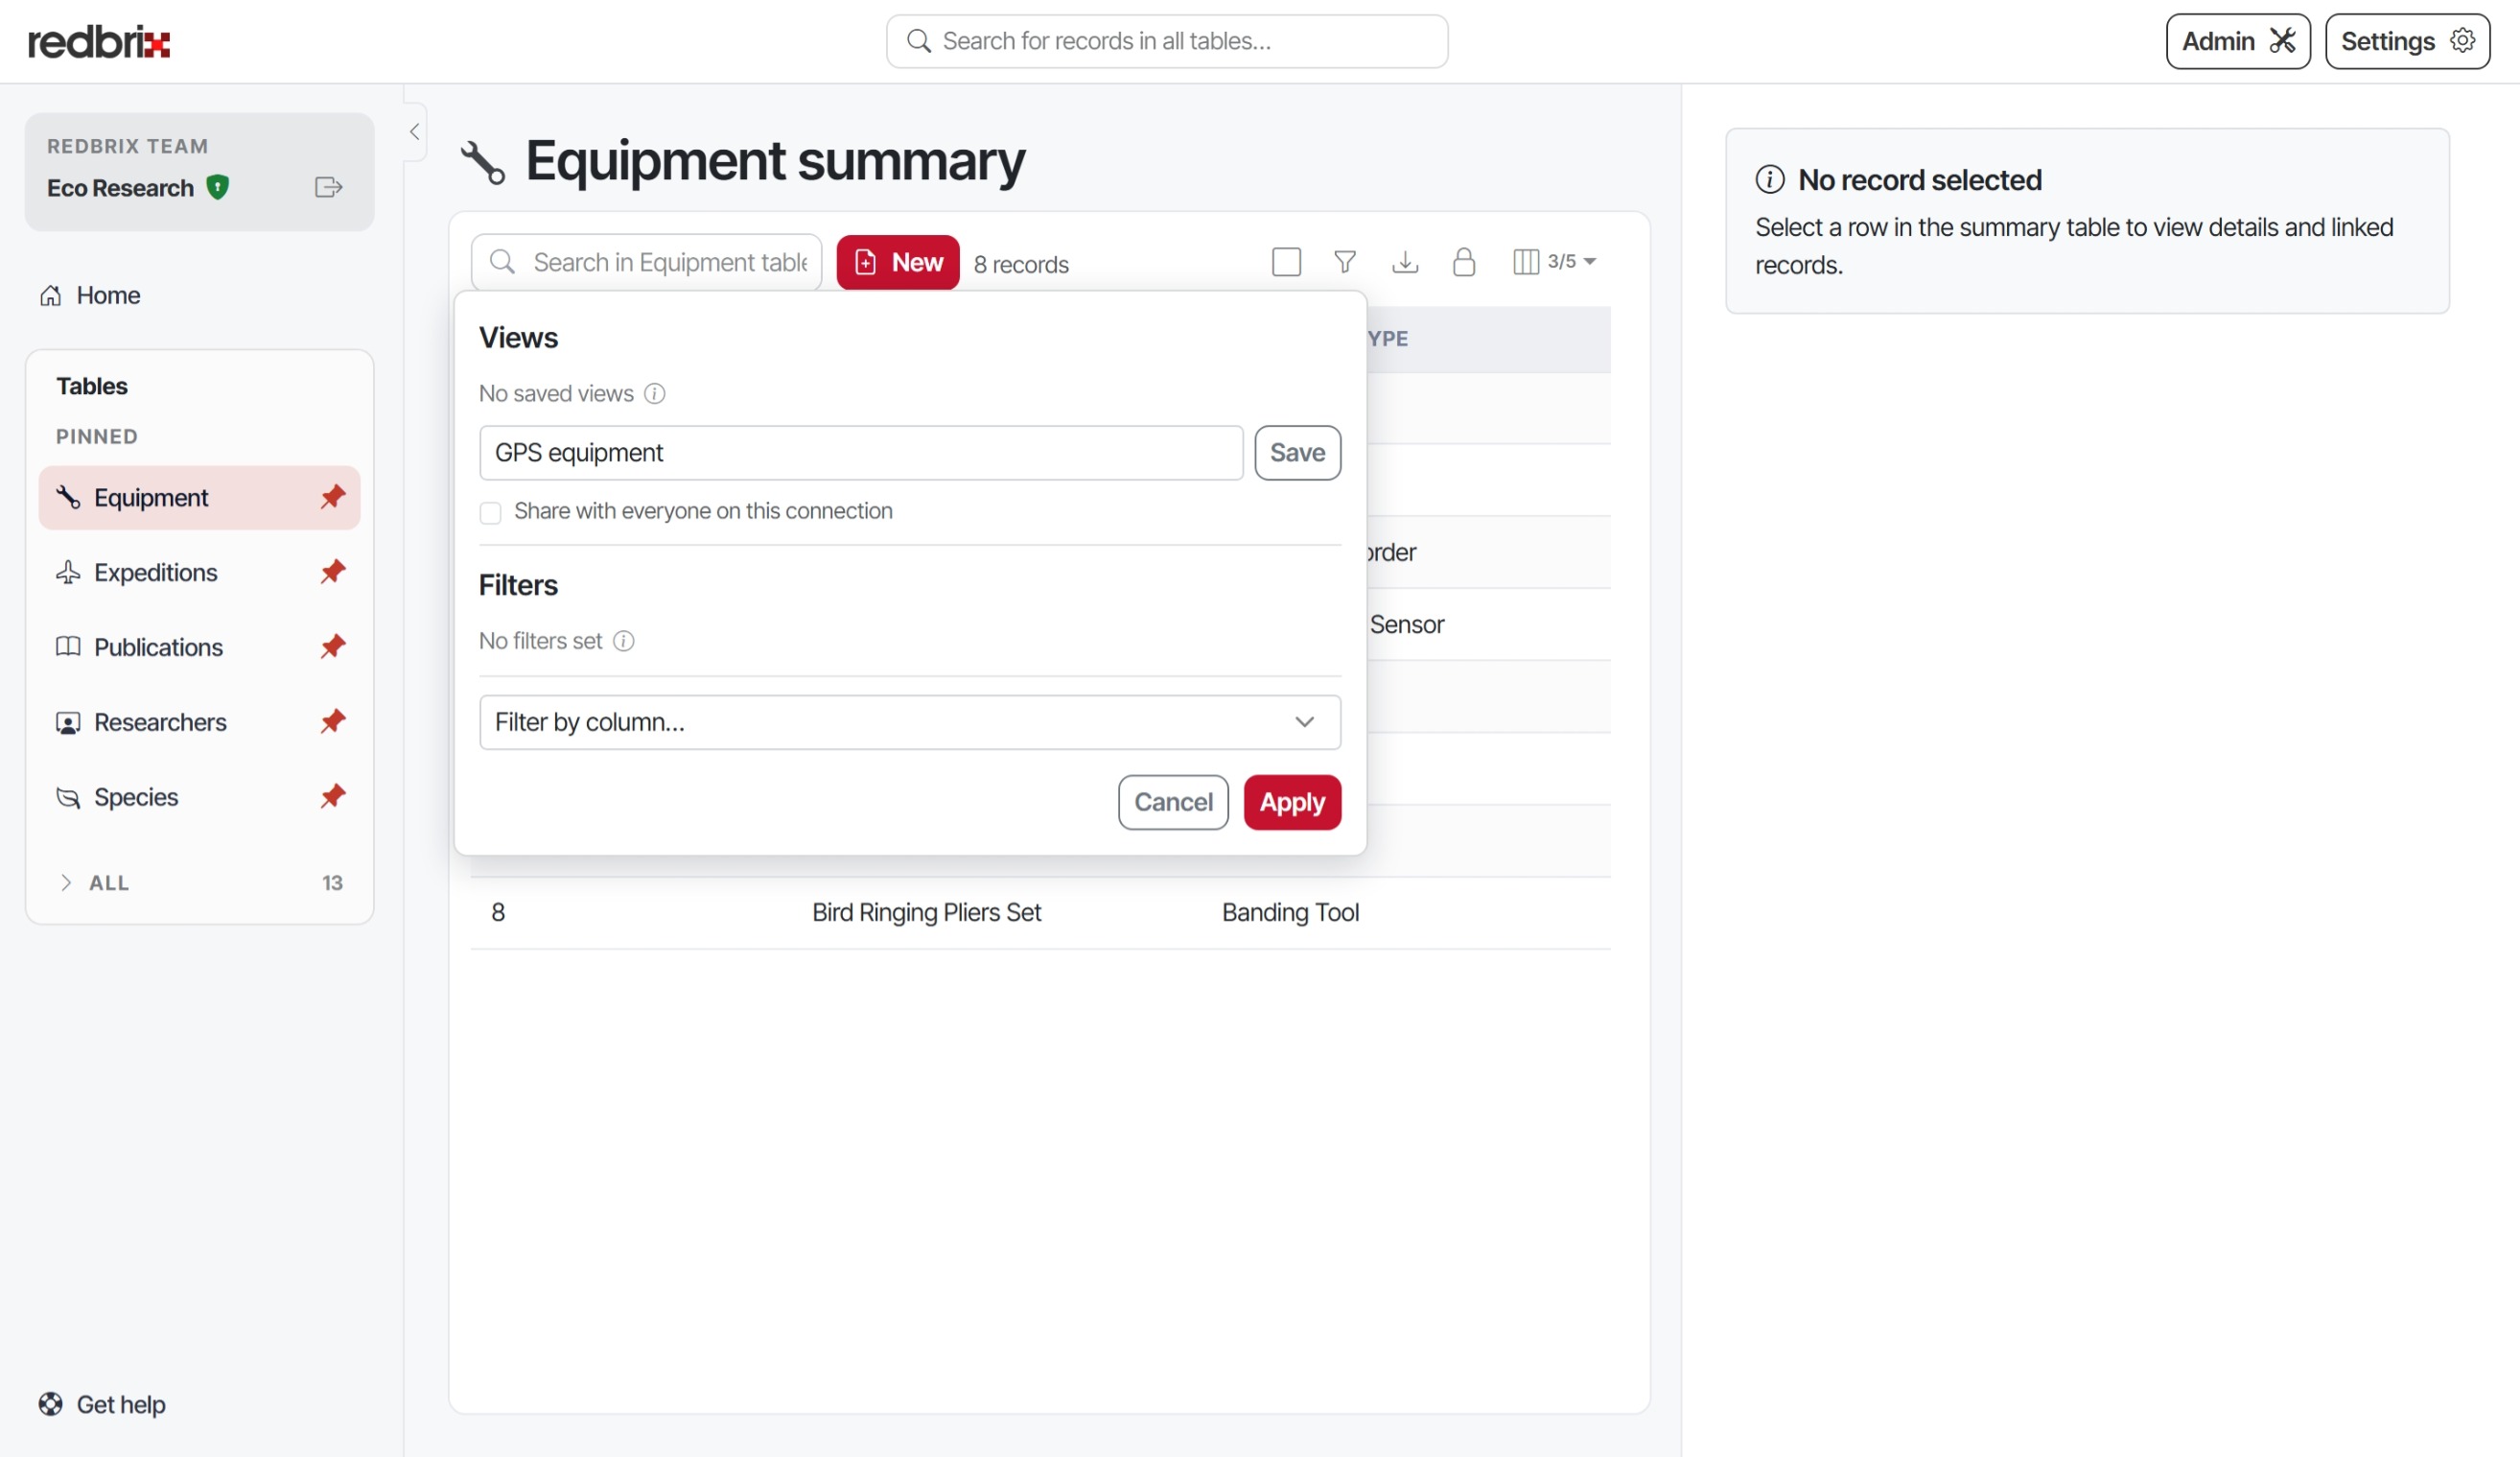
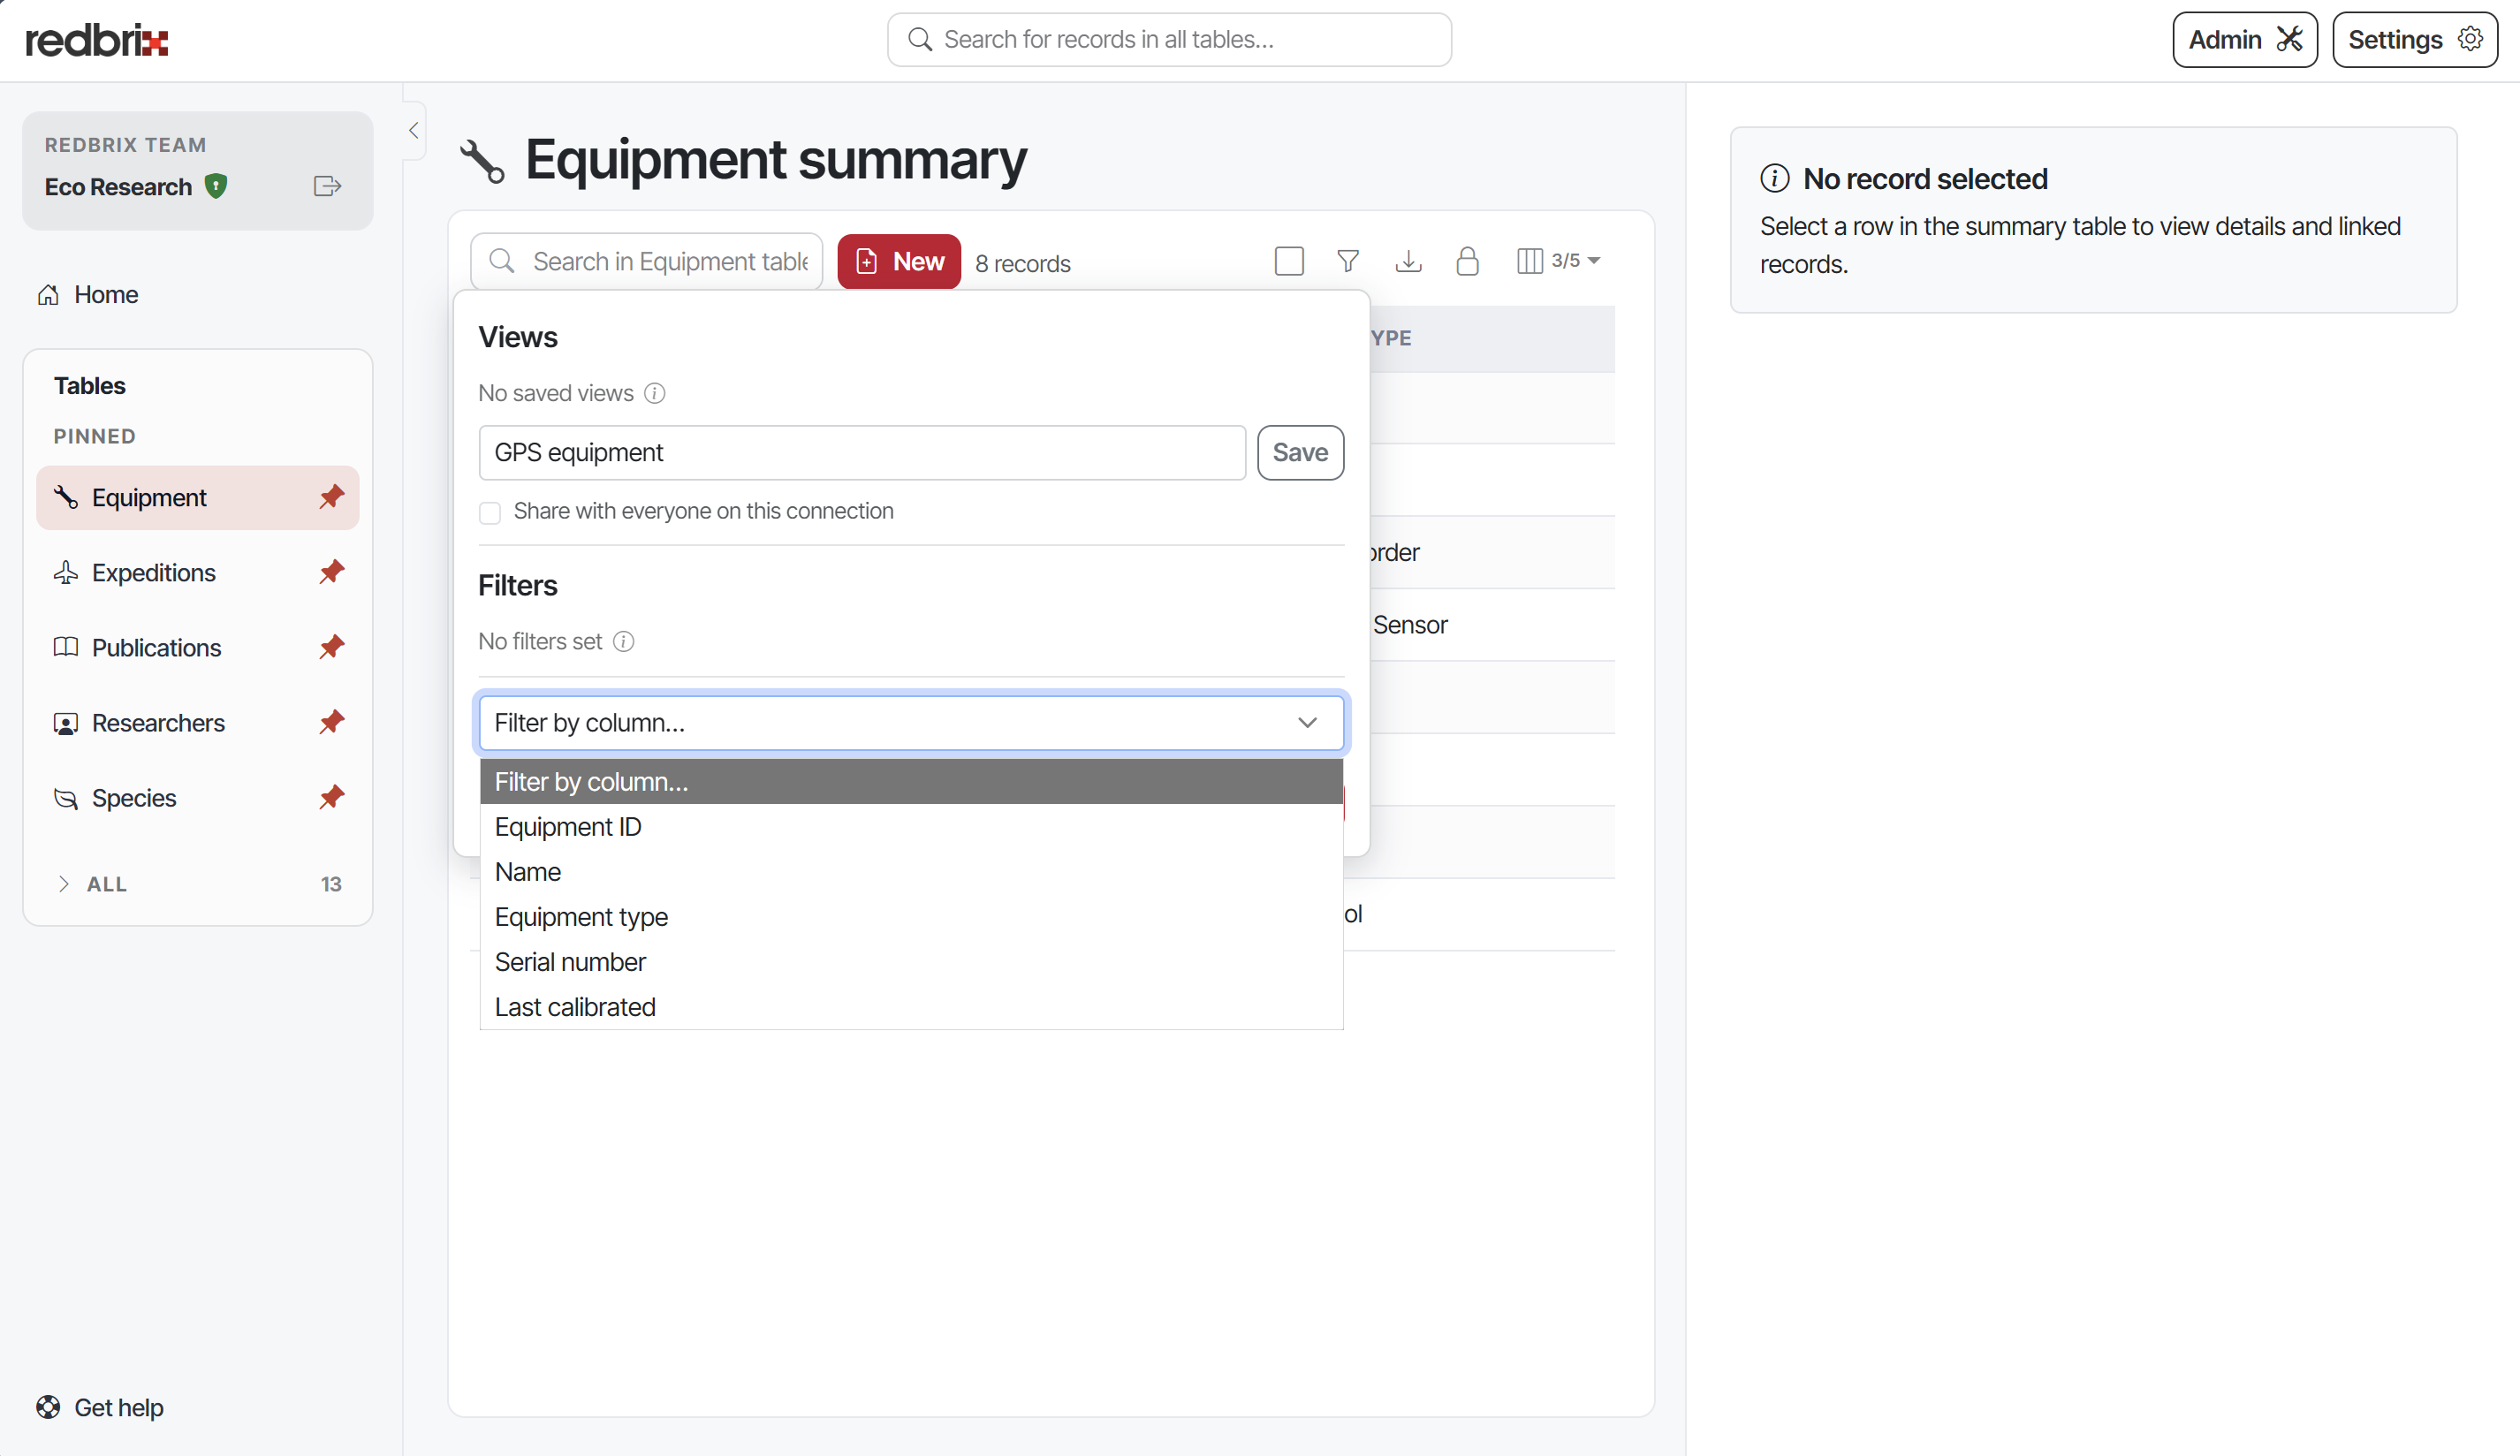
Filters allow you to narrow down the records displayed in the summary table based on specific criteria. To create a filter, first click the filter icon on the summary table (as described in the Toolbar icons section).
Filter name
You can save the filter permanently by giving it a name and clicking Save. If you are an administrator, you can also choose to make the filter available to all users by selecting the Share with everyone on this connection checkbox.
Choose column
First, select a column on which you want to filter:
Specify an operator and value
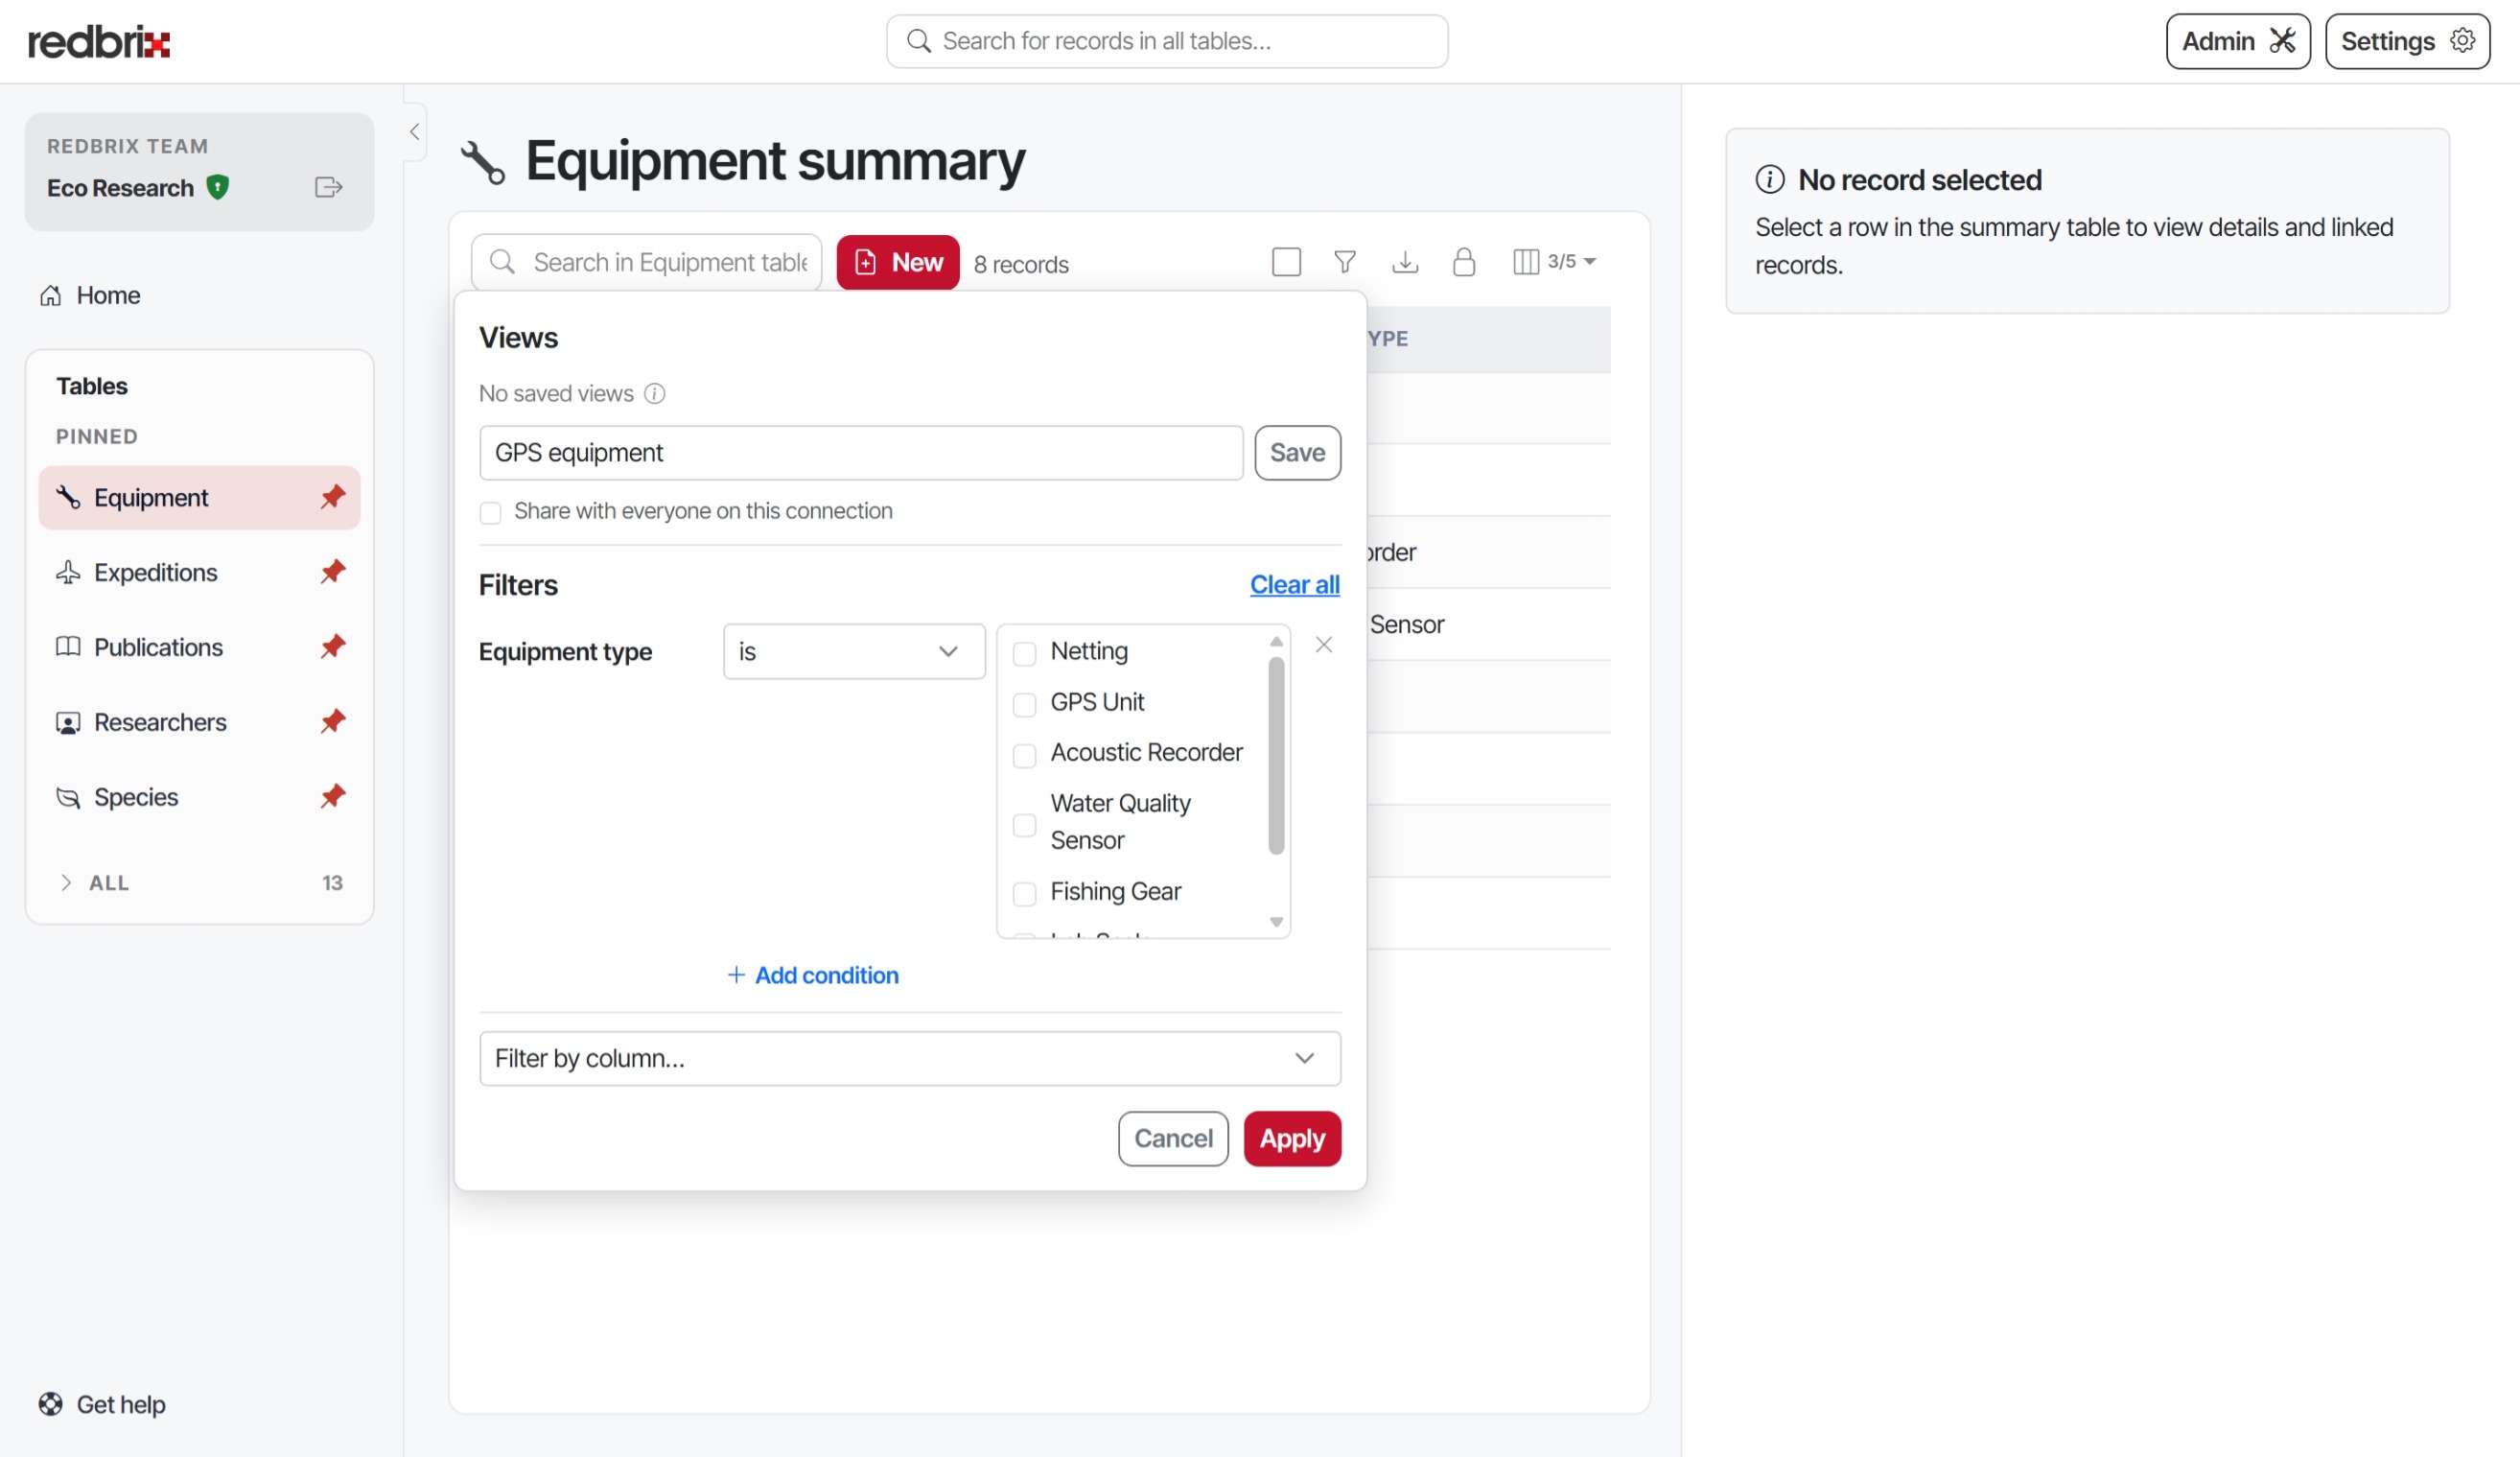
Next, choose an operator (such as "is", "contains", or "starts with") and specify the value to filter by. Note that depending on the selected column and operator, the value format may vary. For example, if the column contains a finite set of options, they will be displayed as a list of checkboxes similar to the one shown below.
Apply the filter
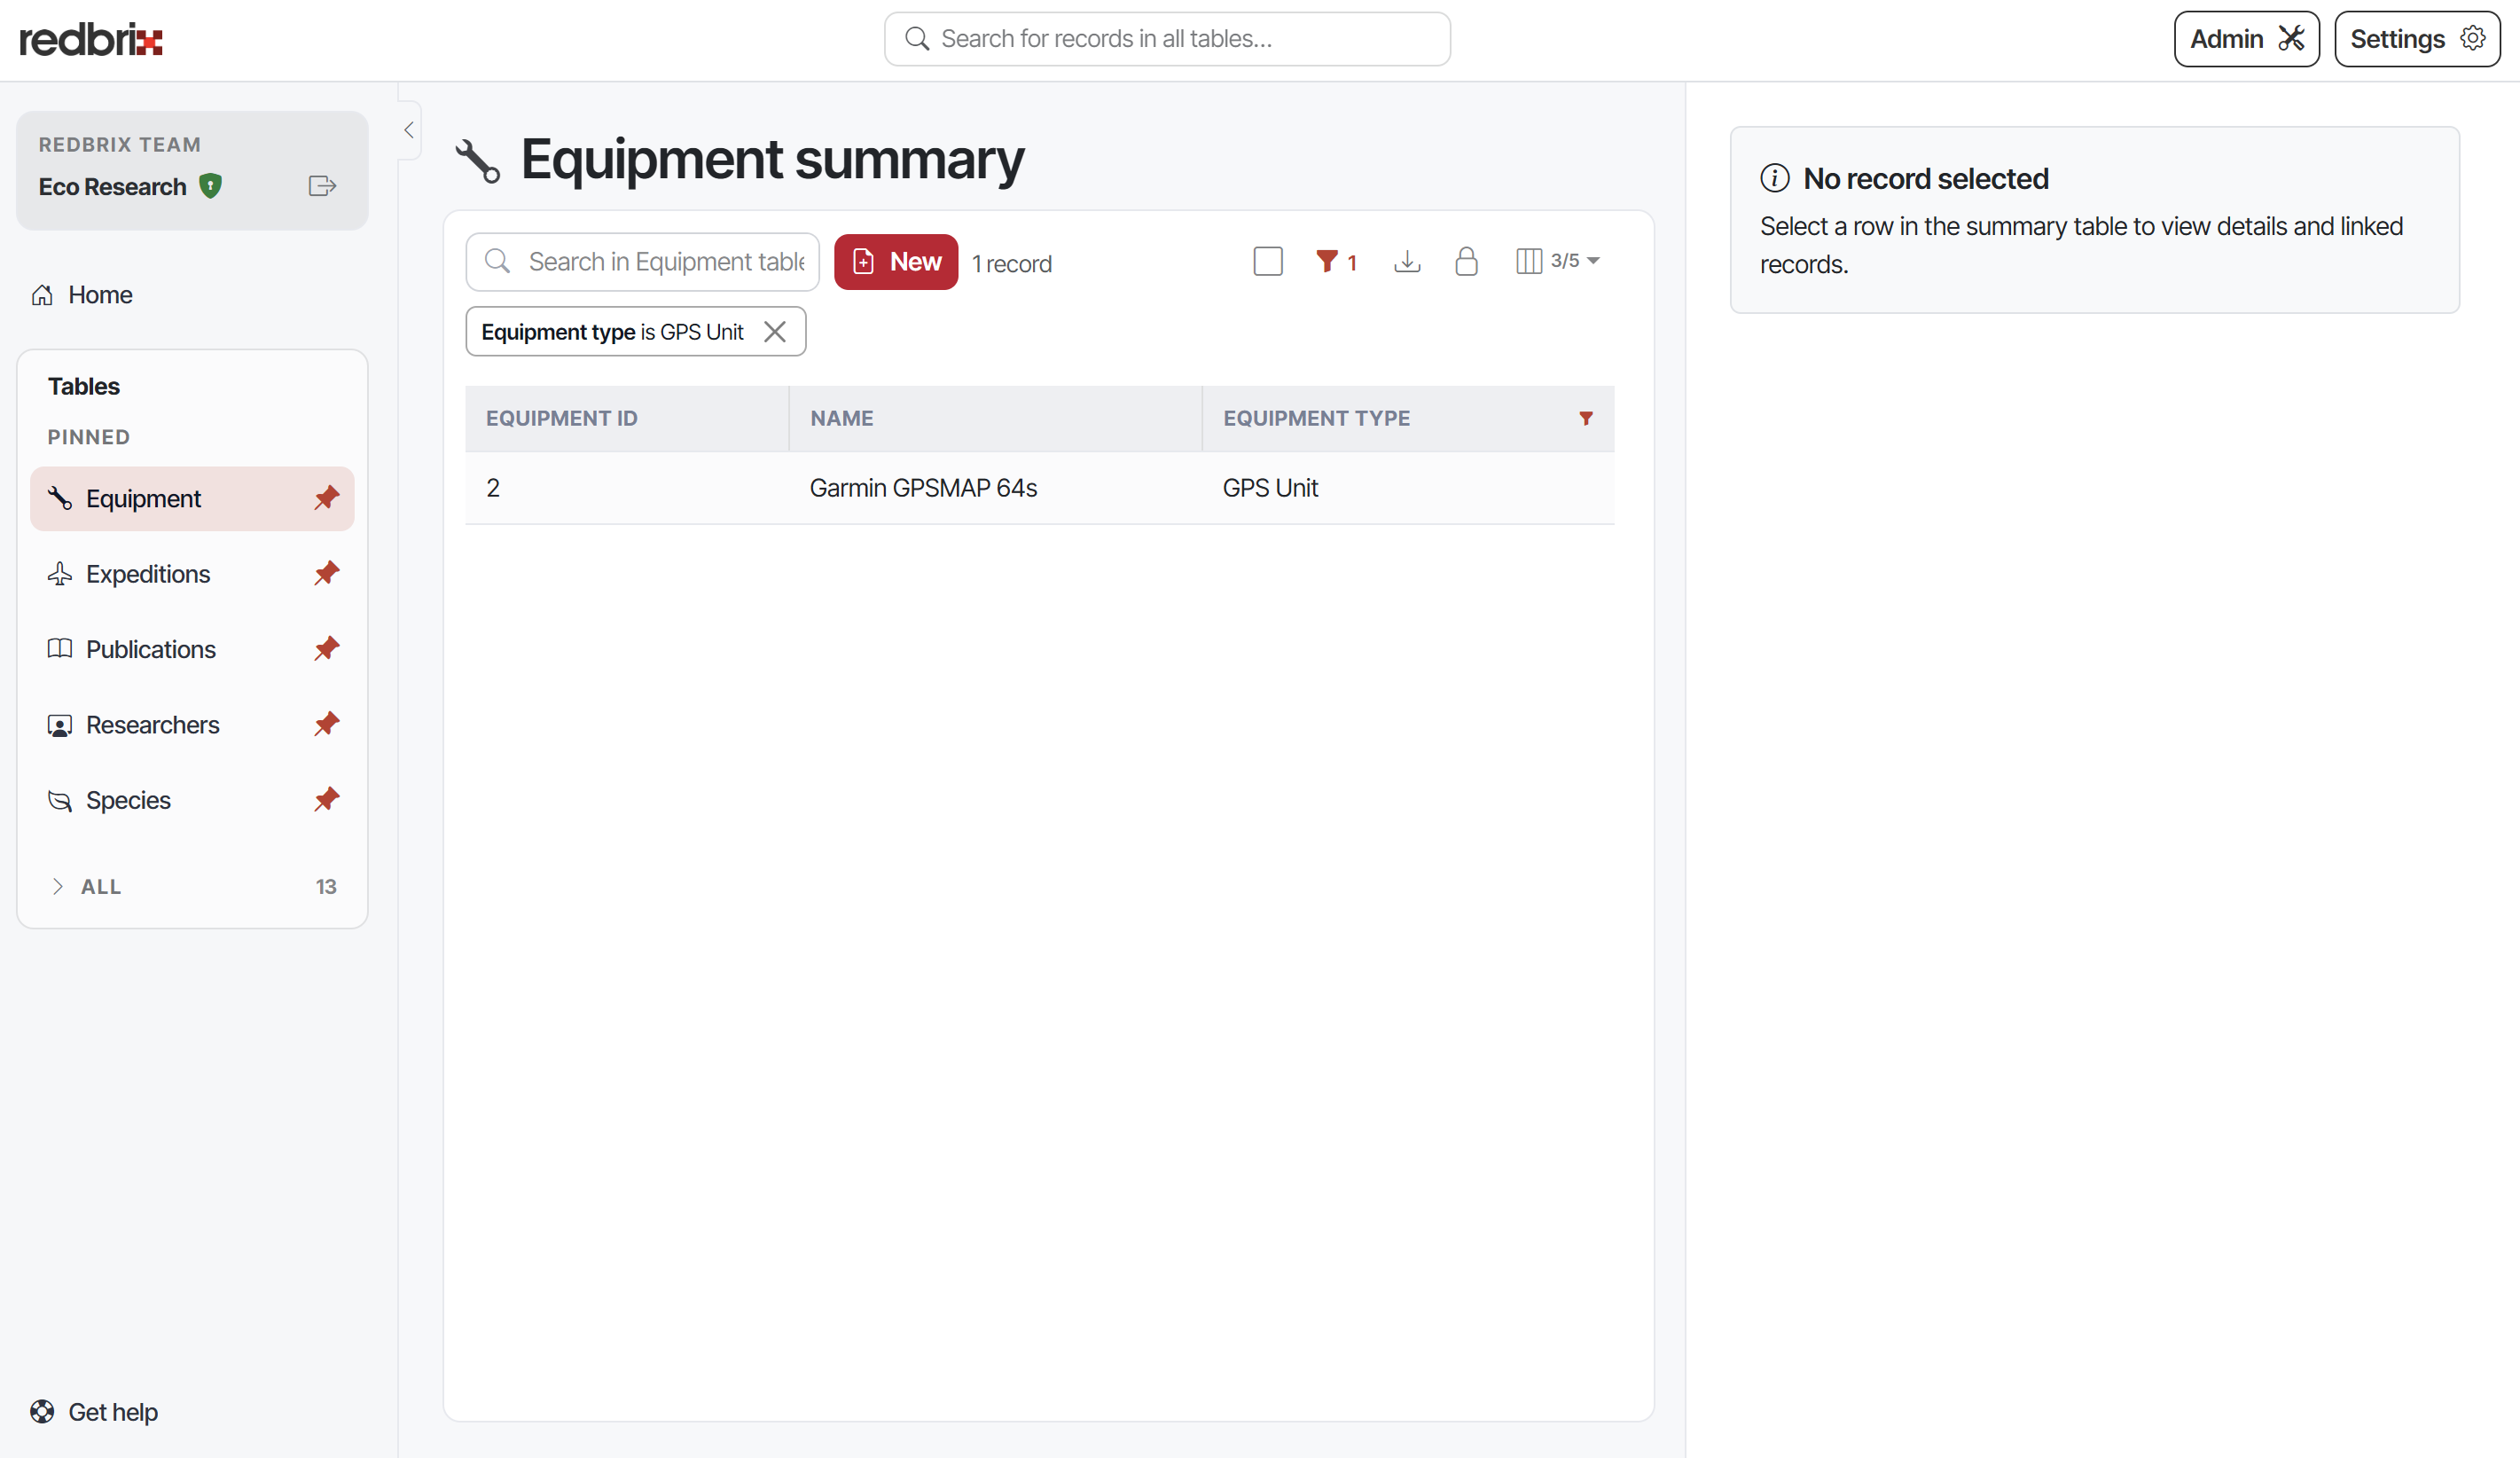
Once you click Apply, only the records matching the criteria will be displayed in the summary table and a badge will appear above the table showing any filters that are active. These have a close icon ("X") that can be clicked to remove the filter quickly. Note also that the filter icon in the toolbar will be filled and accompanied by a number, showing how many filters are currently applied.
Inline editing
If your administrator has enabled inline editing, you can edit records directly within the summary table. To do this, first click the padlock icon in the toolbar (see Toolbar icons section above) to unlock inline editing for the table.
Now, when you hover over a cell in the summary table, the inline edit icon will appear:
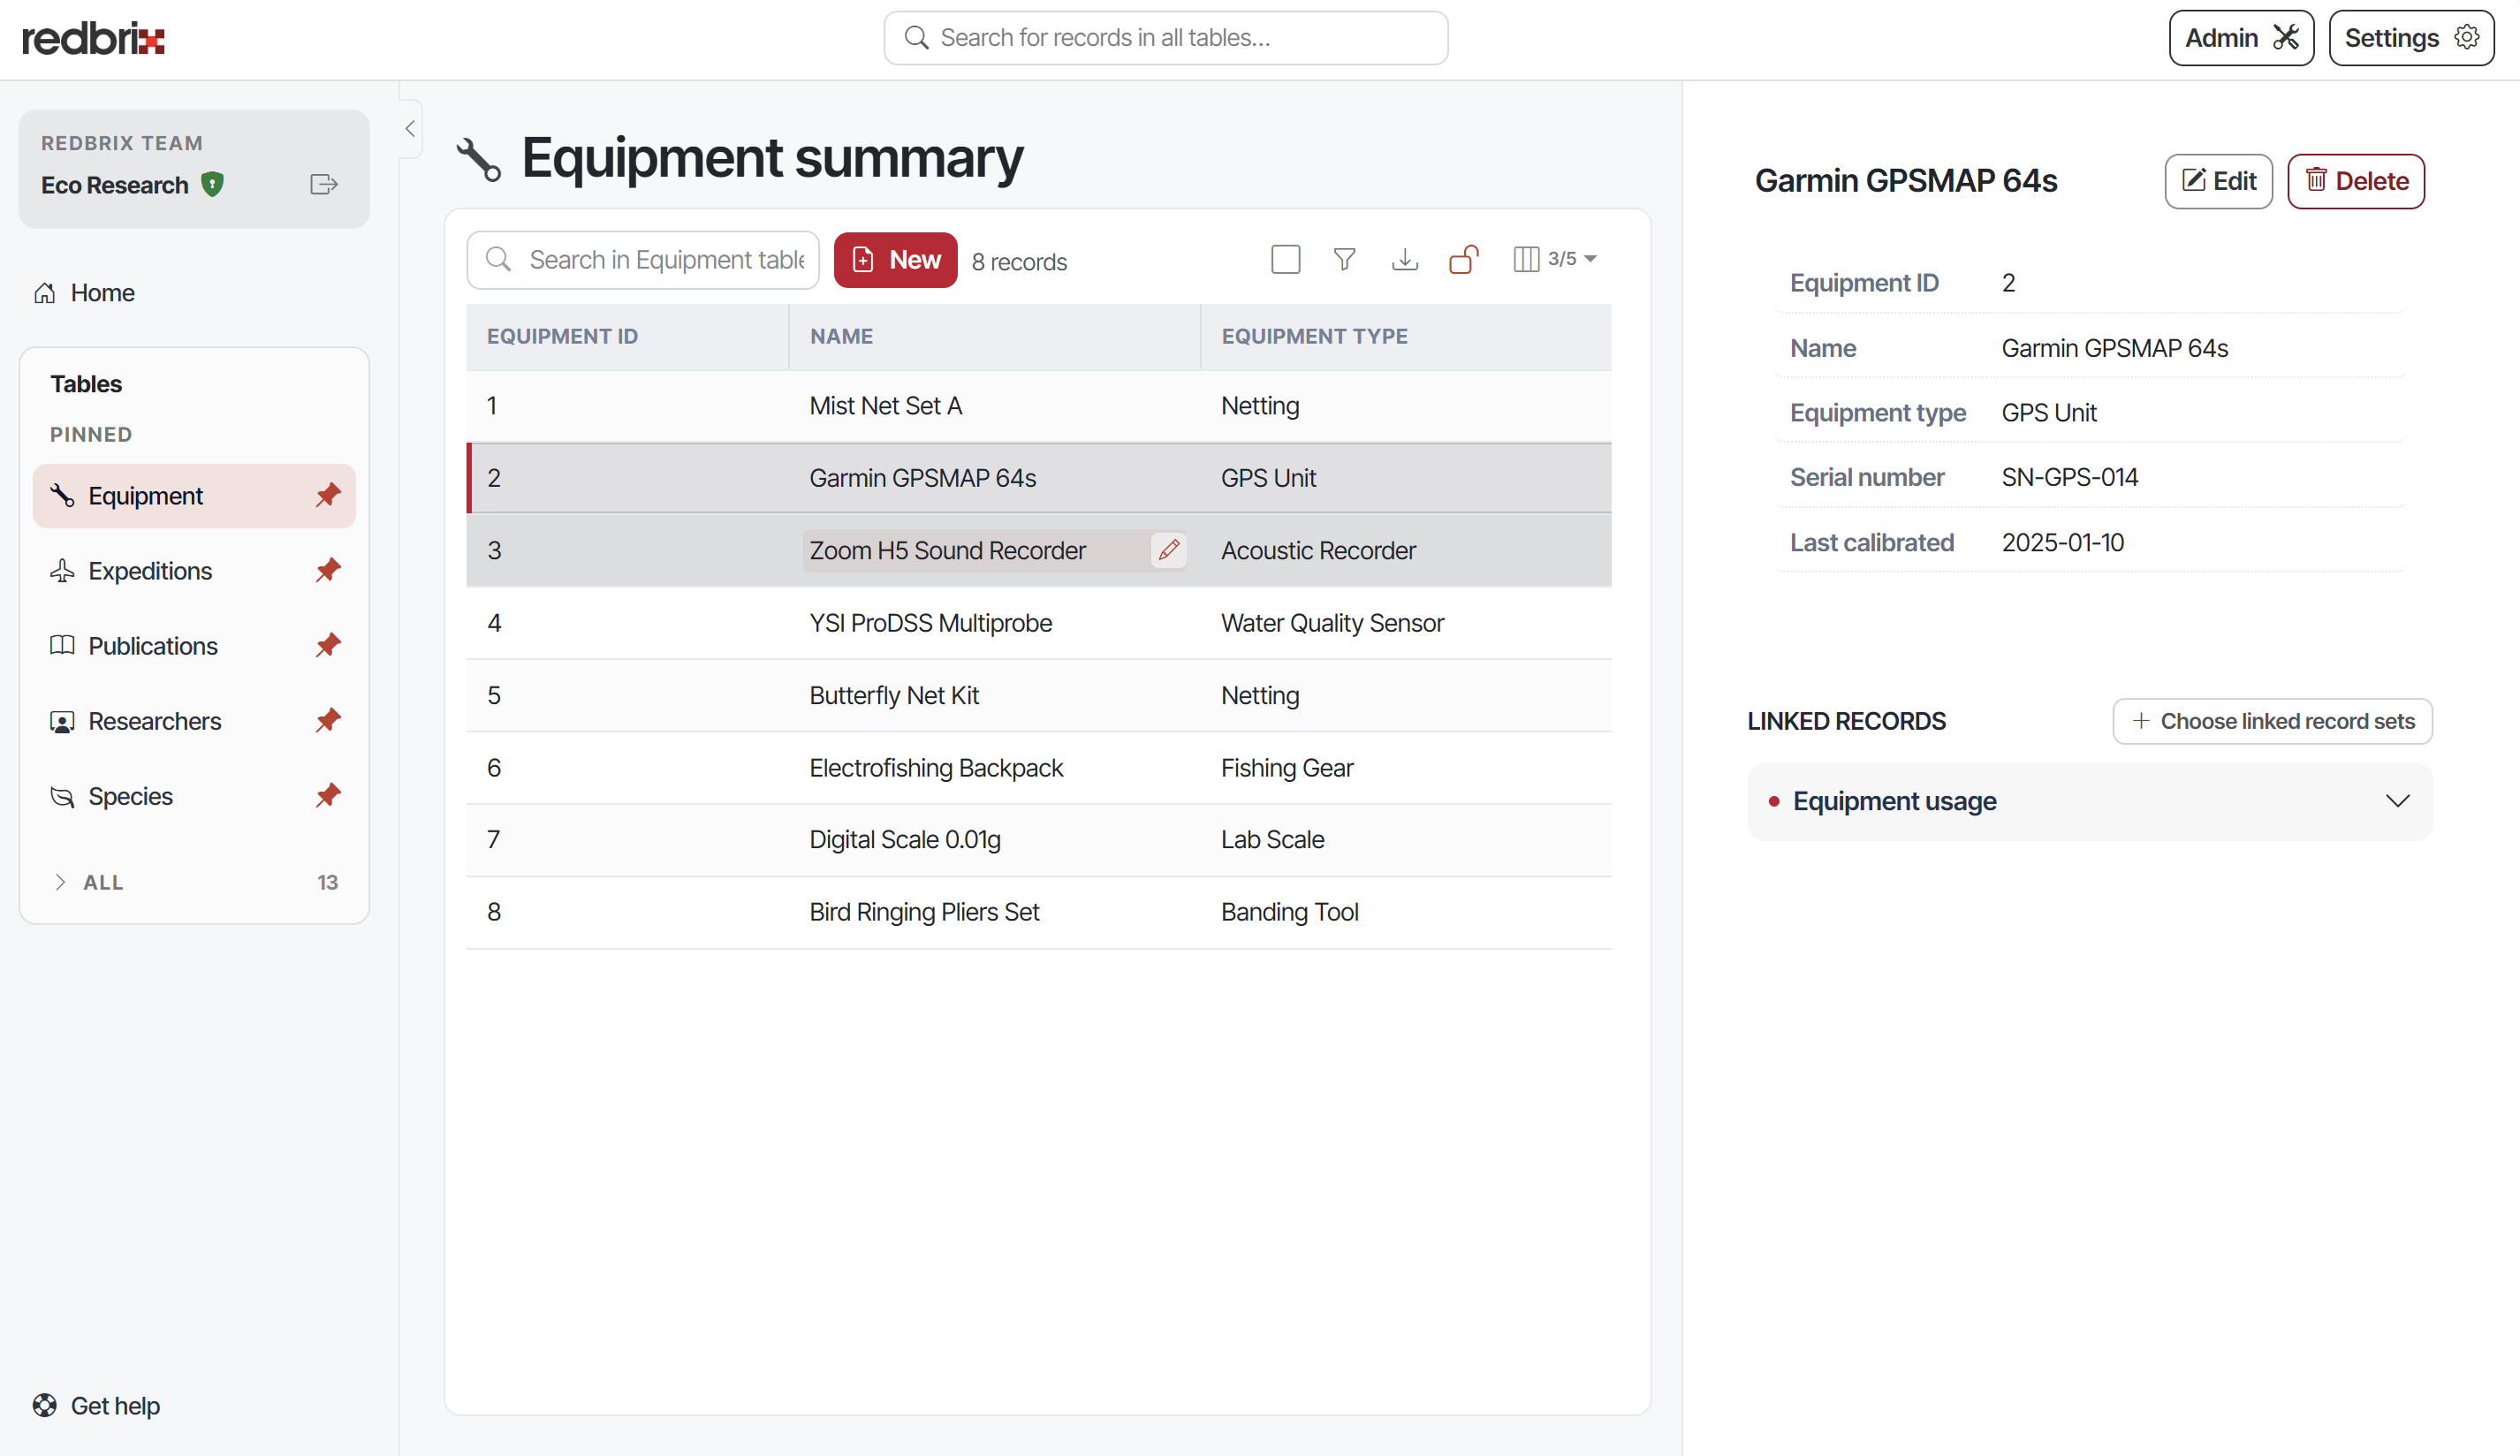
After clicking the inline edit icon or double-clicking the cell, you can modify the cell's content directly within the summary table.
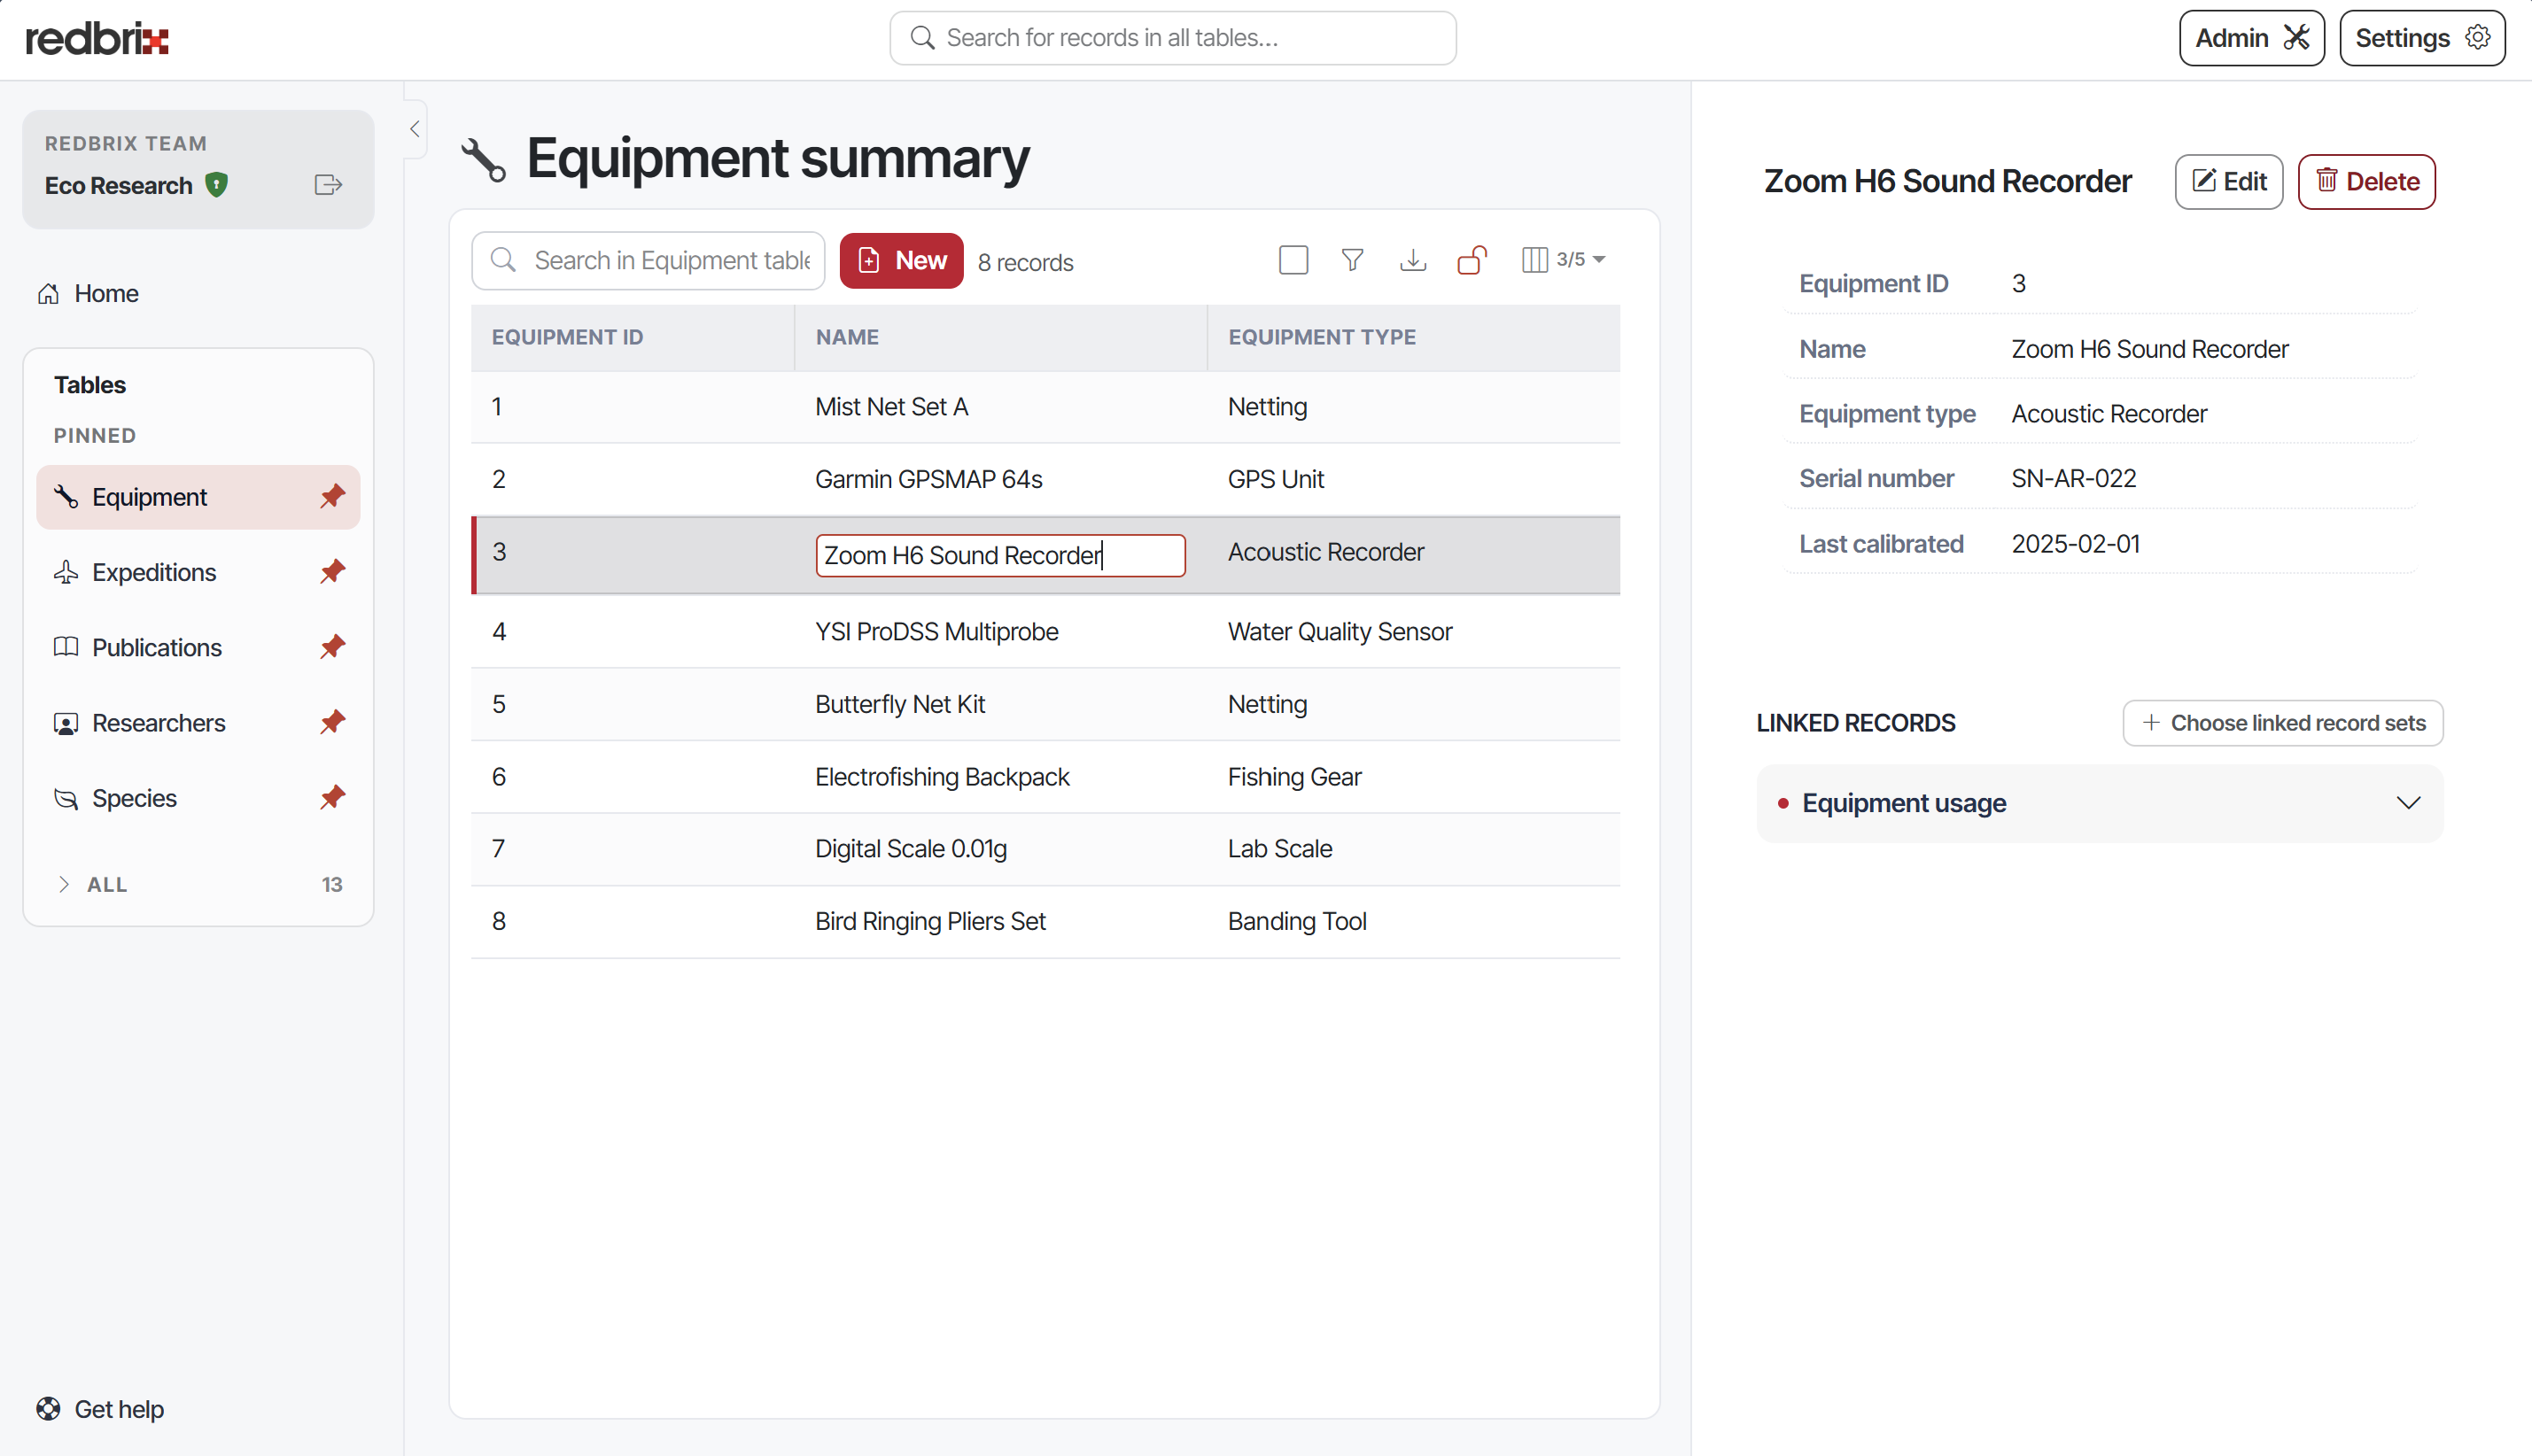
Press Enter or click outside the cell to apply the changes (or press Esc to cancel). Any changes will be reflected immediately in the summary table.